RON REES modifies GLYNN GUEST’S Fairey Huntsman
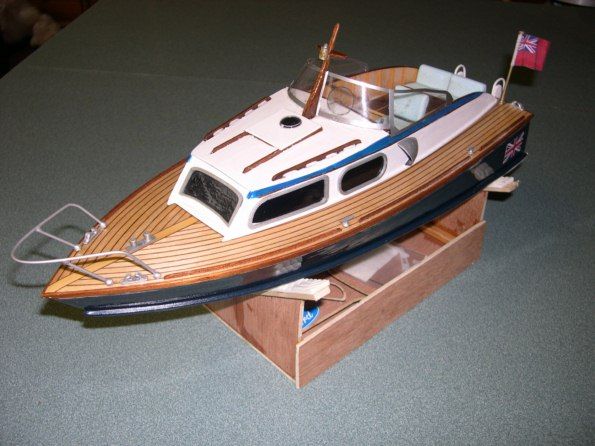
The snow was thick on the ground, the workshop out of bounds because of the cold weather and I was recovering after an operation stuck indoors in an armchair with orders not to do anything silly. So yes, you have guessed it, I was bored stiff! The only space available to do anything on was about the size of a dinner tray. Then I browsed through the 2010 Model Boats Winter Special for the hundredth time and there was my answer, a little ‘dinner tray’ sized Fairey Huntress by Glynn Guest, my saviour from a period of boredom! The model, as designed is just a bit over 14 inches long.
I like Glynn’s simple model designs and this was a Fairey Marine boat to boot. I have admired them all and had previously built a big 46 inch Gannet powered Huntsman and a 31 inch 0.40 powered Swordsman as well as a little 24 inch Huntress from another free plan for r/c scale steering some years ago when diesel fuel on your sandwiches at the pondside was the Sunday norm. Oh, happy days!
Enjoy more Model Boats Magazine reading in the monthly magazine.
Click here to subscribe & save.
Getting started
I had nearly all the required materials to hand and a quick call to Paul at Modeller’s World in Hornchurch, Essex, had the recommended Graupner geared 400 type motor and a junior rudder assembly winging my way within the day.
I won’t bore you with a step by step constructional account as I followed Glynn’s instructions and pictures to the letter and soon had a lovely balsa hull sanded and ready, all whilst I was recovering by the fireside. I had to wait for the dreaded thinned dope application sessions as even I couldn’t get away with that until the house was empty, but the old pear drop aroma hanging around just below the ceiling, gave it away on the family’s return and I got a suitable grilling for ‘stinking out the house’. So, there had to be another way, my wanting to proceed as quickly as possible. This is really the point where following the instructions went out of the window.
Looking at the tiny hull I thought: ‘What a great starter model for the club at school’! I should say here that I am retired, but teach Design Technology for a few hours a week at a local school. I thought that I could take a vacuum forming of my hull and the school children could have a go at doing the rest.
So my first trip out after recuperation (which wasn’t long) was to the school workshop and after putting the kettle on, I fired up the vacuum forming machine and selected a nice bit of bright blue 2mm thick HIPS (High Impact Polystyrene Sheet). In went my lovely hull and the plastic sheet and over it went the heater unit. I bet you have an inkling of what happened next!
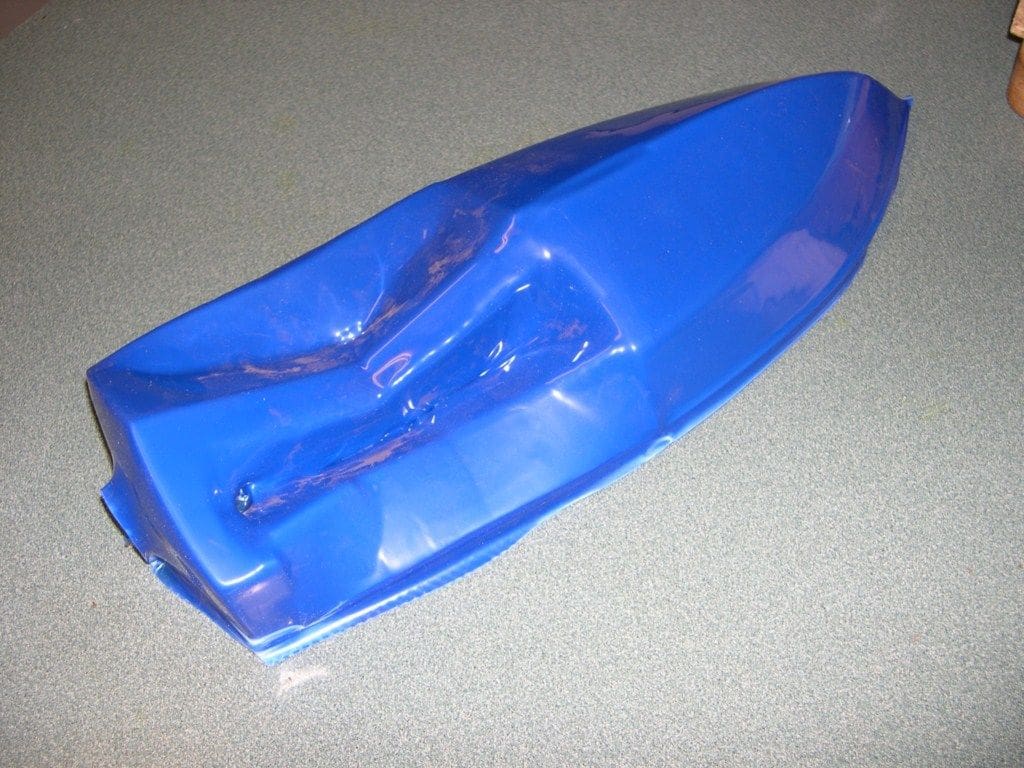
A quick prod with a fingertip, which is the only really technical way to check the HIPS was hot and flexible enough, and then a smart yank on the big lever and up she came. I smiled as I punched the vacuum button and the plastic draped beautifully over the hull, but just as I took my finger off the ‘suck button’ there was a loud ‘Bang’ and my beautiful blue hull shape turned into something that resembled a discarded Quality Street wrapper, Photo 1, and my balsa masterpiece was trapped inside it! I couldn’t even look at it, so I just tugged the molten heap out of the machine, abandoned the tea and plodded home very dejected.

After the disaster
It was a few days before I could bring myself to inspect the actual damage. Once I had extracted all the squished and fractured bits and laid them out on my tray, I remembered the bags of balsa scrap that I brought home after flying control-line combat with my pals at Croydon Aerodrome when I was young, handsome and innocent, well, I was young anyway! We used to glue them all back together every week and as long as the engine kept going, we would be back flying them the following weekend.
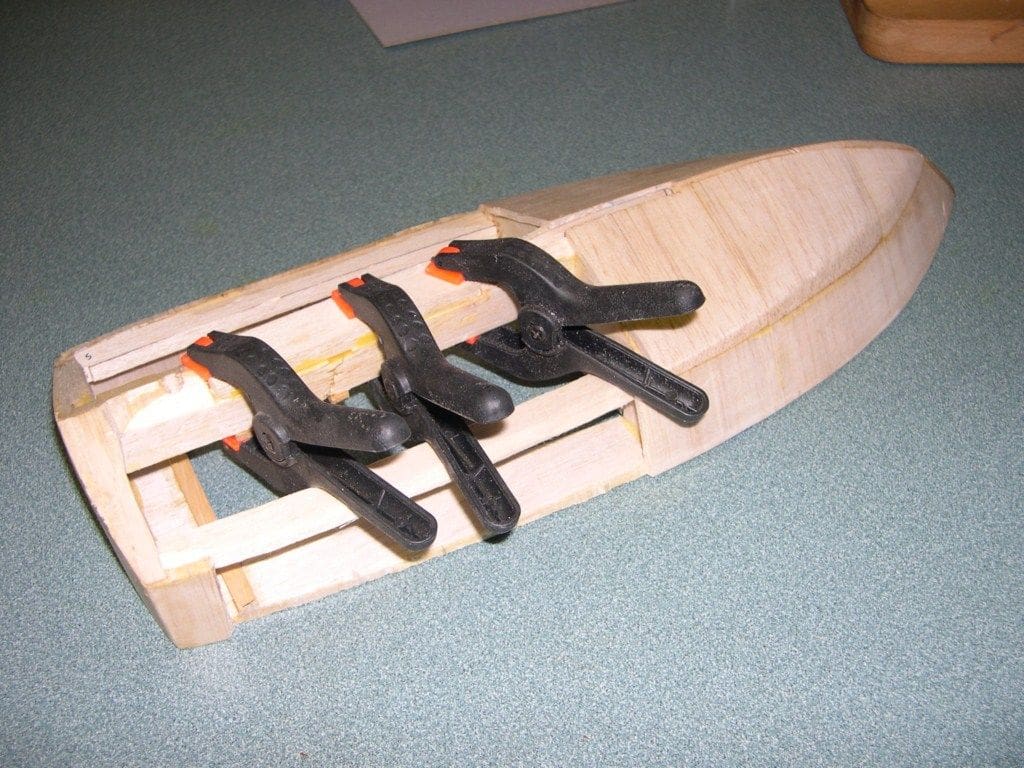
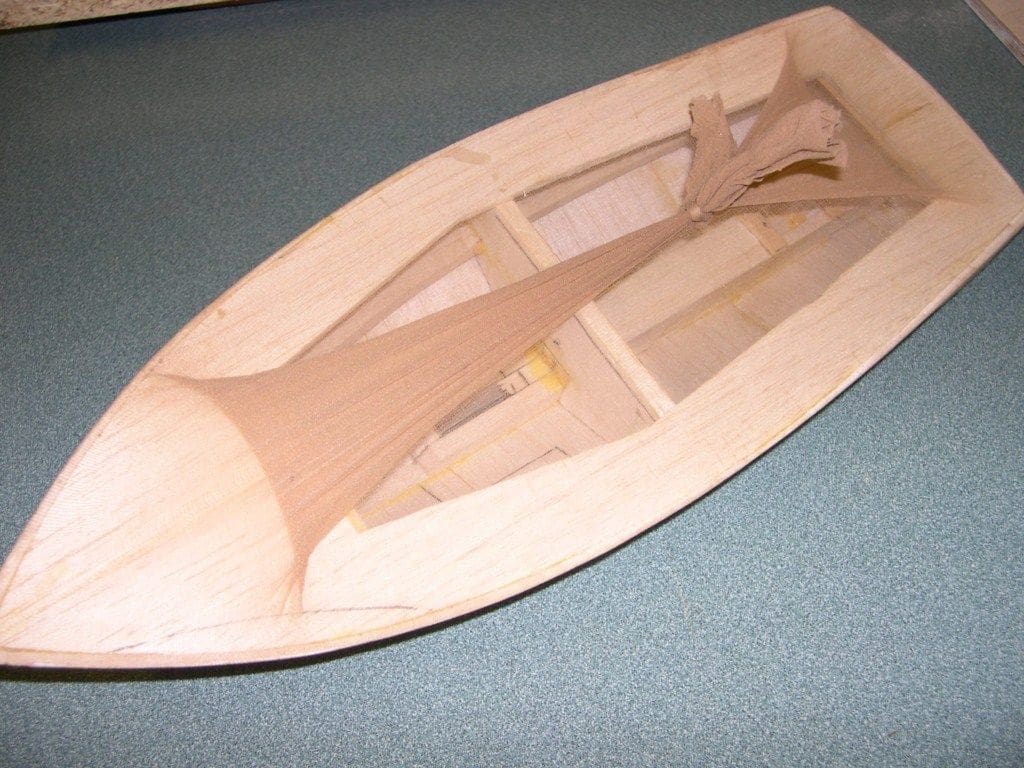
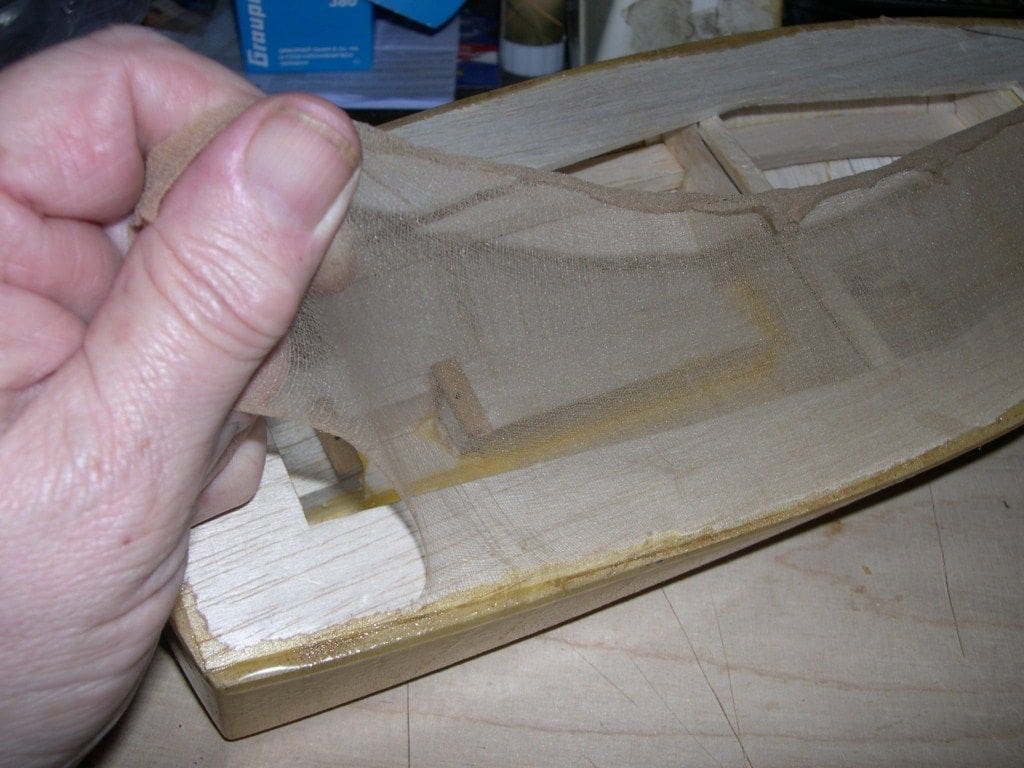
This was no different and just a puzzle to be solved. Carefully I extricated the shards of my hull and slowly put as much as I could back together, Photo 2, mostly from the bow to the first former and a bit of the sides. Runny superglue did the trick and then I rebuilt the keel and re-sheeted the sides and the bottom using Aliphatic resin glue, Photo 3.
A good sanding and I was back where I had started, apart from the dope and there was no way I could use that stuff indoors again.
I also now had to ensure the strength of the hull, considering that it had been broken in half and squashed flat. So, back to the old control line days where we experimented and covered models with Eagle comics, newspapers, brown paper bags and of course ladies nylon stockings! Now, this wasn’t just because it was fun, but because we had no money and it was if you like, recycling in action, but 50 years ago.
A quick rummage through my wife’s ‘ladies-bits drawers’ and I found a suitable pair of tights. It might be best if YOU ask first before doing this in your home!
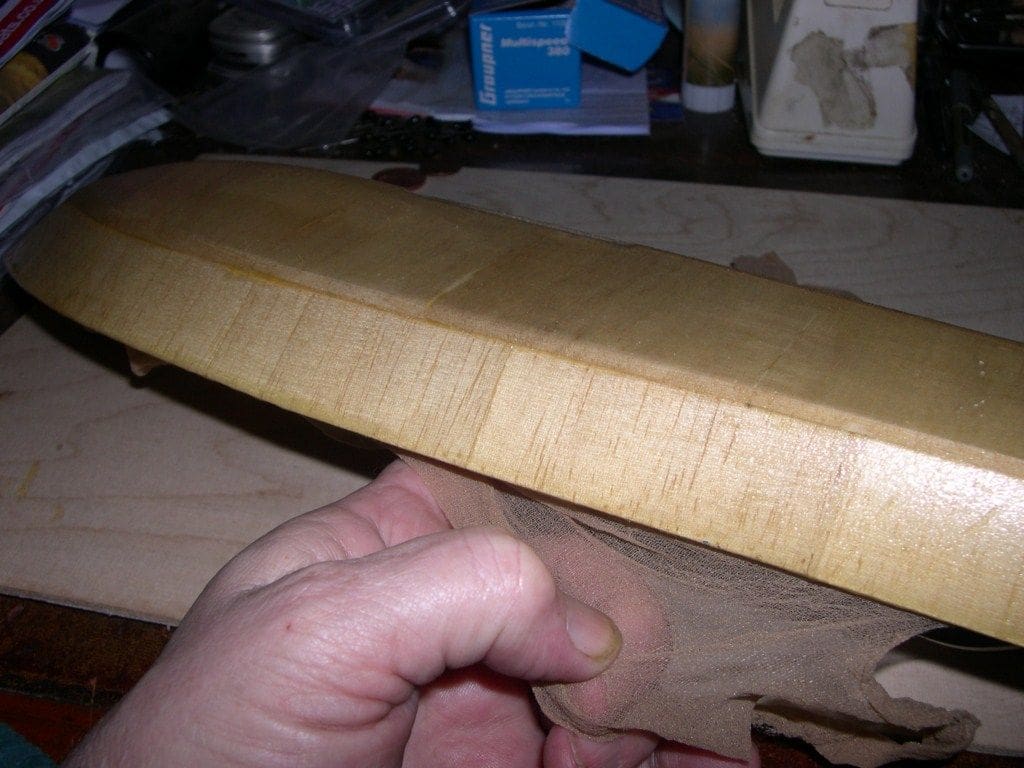
The legs were cut off and the hull was slid into one of them and pulled taught following every contour perfectly. This is definitely something tights were not designed for, but proved ideal for Diana which of course is a nice female name as well, Photo 4.
Next. I mixed up some Z-Poxy Two Part Finishing Resin and stippled it on through the nylon, finally running the brush back and forth to make sure the stocking was ‘wetted’ right through with no air bubbles. This stuff does not smell once it is mixed, but before that though, it does stink like a rugby club toilet after the match and with the bar open, so be quick!
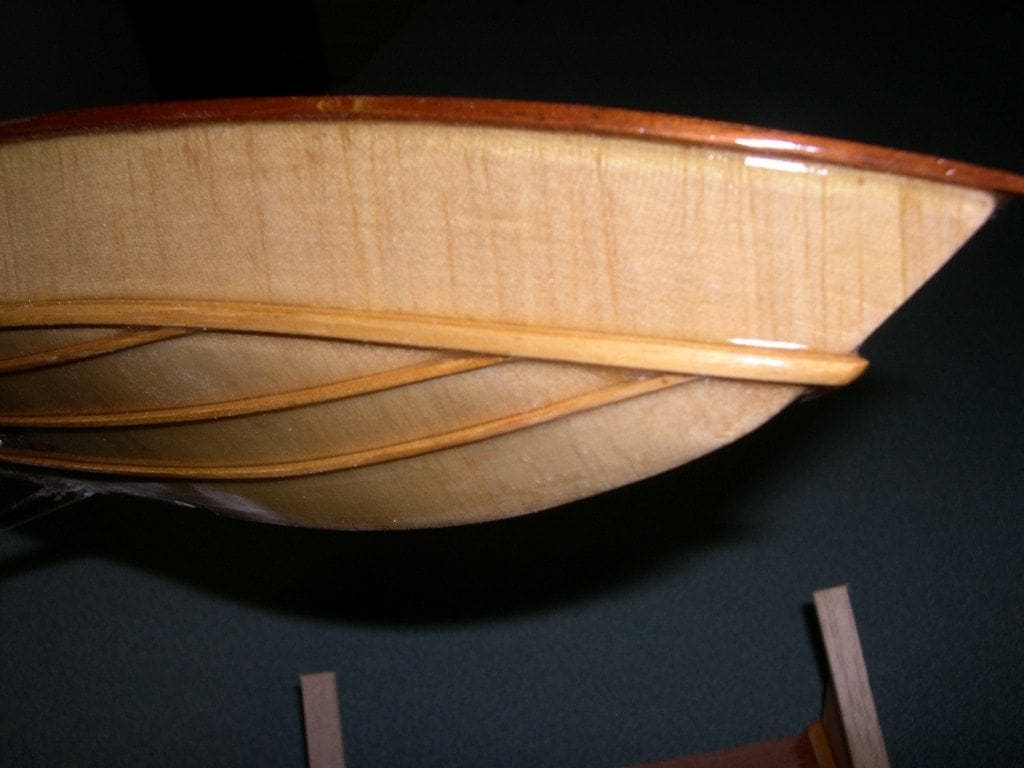
Two hours later and it was all set, and very nice it looked too. The weave was still plain to see, Photo 5 , so another thin coat was added after a dry rub down, which did the trick. After half an hour’s work with wet and dry sandpaper it was smooth as a babies ‘you know what’ and ready for all the strips and rubbing strakes. Photo 6 is me removing the surplus nylon from the deck and top of the hull as I had taken care to keep the finishing resin only on the sides and hull bottom. Roughly speaking, I now had a basic hull ready to have all its finishing touches added and the r/c installed.
Spray rails and rubbing strakes
Nothing complicated here as they were cut from strip hardwood, glued at one end in position firmly with a blob of superglue, then held down with a cocktail stick at the other and a dribble of the thin variety of the same glue run along the joint surfaces, Photo 7.
In the article in the 2010 MB Winter Special, Glynn mentioned his reasons for not planking the deck of his model and fair enough, but I like the pondside social networking and discussions of what, how, why and so on. I think a model should look good on the bank as well as in the water, but that’s just my personal opinion, so to deck planking.
Planking
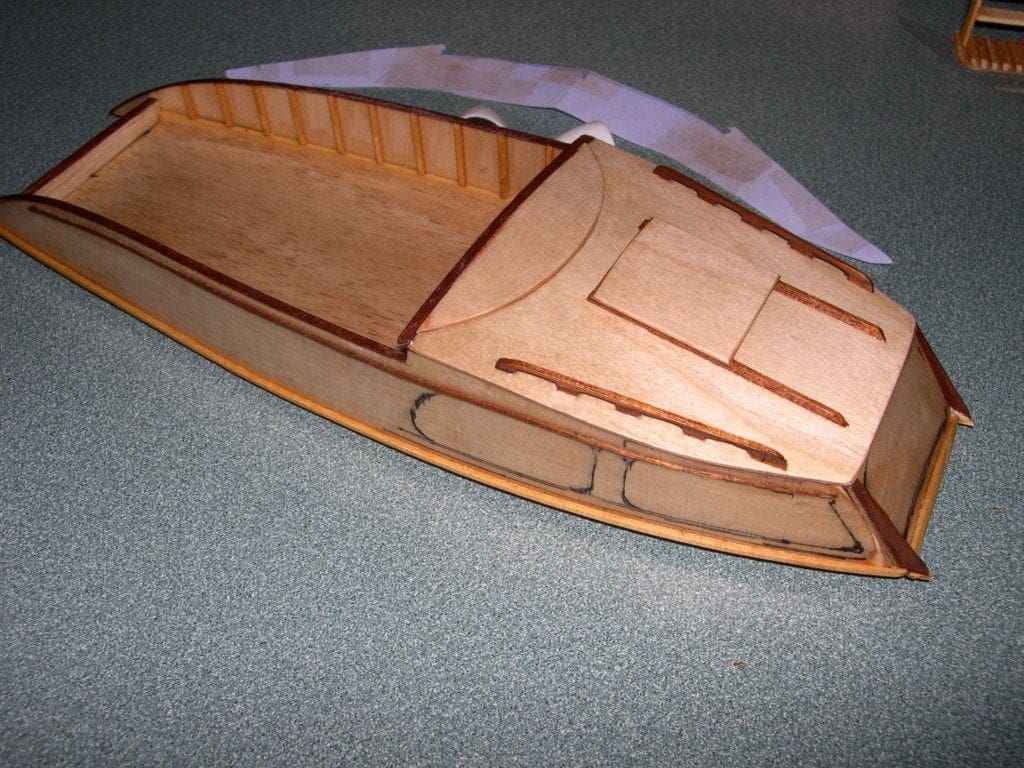
More recycling now, so I trudged through the snow to the workshop and cut up some wood for the decking on my big circular saw. Many of these boats have been changed and added to by their owners since they were built in that golden period of classic boat construction, but as Glynn says, they nearly all started with planked decks, usually of teak, which was lightly oiled and bleached almost grey white by the elements.
Hardwood is so expensive and I don’t throw anything useful away, so I worked out the scale to be of about 1:16 to 1:20 and thus a three inch average wide teak plank came out to be 4mm wide. Sorry, but I work with both imperial and metric measurements virtually all the time, even though it looks odd, but anyway I know what I mean.
I had followed Glynn’s suggestion and made card templates at the start of all this, which was a life saver, and the deck edge template enabled me to cut a clamping former of 6 x 2 x 18 inches long. An old school desk leg of White Ramin supplied the planking strips and offcuts of Sapele Mahogany cut very thin like veneer, from an old conservatory, filled in the gaps.
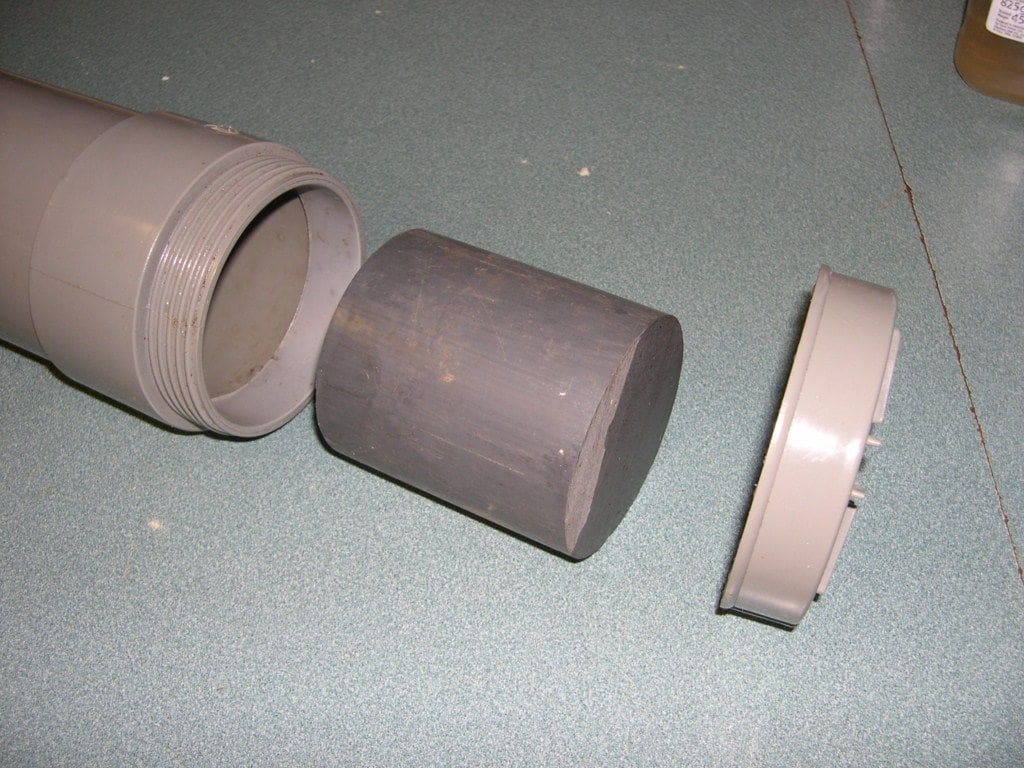
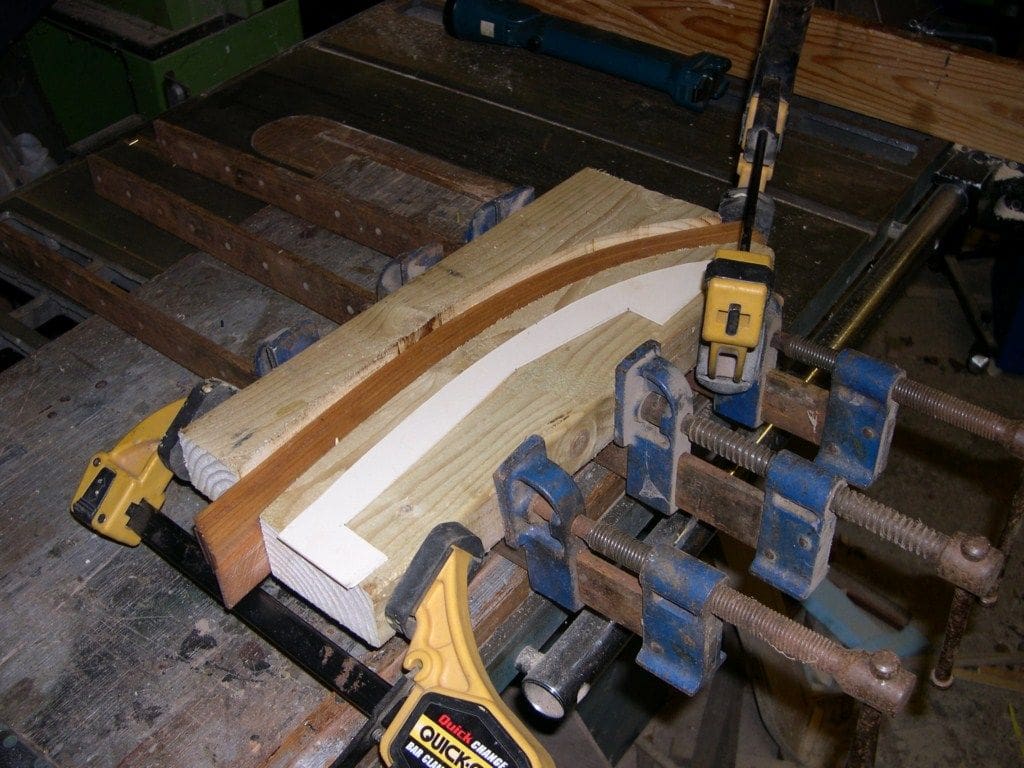
The white wood was very stiff, so I dug out my super-special steaming machine. Well, it’s a bit of four inch plastic pipe with end caps, one glued on and the other unscrews. Also, a round lump of lead that I had cast many moons’ ago in a tin can. This slides down the pipe, Photo 8, and holds the wood under the boiling water that gets poured into it. Two hours in the steamer (boiler) and I could bend the Ramin strips, so they were clamped without delay whilst still wet into the former and left by the radiator for four days to thoroughly dry out. Don’t even try to glue wood whilst it is wet, because unless it is totally dry it will all come apart and I know, because it has happened to me, Photo 9.
My favourite glue for laminating is Polyurethane Wood Glue. That is the stuff that starts to foam and then goes hard. It is unbelievably strong, fills gaps and you cannot even chisel it apart when it’s dry, but it needs a bit of forward planning as it is the messiest stuff ever invented.
Knowing that the least trace of this stuff on my clamps and formers (and the domestic kitchen worktops as I was still working inside the house) would never come off, I stapled cut-up polythene bags to everything and covered a large area with several layers of newspaper. Choose a stiff brush that you are not in love with as it will definitely go in the bin after this task, and if possible, get someone to help you. Don the latex gloves which are essential, put out the dog before you start and you are ready to start.
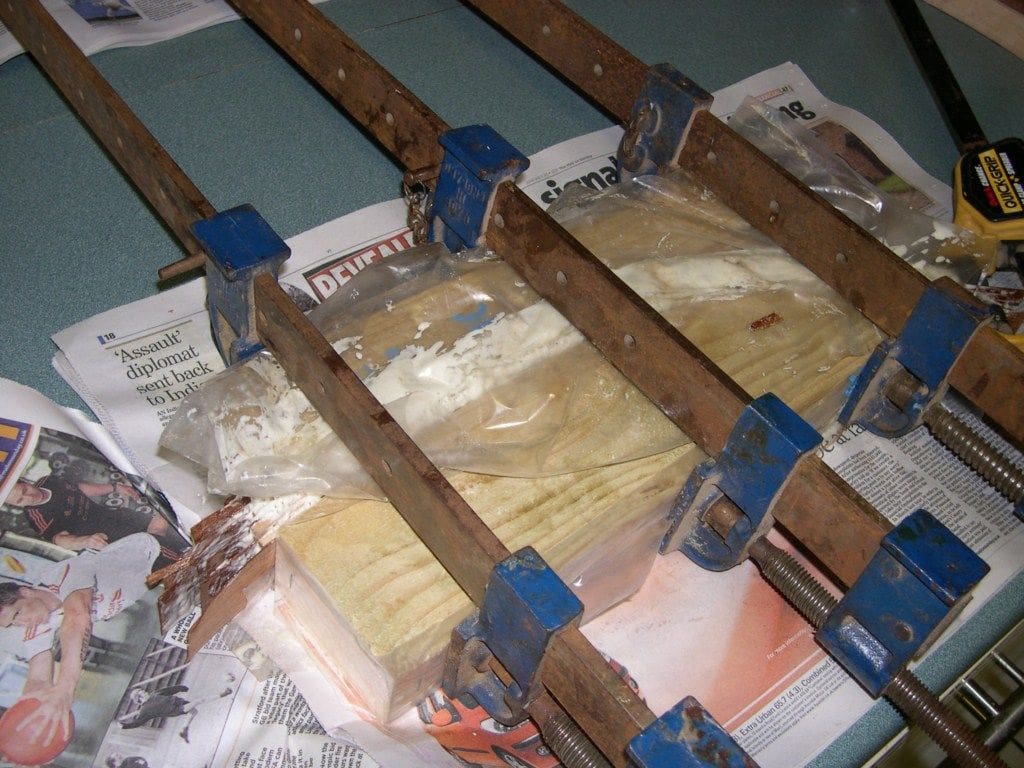
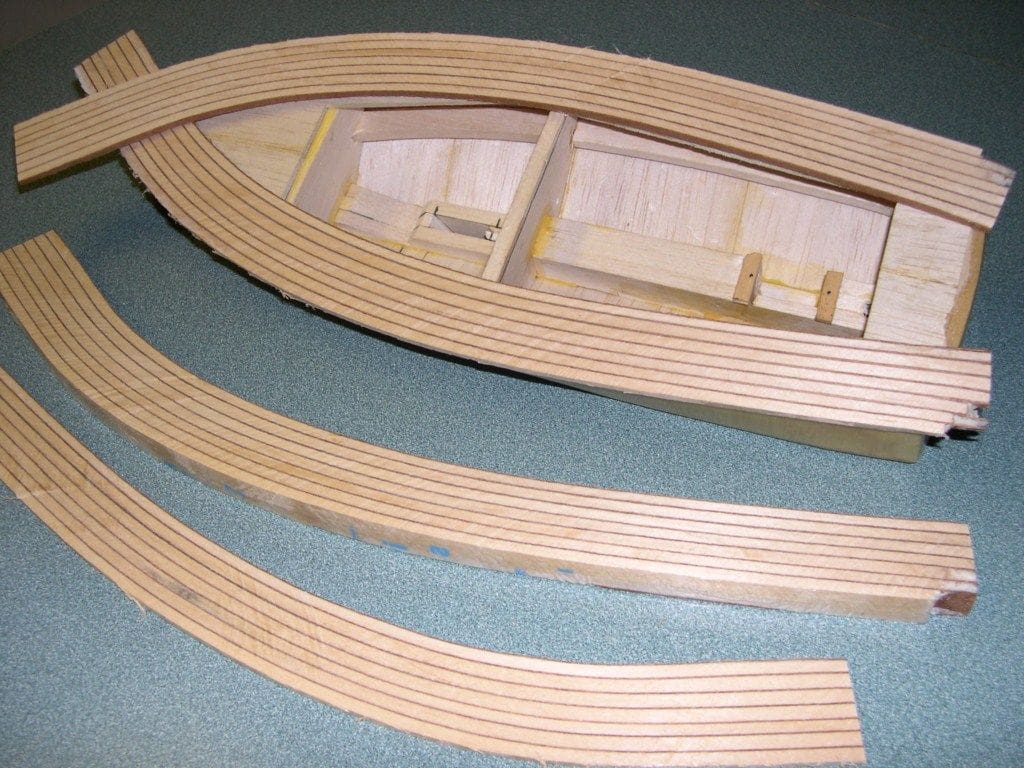
Coat one side only and laminate one veneer and one plank as fast as you can because in 15 minutes it starts to foam. Then it slips and slides everywhere, but with perseverance, and a lot of shouting and swearing it will finally all go together, Photo 10. Make a cup of tea while the kids clear up all the mess and an hour or so later it’s all done and dusted. I bandsaw off all the dried foam and then rotate it and slice it into strips on the table saw. Despite all of the above, this method makes the most beautiful and accurate curved planking. I am just being ‘flash’ making it curved to fit the decks as it will look good if done straight as well, Photo 11. The next picture, Photo 12, includes the ‘raw’ glued up blocks and this is the easiest way of producing curved planking.
The planking was trimmed and nice coloured off-cuts added at the bow and the stern and glued down with Aliphatic adhesive. With care, the hull was placed upside down on the belt sander to remove the worst ‘bumps’, then a final finish by hand sanding plus two coats of thinned dope and the planking was finished in all its glory, Photo 13.

Cabin and further detailing
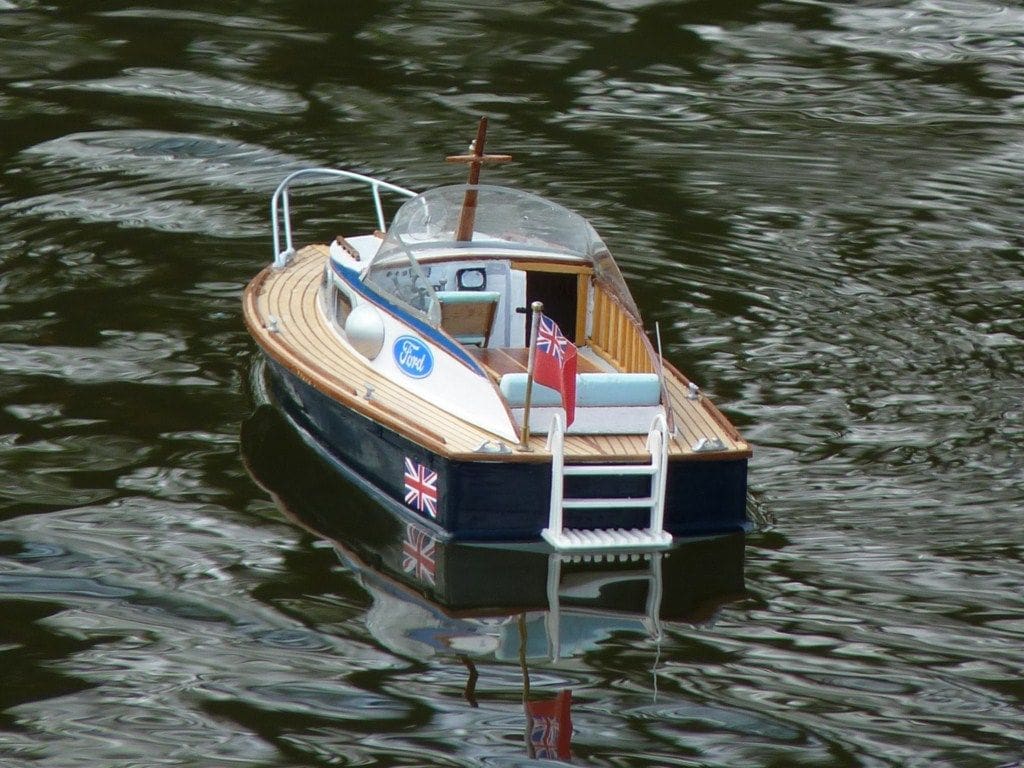
I wanted to add a lot more detail to my model and the Fairey Owners Club Website was the centre of my research. I printed off a selection of images and chose the bits I liked because as we already know, these craft have all been individually tailored to meet their successive owner’s needs and fancies over the years, but I really liked all the varnished wooden bits, which I tried to copy.
The decking had undoubtedly added some weight, even though I changed the sub-deck sheeting to 1/16 inch balsa in preparation. Add to that the finishing resin and all my planned fittings, so I had therefore to watch the weight.
I used Glynn’s cabin templates, but made a few changes to allow for thinner materials. I changed the sides to 1/32 inch Miralyte plywood and built a lightweight frame out of 1/8 inch balsa, curving the top formers so that I could have the thin overhang at the front and sides while keeping the camber of the roof. I noticed that the well deck often had the remains of the original frame construction, so I used 1/16 inch strips to strengthen the sides, Photos 14 and 15.
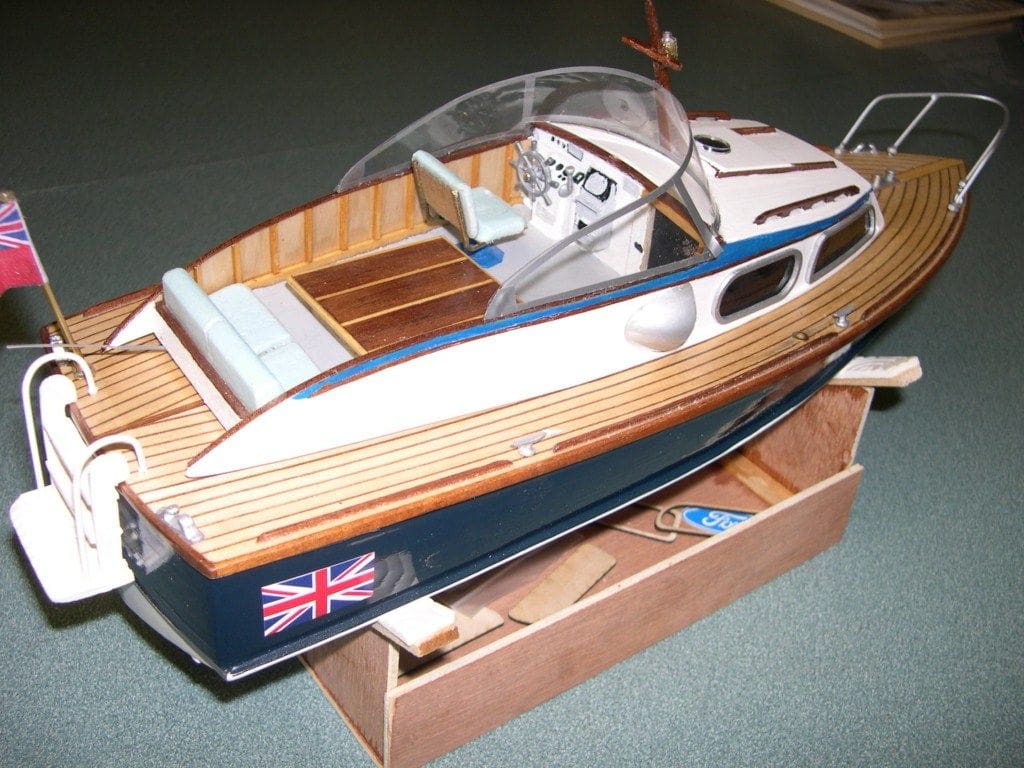
The seating was carved out of blue foam and the tiny wire frames glued on using R/C Modellers glue which is a clear drying latex type acrylic adhesive that is used for windscreens and will not harm foam. Some of the deck fittings were bought online, including the flag and others were made from ball point pens, matches, electrical wire, tubing as well as those throw away plastic spoons you get with Calpol ( a child’s pain relief medication) etc. Many happy hours were spent fiddling with things and sticking my fingers together……
For the windows, I couldn’t wait to go back to school after the Christmas break to get my hands on the laser cutter. Drawing out the window frames in Corel Draw was a pain, but when the laser cutter churned out 2mm wide frames in 1/16 inch plywood it was all worthwhile. Black sticky-backed plastic was used to simulate the glazing. Having actual window frames rather than just silver trimline is a nice finishing touch.
Painting
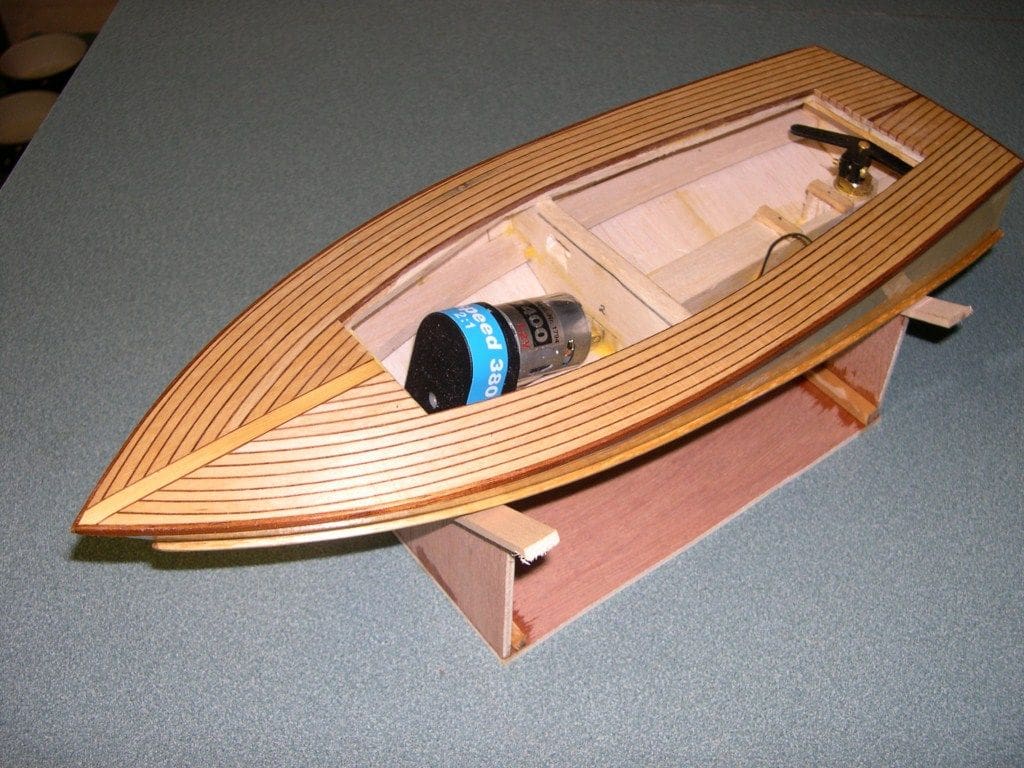
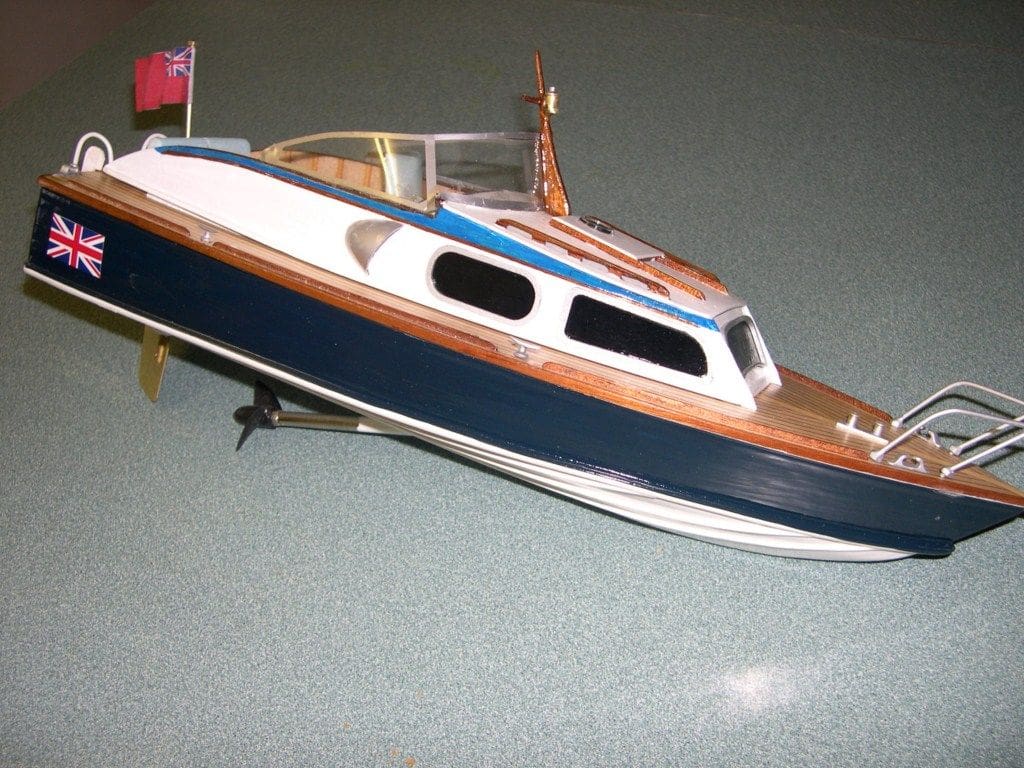
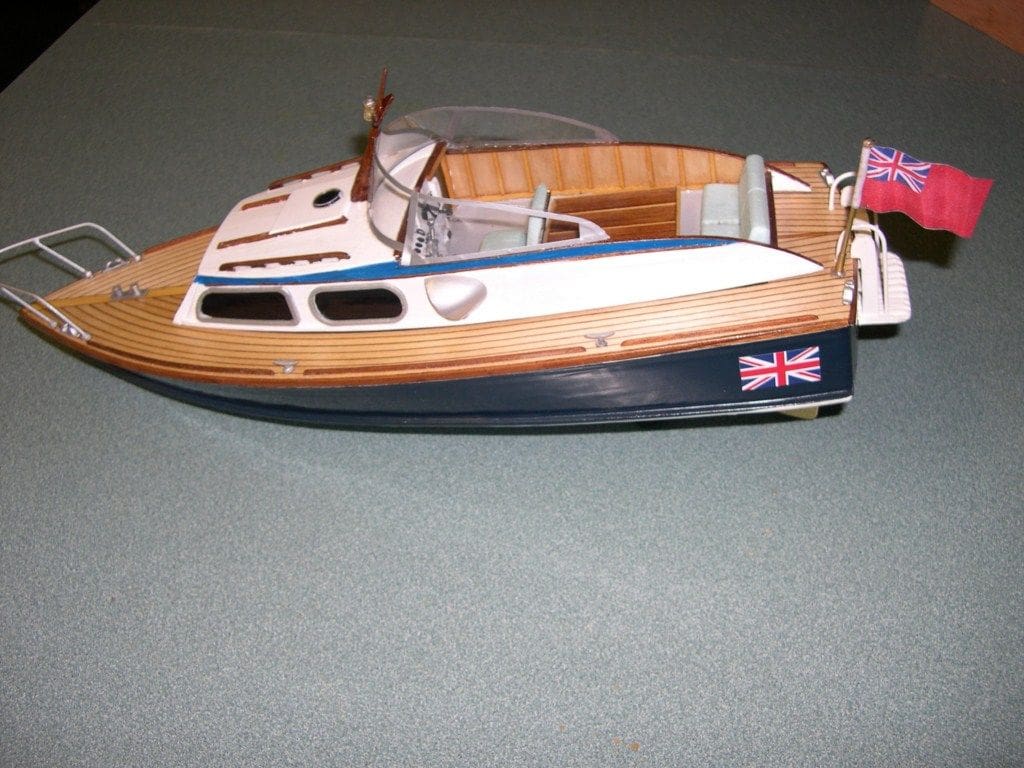
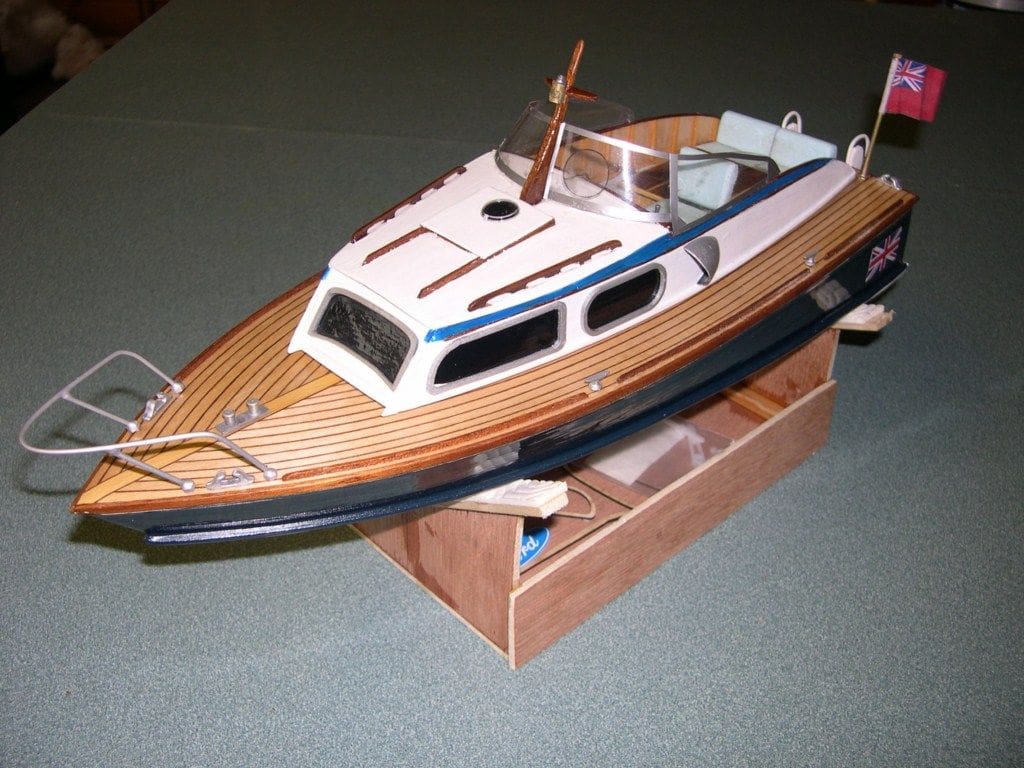
Halfords spray white primer was used on the hull and I then hand painted the sides with a blue water based acrylic to which I added 10% black to make that lovely dark blue. White gloss acrylic for the cabin did the trick there and then I gave the whole thing (except the decks) a couple of coats of thin Krylon Crystal Clear Acrylic. This stuff is great and it dries so fast and produces a beautiful final finish, Photos 16 and 17.
Radio control and sink test
I treated myself to a cheap 2.4GHz four channel transmitter and two receivers from Howes Models, all of which were not much more expensive than a conventional two channel 27MHz set. Two packs of three cells, just like Glynn suggested, were assembled, but I got the more powerful 2000MAh NiMH type. They were also laid out as a two and a one instead of three across, so as to spread the load a bit more.
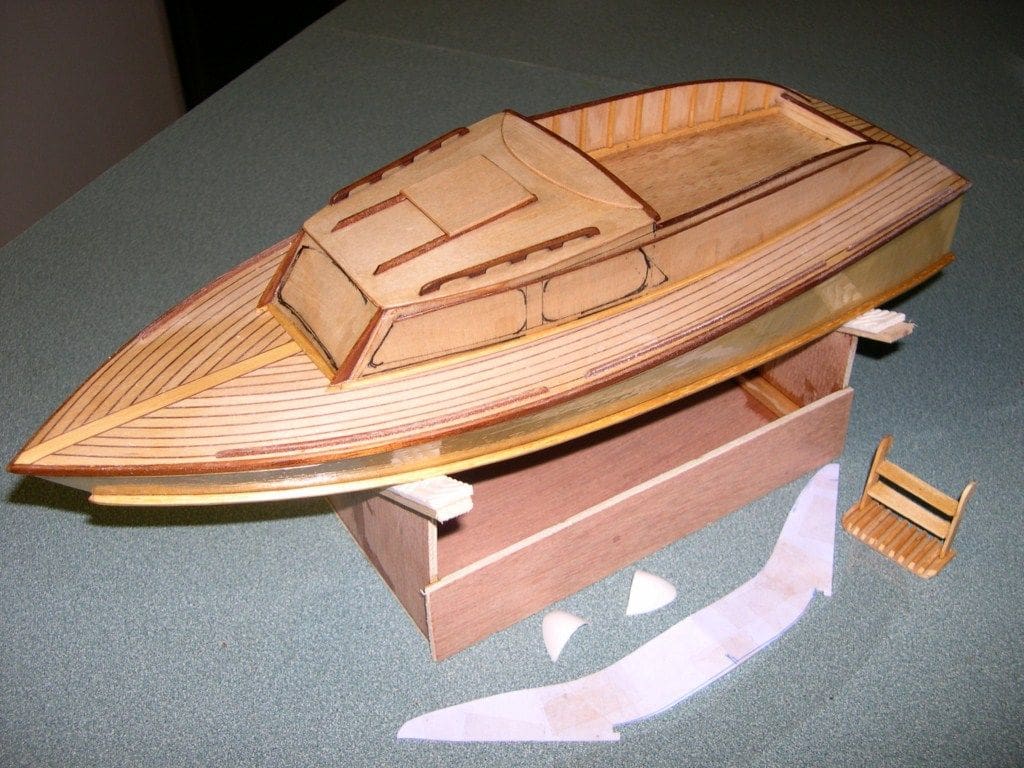
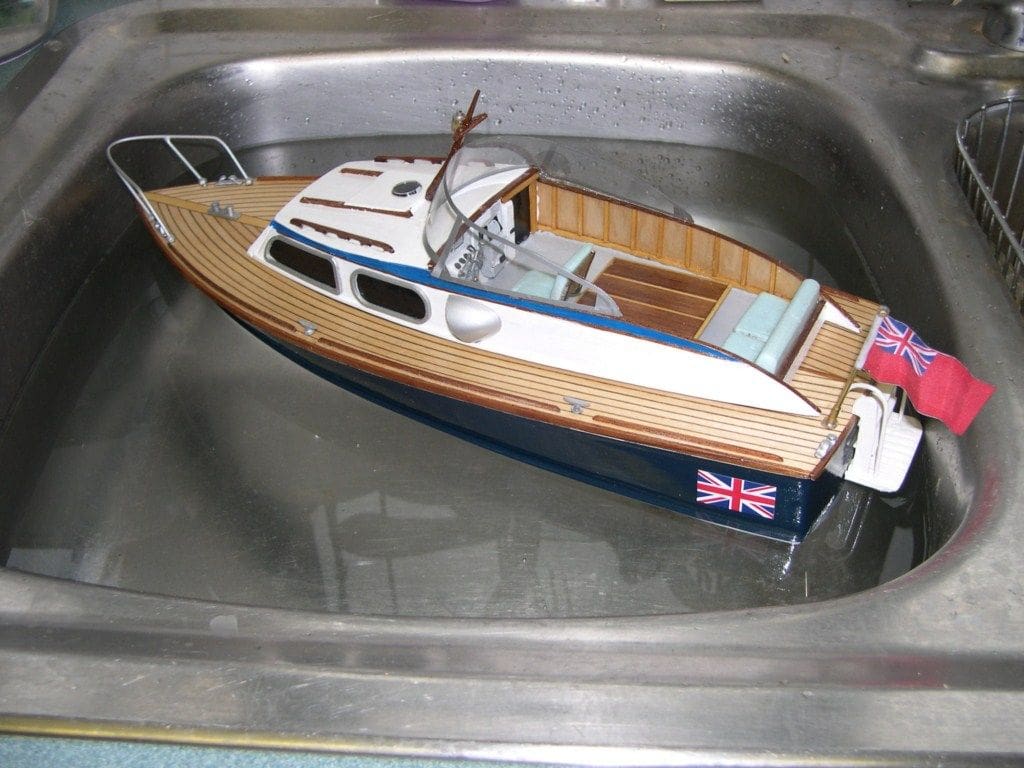
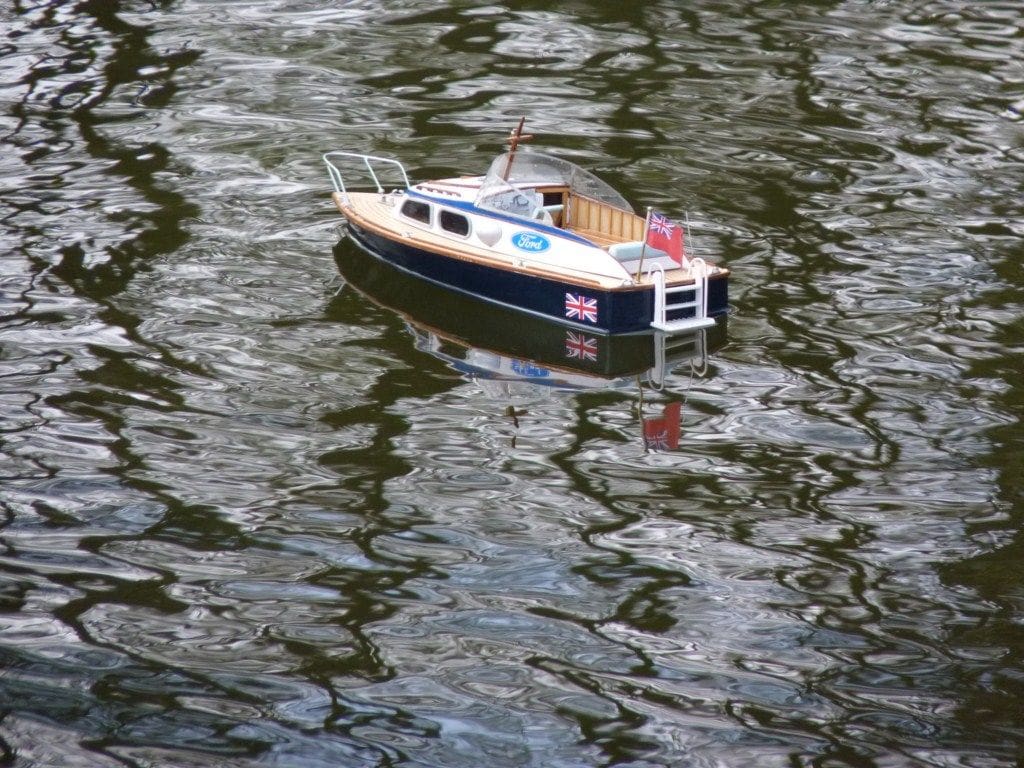
So, to the sink test and it floated spot on the waterline and weighed in at only 1.75 ounces more than Glynn’s, Photo 18.
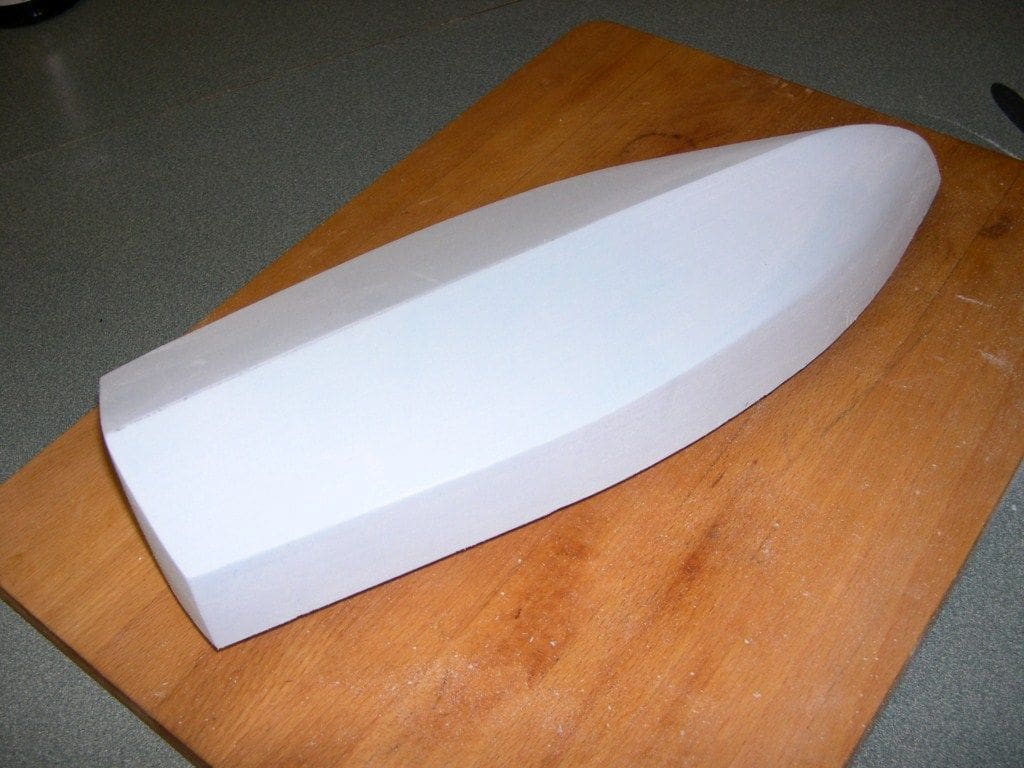
Which brings me back to the ill-fated vac-formed hulls! The idea behind these were so the youngsters in my school could have a go at building something for design and technology. So, I decided to have another go using templates to mark out and carve a new hull from dense ‘Blue Foam’. Three coats of the finishing resin later and an MDF base this time and another go in the vac-forming machine resulted in a hull as in Photo 19, which is where this story finishes, at least for the time being.
My thanks and apologies to Glynn Guest for taking his great little model ‘Diana’ and modifying it. It helped me recover from my operation and was of course built during the cold spell before Christmas 2010 and just after the New Year. It is a quick build model using Glynn’s techniques, and the deck planking in particular really enhances it. Just because a model is small, there is no reason why it cannot be enhanced as the builder wishes.

Editorial note:
Diana by Glynn Guest
This was first featured in the 2010 MB Winter Special, published in late October of that year. Back issues may still be available. The plan was printed half size in that issue, but is available full size as Plan No. MM2050 priced at £12.50 from MyHobbyStore, either online: www.myhobbystore.co.uk/modelboats , or by telephoning: 0844 848 8822, Mon. to Fri., 10am to 4pm.


