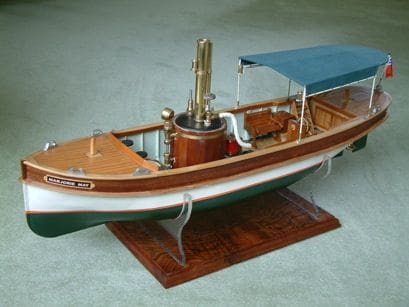
A 1/15th scale working steam launch built from card by DON DIMENT
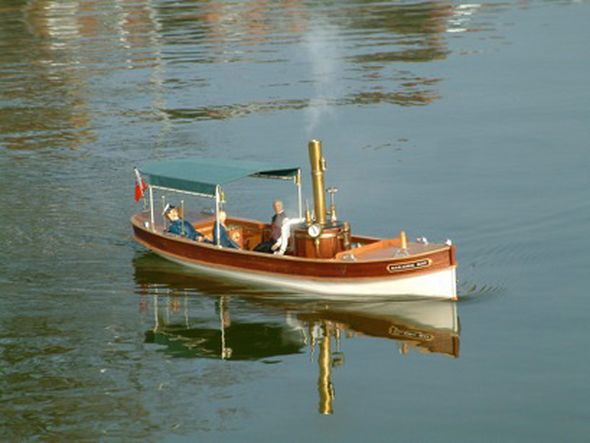
Marjorie May makes a fine sight steaming across the pond
Introduction
Enjoy more Model Boats Magazine reading in the monthly magazine.
Click here to subscribe & save.
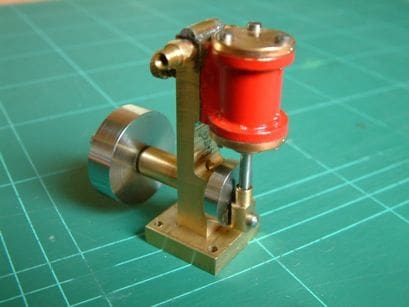
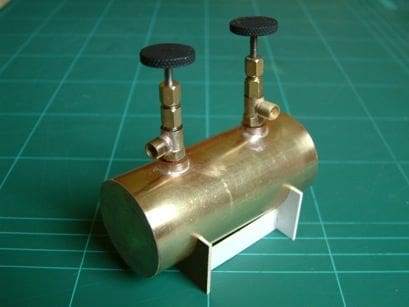
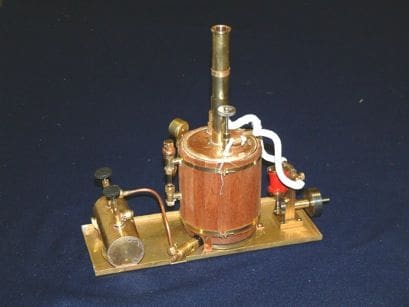
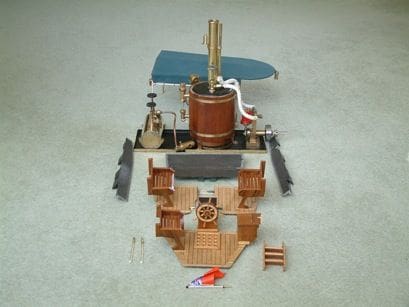
The reason for this project came about when my wife won a model double acting oscillating steam engine in the club Christmas raffle, Photo 1. Fortunately, the builder of this engine then kindly volunteered to build a gas tank, Photo 2 as well as a boiler and from there I was committed to construct some sort of boat to make good use of this assembly. The complete steam plant is shown in Photo 3, all mounted on a nice brass base plate for easy model installation.
Design
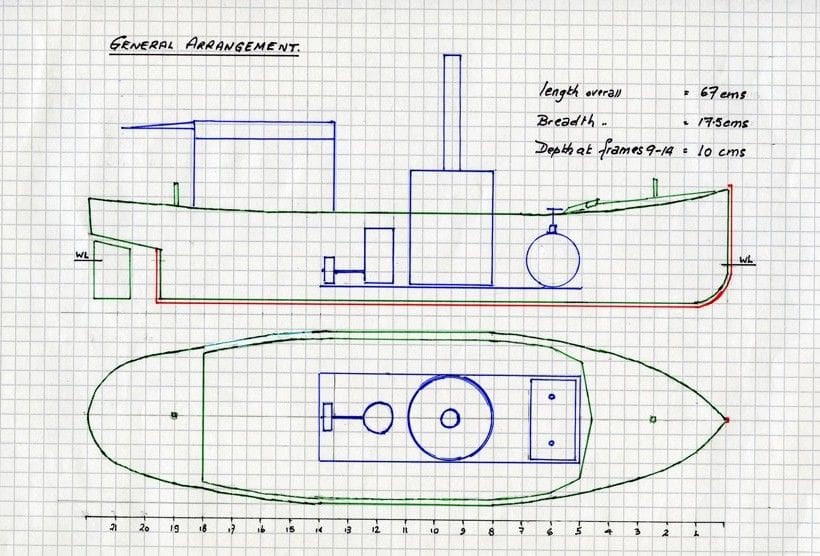
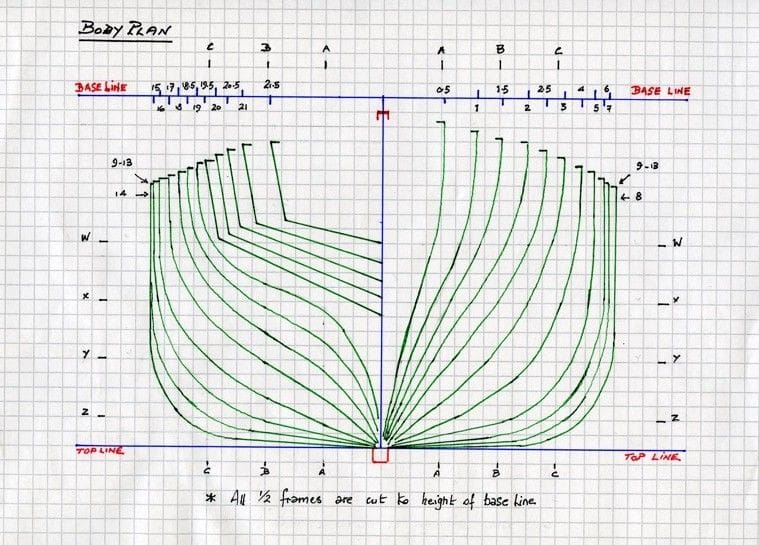
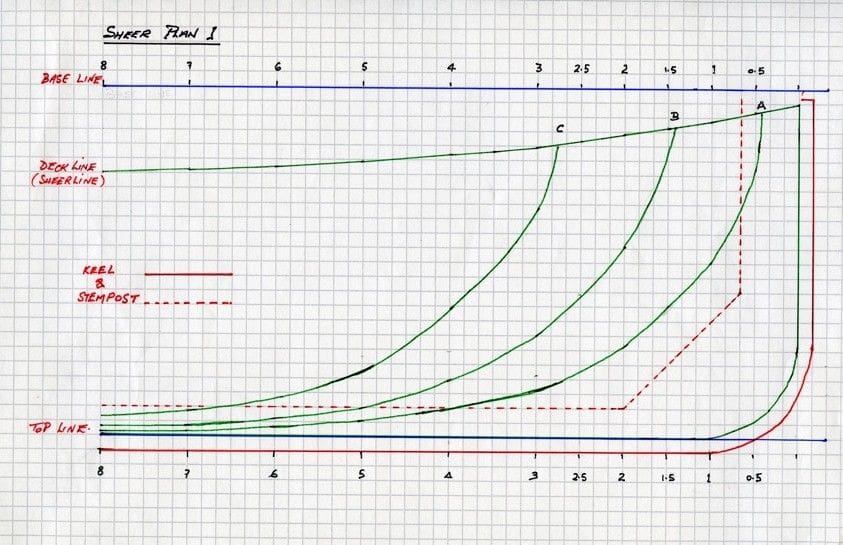
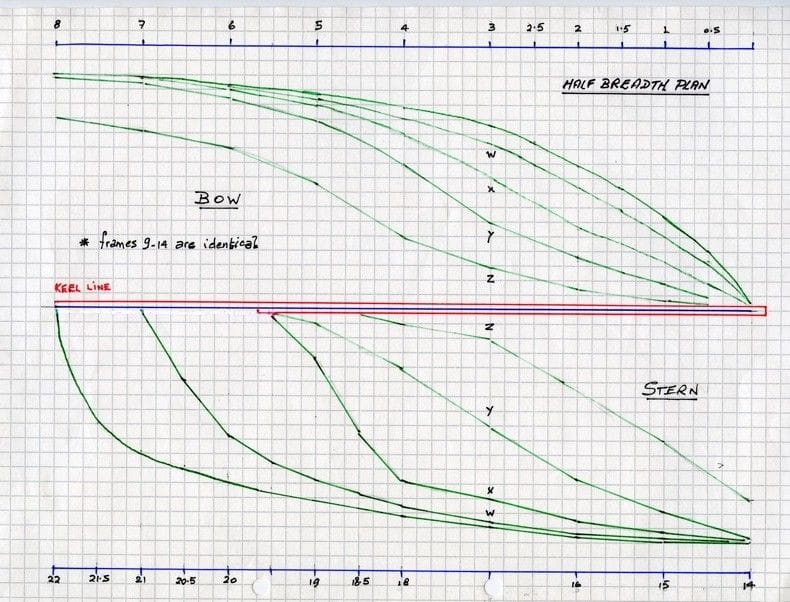
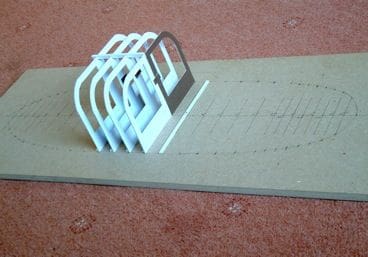
There were no suitable plans available, therefore I drew a set of plans to represent an open wooden launch which might have existed in the early part of the 20th Century. I used graph paper to design a model of length 67cms, beam 17.5cms and depth at Frames 9 to 14 of 10cms. This proved to be quite straightforward and the general arrangement is shown here in Photo 4 and the body plan is in Photo 5. I hope these pictures show that by using graph paper, readers will appreciate that the task is not too difficult. Having the ready built steam plant to hand enabled the overall size to be easily determined, but the design also had to allow for the easy removal of the complete steam plant. The fore and after parts of the hull would be decked, with the radio control equipment and battery hidden below the poop deck and removable hatches providing access. I also drew a sheer plan (in two parts to fit the paper and a half breath plan. Photo 6 is of the bow section of the sheer plan (stern sheer plan not shown here) and Photo 7 is of the half breadth plan. I hope these pictures give you an idea of what is involved in what is not really a complicated process and can be applied to any model intended to be built from an ‘own’ design.
Construction material
The hull, decks, floors, furniture and rudder are all built totally of card. The material used is mountcard, usually used to frame art work or photographs. It is easily cut with scalpel or craft knife and it can be bent, twisted, lightly sanded, painted, is acid free, inert and will not deteriorate. Superglue is the bonder of choice.
Hull
A suitable board of 1/2 inch MDF is prepared on which the deck plan of the hull is carefully drawn and the frame stations marked. Strips of card are glued against the frame lines.
Half frames were lifted from the lines plan using carbon paper onto a sheet of 2mm mountcard and then cut out with a scalpel. The half frames are turned over, marked around and then cut out producing a full set of whole frames which could then be glued upside down against the strips on the board plan. As the frames are cut to the maximum height of the hull, the keel line will be horizontal to the building board and any sheer or steps in the deck line can be cut out later.
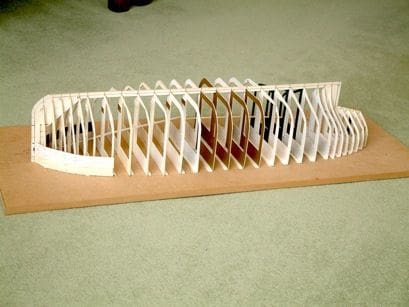
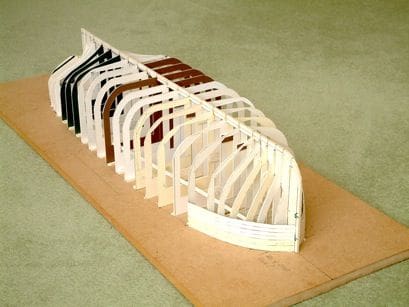
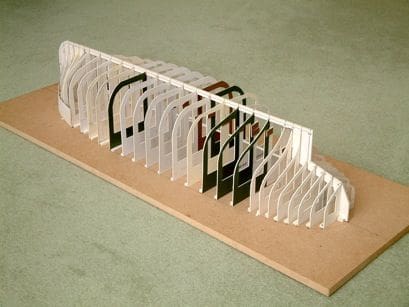
For this model, which is 67cms. long, a total of 29 frames were cut and glued to the building board, most of them 3cms apart, but with three extra frames inserted at the bow and four at the stern to ease the planking curves. Photo 8 shows the basic process for mounting the frames. The keel sternpost and forefoot were cut from a single piece of 4mm mountcard and inserted into the cut-outs in the base of the frames. Having ensured that the structure is all square, this piece can be glued into the frames, immediately producing a quite rigid structure, Photo 9.
Planking the hull is achieved by cutting strips of 2mm thick card and tacking them with superglue to the frames. Because the card bends and twists easily there is no spring and no need for pins or waiting for the glue to dry. Stealers are easily cut and inserted. Planking is started at the top of the hull (nearest the board) working towards the keel piece, as any excess superglue runs down and this helps the sticking process. Photo 10 is of the hull completely planked.
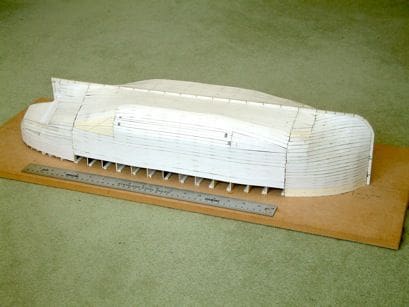
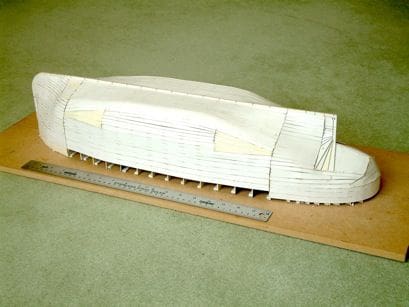
The planked hull was now covered in glass tissue and resin. Some of the resin was absorbed into the card and after being left to cure for a week or so, the resulting structure is waterproof, very hard and very rigid. Provided care is taken with this task, the resulting hull is easily as strong as the traditionally built wooden hull and certainly lighter and stronger than a complete GRP version. The proof of this is that in a hull of this size, no bulkheads are needed to stiffen its construction. After the hull has been removed from the board the excess height of the frames and any designed sheer can be cut with a razor saw. Any minor flaws or small lumps in the resin coat can be sanded off or filled with Isopon P38 before painting. As this is an open launch the frames were cut down to about 2mm out from the planking to represent the ribs.
The fore and poop decks were cut from 2mm card and glued to 4mm card beams laid across the hull. A further coat of glass tissue and resin was applied to the interior of the hull between the fore and aft decks, purely to protect the structure from the hot water, steam and oil which is pushed out by the steam plant. The inside of the hull was then painted.
Decks and furniture
The interior decks are all cut from 2mm. card. Those closest to the steam plant are covered in fine plastic mesh found in the junk box to represent steel chequered plate. Further aft, the card is planked with 1/64in ply with strips of grey pastel paper inserted between the planks and sanded down to represent caulking. PVA glue was used in this situation.
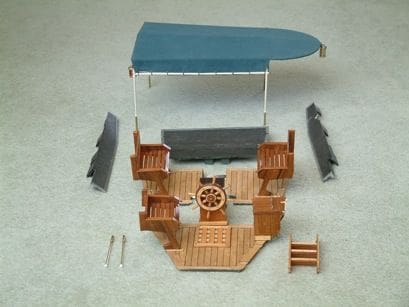
As this model was meant to represent a smart wooden built boat, a lot of varnished wood would need to be included and this was achieved by using marquetry veneers. Luckily, a fair stock of offcuts were found from a time when I used to make marquetry pictures. This material is still available from good craft suppliers, either in marquetry kits or as separate sheets of all kinds of different exotic woods. These veneers are no more than 1mm thick and are normally cut with a scalpel, but obviously care must be taken when sanding them. The benches, binnacle, lockers, and steps are all built in card and then covered in veneers of suitable colour and grain Photo 11, as are the tops and sides of the bulwarks. The fore and aft top decks are planked in elm veneer planks, again with strips of grey paper inserted between the planks and then lightly sanded. A rubbing strake was glued all round the hull below the gunwale. This is of card, but again veneered with 1/64in ply. For purely cosmetic reasons, I decided to plank the outside of the hull above the rubbing band and strips of mahogany veneer were used here. A strip of 3mm square wood was glued all around the gunwales and decks to hide all the edges and complete the hull.
Finishing
A mixture of linseed oil and methylated spirits was applied to all the wood areas. This feeds and brings out the colours of the wood or alternatively a proprietary wood reviver could be used instead. This was followed by five or six coats of clear varnish, rubbed down between each coat, using matt varnish on the floors and satin varnish on everything else. The remainder of the hull was painted in the desired colours. The canopy is constructed from brass tubing and covered with thin cotton cloth which is then waterproofed. This is to protect the interior and furniture from some of the effects of the steam plant and it also adds character to the model.
The fairleads were carved from 1/4in Perspex with a mini-drill and painted with Metalcote and finally pinned into place. The name plates were produced on a computer, stuck to a piece of veneer, lacquered and then pinned to the hull.
Photos 12, 13 and 14 are of the finished model prior to her first test sailing.


Conclusion
The final result achieved the initial aim of producing a good looking model using the existing steam plant assembly and for virtually zero expense. As an example of this, a 4ft x 3ft sheet of mountcard from a good art shop should cost no more than £5. Professional framers always have large amounts of offcuts which they are quite happy to dispose of, often free of charge and a pack of suitable mixed veneers can be had for less than £10. If you then add the propeller, propshaft, glues, fibreglass tissue, resin, paints and varnish and the bill is still less than £30. Only the steam plant and r/c equipment are further required to make the model operational.
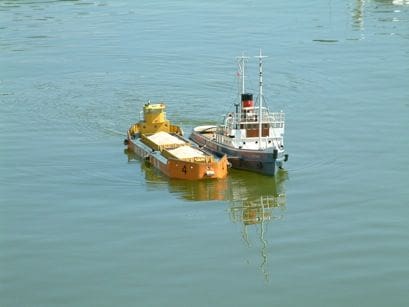
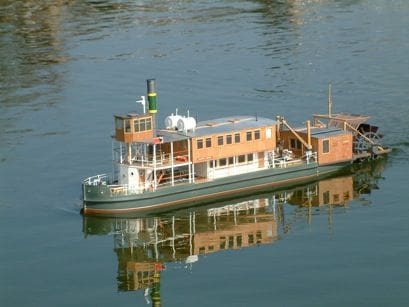
This was no experiment, as this is my fourth boat built of card although this is the first to be built using plank and frame. The other three, a barge, a stern wheel paddle boat and a Mirror Class dinghy are hard chine boats where the sides, bottom and chines are each cut in single pieces of card and glued around bulkheads. If there are still doubts as to the viability of using card as a building material for a working model, the barge and stern-wheeler have now been sailing for some ten years and still look as good as the day they were launched, Photos 15 and 16.
I hope this has given some food for thought to our readers as an alternative to the more usual ways of building a working model boat.
(There are some very thought provoking ideas in this article that provide food for thought for scratch builders – Editor)