Dave Abbott reviews the Models by Design semi-kit
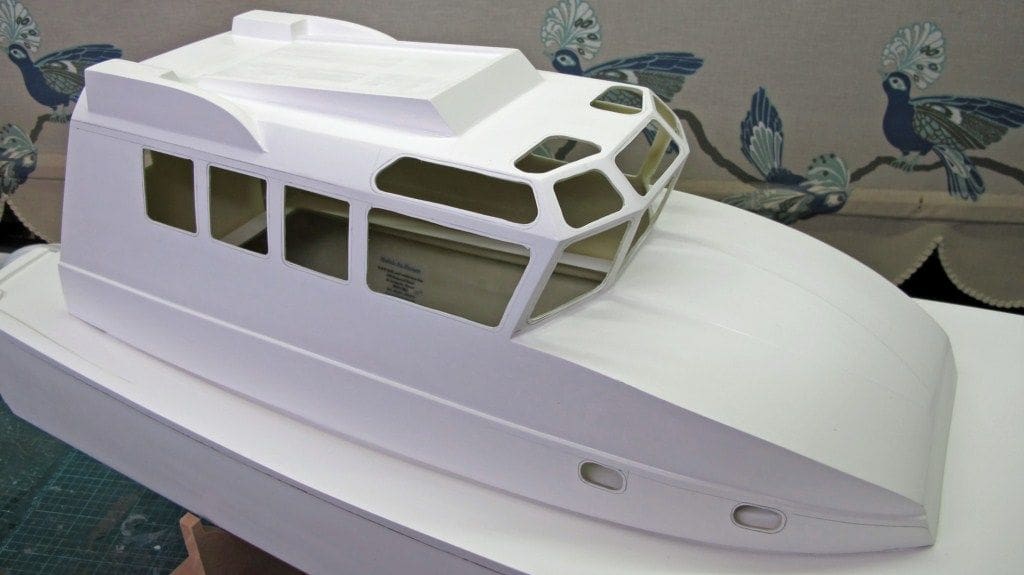
Models by Design produce a huge range of high quality GRP model boat hulls and fittings and they have recently introduced this kit of the Portland Interceptor 42 Pilot Boat. The full size pilot boat was built by Safehaven Marine and is fitted with two Volvo D12 engines, each rated at 450hp which give a maximum speed of 24.4 knots. The engines drive two five bladed propellers in tunnels with low shaft angles and carefully calculated tip clearance to eliminate any potential cavitation problems. Further information on these boats can be obtained from the website of Safehaven Marine.
The kit
Enjoy more Model Boats Magazine reading in the monthly magazine.
Click here to subscribe & save.
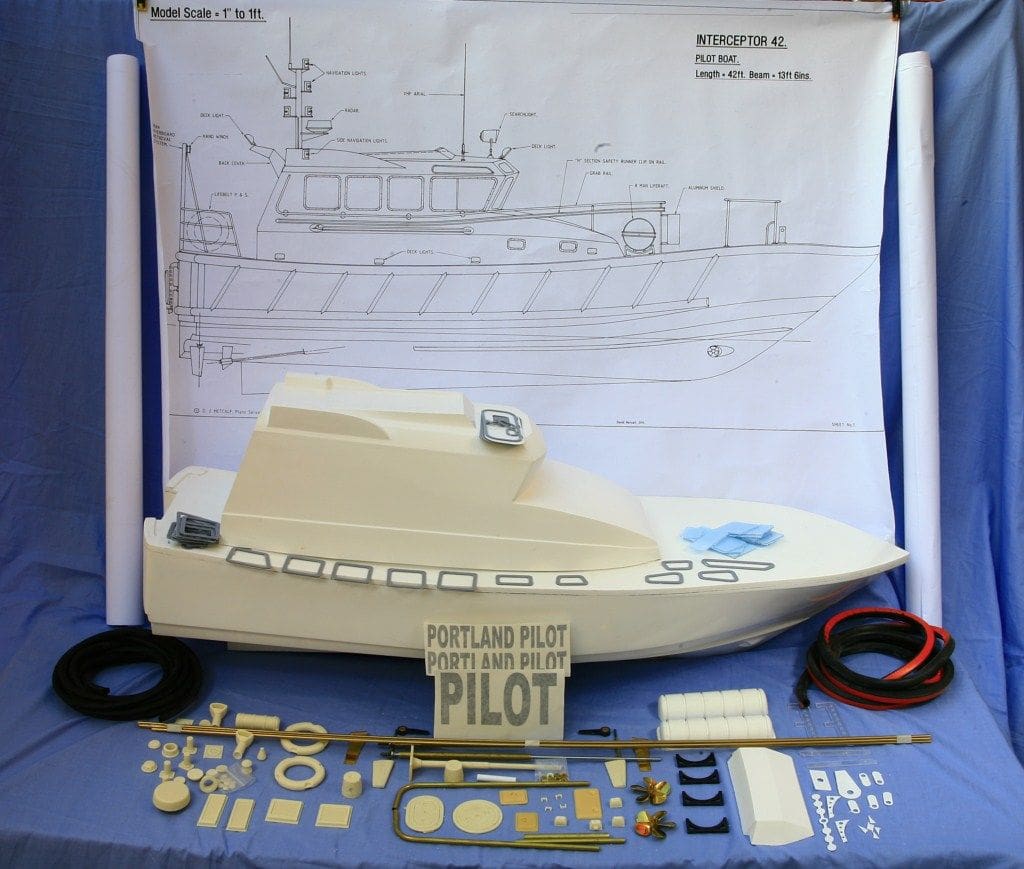


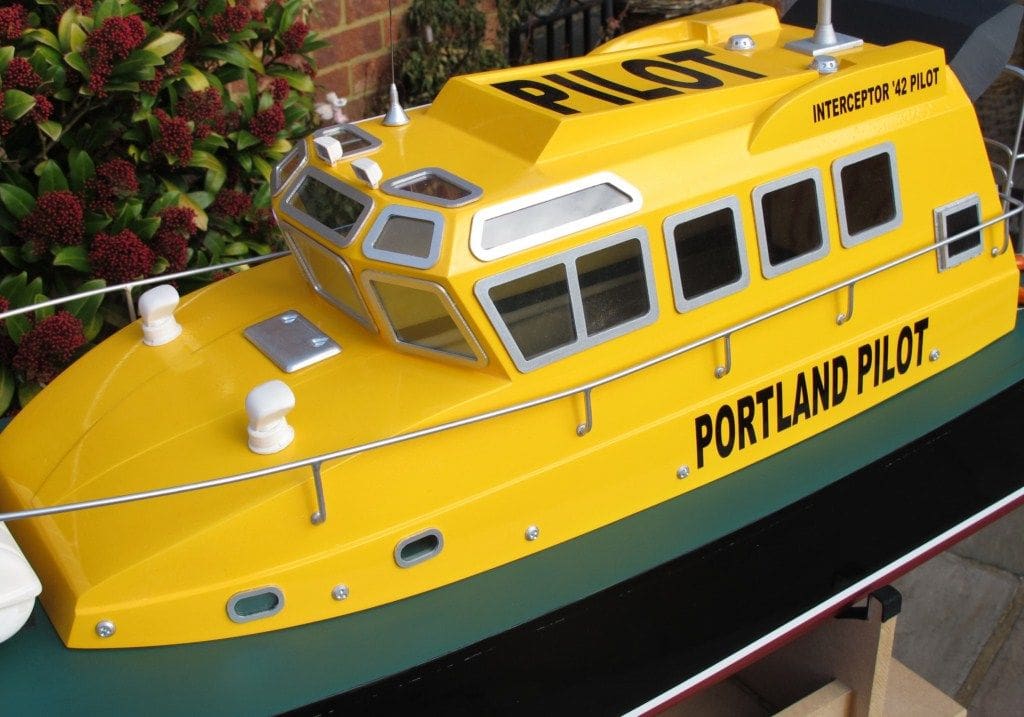
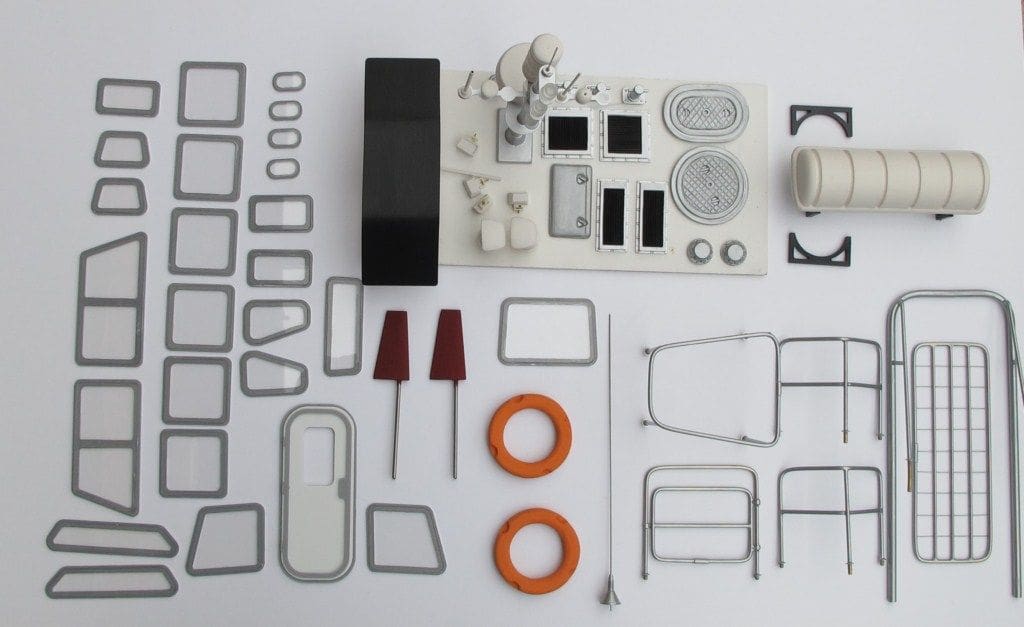
This is to a scale of 1:12 giving a hull length of 42 inches (there is a clue somewhere in the name!) with a beam of 12 inches. The kit includes a GRP hull with a joined deck and a separate wheelhouse. Also in the box is a selection of brass rod, fender rubber, a window set, propellers, propshafts, P brackets, rudders, polyurethane cast resin deck fittings, mast, clear cast resin navigation lights, liferaft, rear wheelhouse canopy, rear door, rear lift supports and machined arms plus decals and plans. There are three full-size drawings which show all you need to know about construction of the model, but there are no further printed text or pictorial instructions. There is nothing really complicated about building the model though and Photos 1 and 2 show the kit contents. Motors, r/c, paints, batteries etc. will as usual have to be sourced elsewhere. So, this is a project for those with some prior experience of model boat construction.
Basic hull work
As with all my projects, a stand for the hull is a good starting point and Photo 3 shows this made from MDF board. This material absorbs water like the clappers, so it has to be painted or varnished, as inevitably it will get wet sooner or later. Getting construction properly underway, this started on the hull and the running gear. Remember, there is no need to install the deck as this is already joined to the hull.
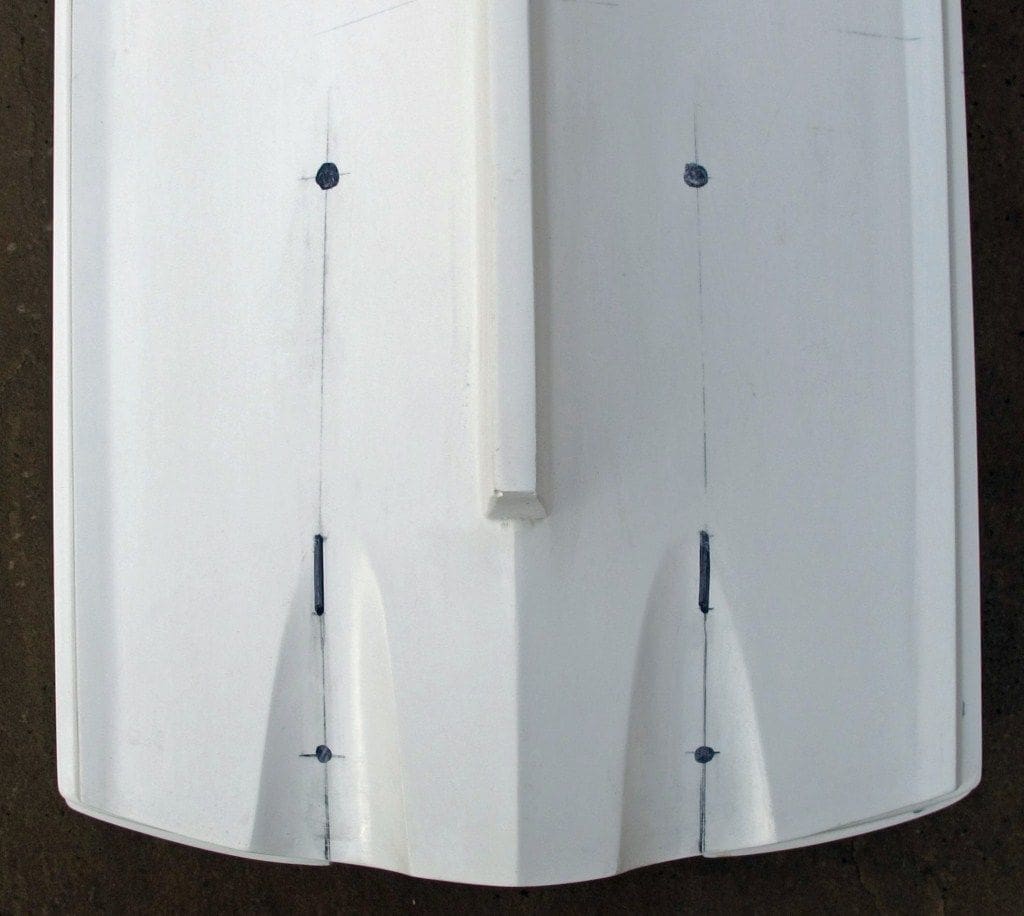
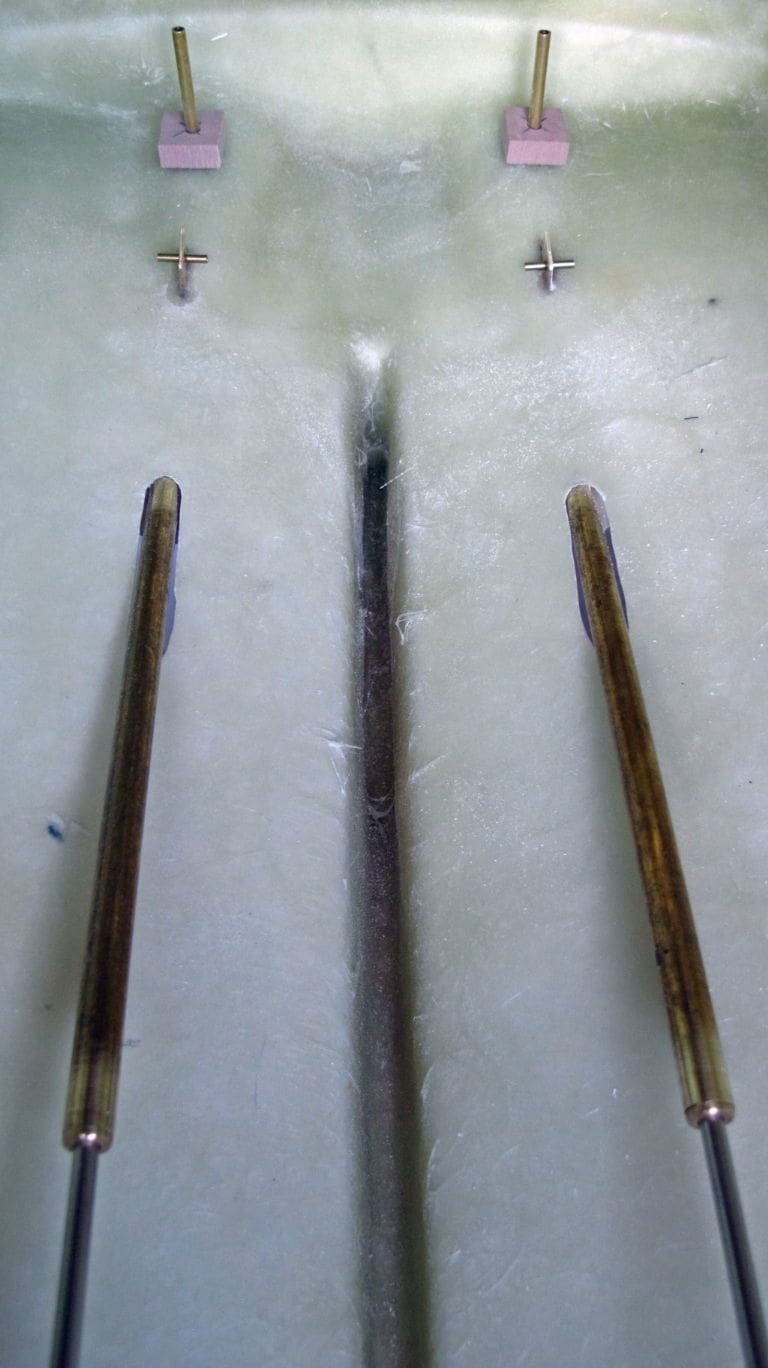
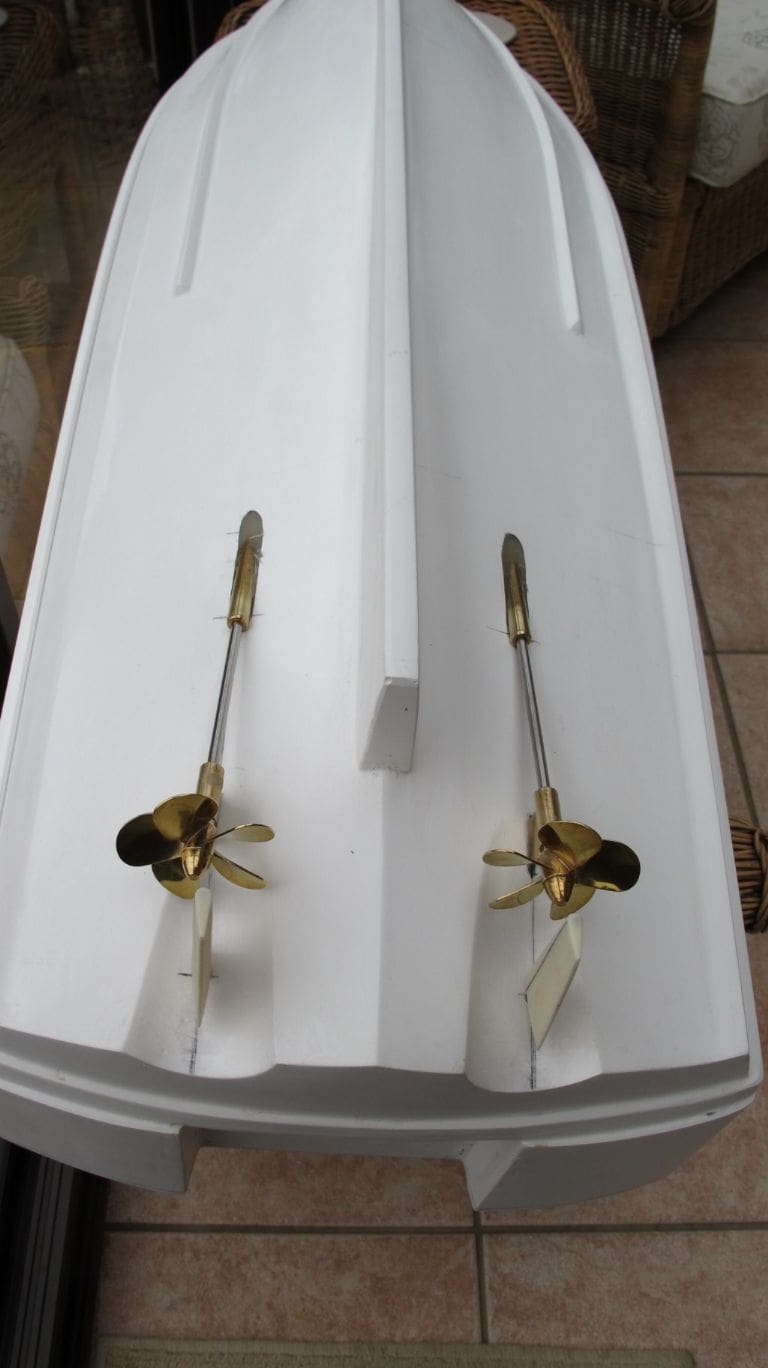
The hull is clearly marked for the positions of the propshaft exits, their P-supports and the rudder tubes in the two tunnels. These positions required opening-out with drills and files to the their correct sizes and profiles, Photo 4. Once the propshafts and rudder tubes have been ‘tack’ fitted they need to be firmly fixed into the hull and Photo 5 shows the propshaft skegs, which protrude inside the hull, drilled and brass rod slid through the holes and glued to prevent any movement. Also, the rudder tubes were supported with small scrap pieces of wood, all held in place with two part epoxy adhesive. Please note that it pays to double-check everything and particularly that the propellers do not foul the tunnels in the bottom of the hull, Photo 6.
Cabin
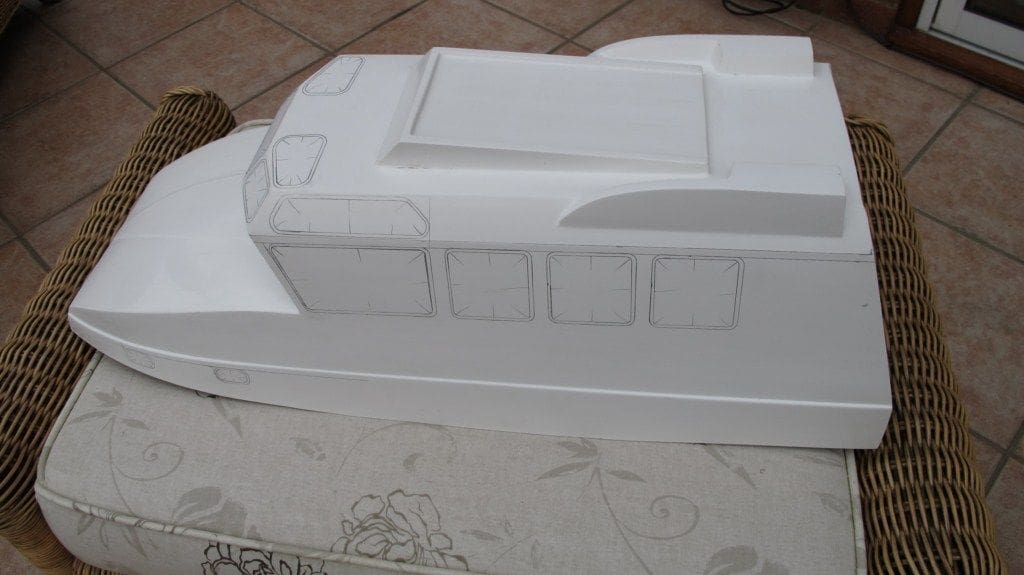
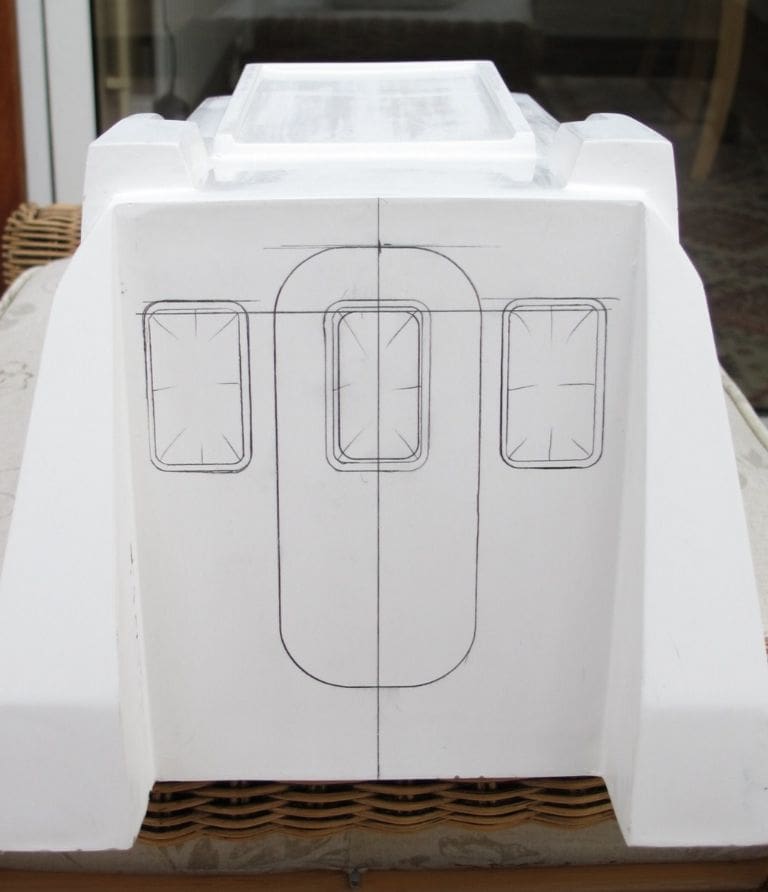
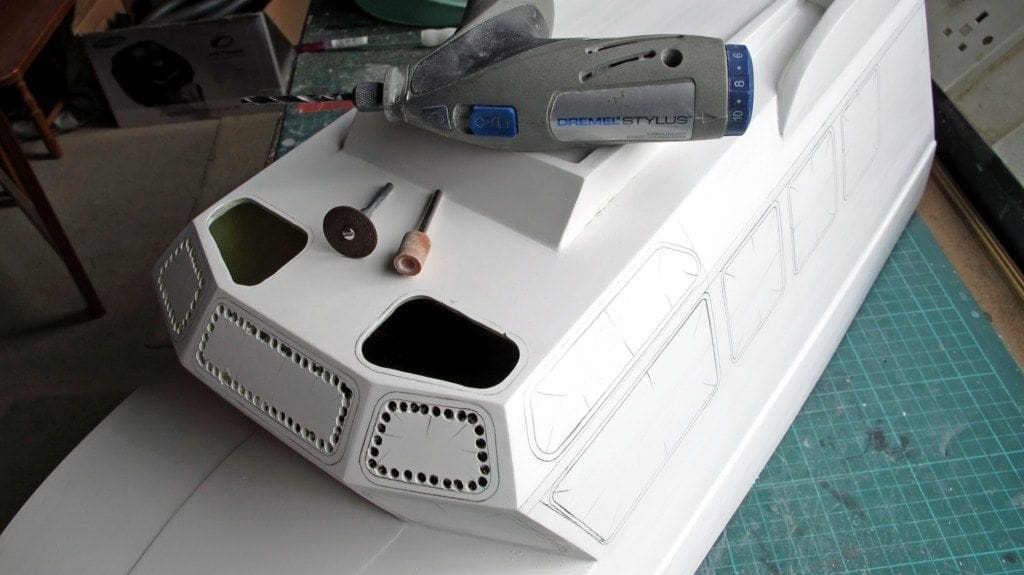
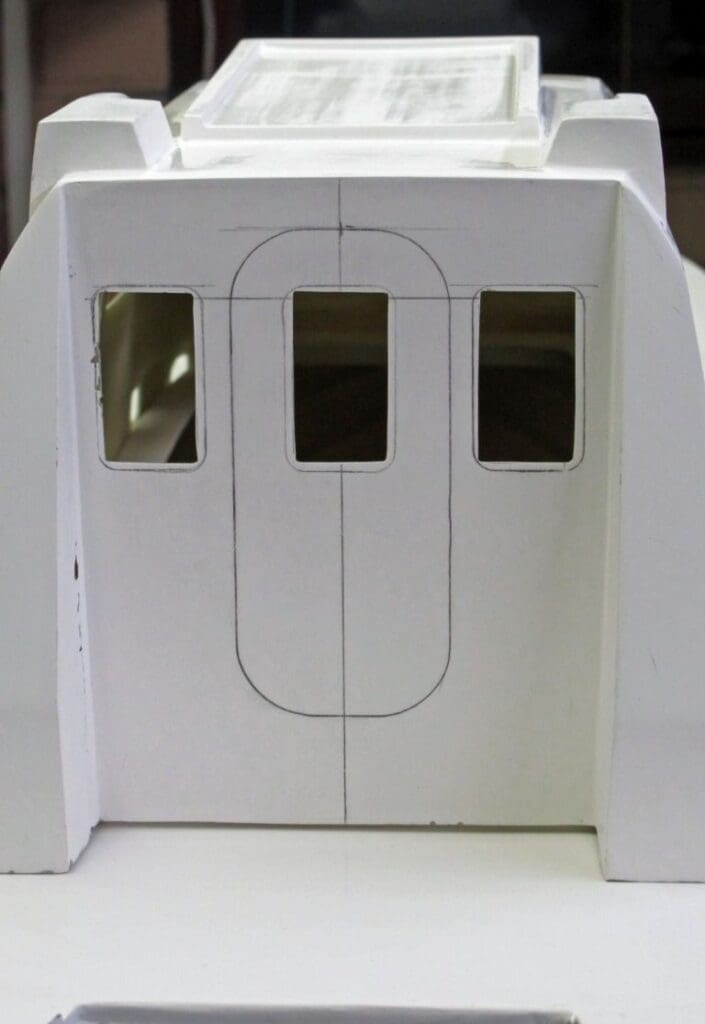
Leaving the hull for the time being, work started on the main one piece GRP cabin superstructure as there are many windows and openings to be cut out of it. The window shapes were transferred from the plan and drawn on to the GRP moulding as can be seen in Photos 7 and 8. There are a number of methods of cutting large openings in GRP, but chain drilling small holes just inside the outer edge of the aperture and then cutting through the small remaining joining pieces and finishing off with a selection of fine files is as good a way as any. It is best to always wear a mask for lung protection against GRP dust and have some sort of eye protection as well. Photos 9, 10 and 11 show the openings marked, drilled and then filed and trimmed to the required shapes.
Photo 12 shows a selection of the window frames and some brass parts (bottom right) which have been assembled and painted prior to installation on to the model. You can do this work at really any point in the building sequence. There are no special skills required for this work, other than patience and basic commonsense and some soldering skills. Please note that some of the brass parts have to be made and soldered after taking their measurements from the full-size drawings.
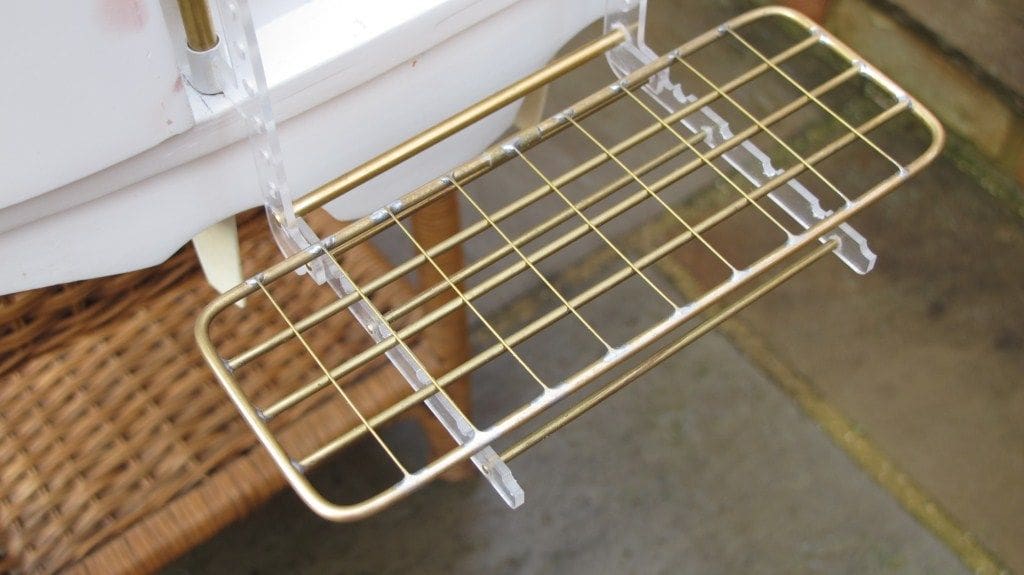
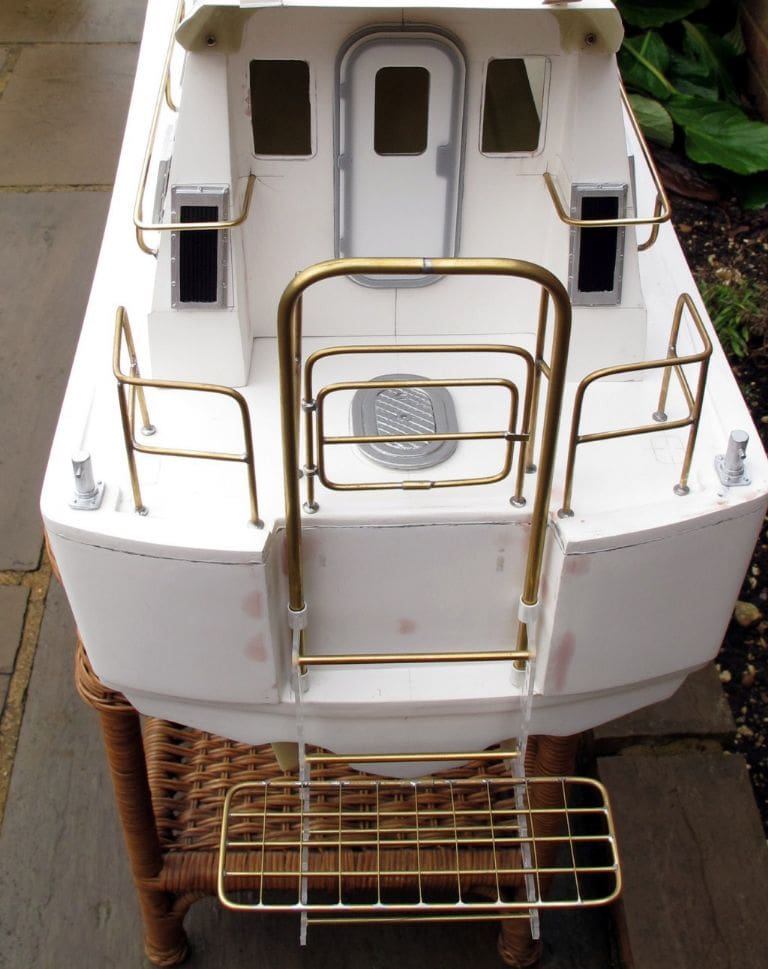
Photo 13 shows the brass stern diving platform completed (but unpainted) and placed on its supplied pre-cut frames and Photo 14 shows the complete stern lifting framework for the diving platform.
Yes, this is quite a big model at 1:12 scale, but that has advantages in that its made-up railings and other fittings are quite large, so there is nothing too fiddly in assembling or creating the various items.


Powertrain
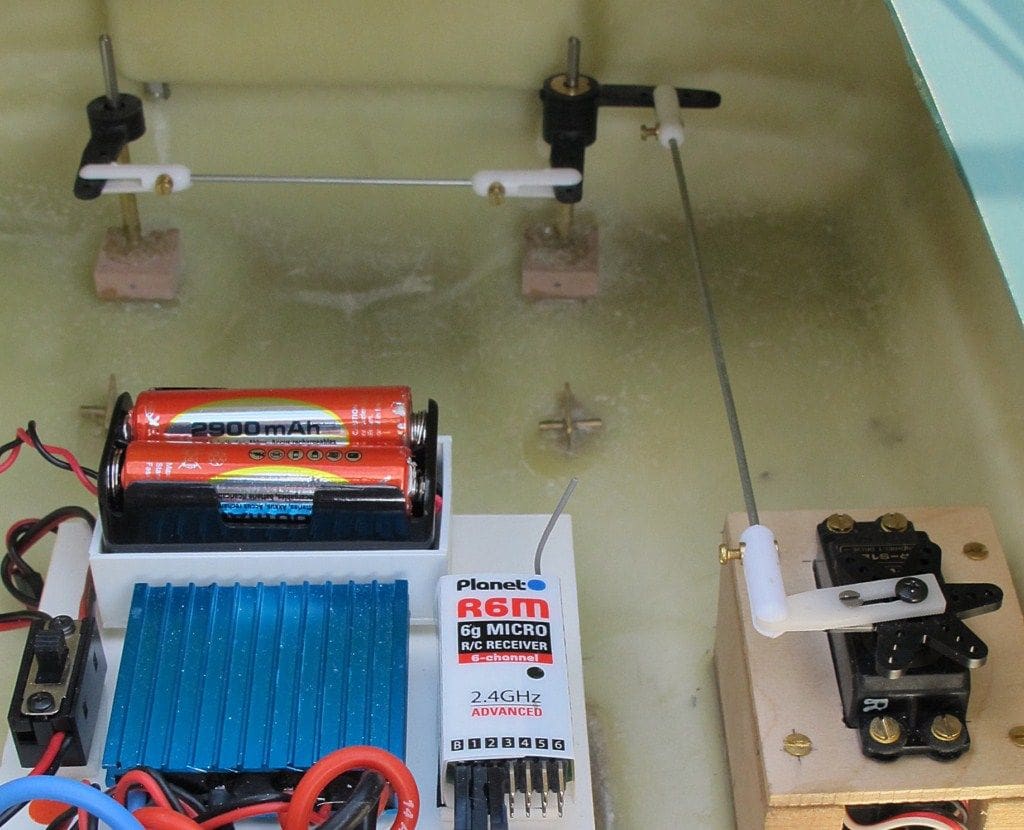
Before painting, the motors, r/c and rudder servo were installed. Two Graupner Speed 600 motors and a basic two channel r/c did the trick. Photo 15 shows the motors installed, connected plus the r/c and battery layout, and in Photo 16 you can see a close-up of the drip and splash trays under and over the ends of the propshafts. These prevent water and oil ‘gunge’ being sprayed around the hull. The prototype Models by Design model has brushless motors and its performance is scintillating, so there is no reason why you cannot go down that route, but the Graupner Speed 600 motors do well enough for me. Andy Griggs at Models by Design will be pleased to advise on suitable motors and speed controllers. The rudder servo and its linkage can be seen in Photo 17, plus the joining link between the two tiller arms.
Painting and finishing
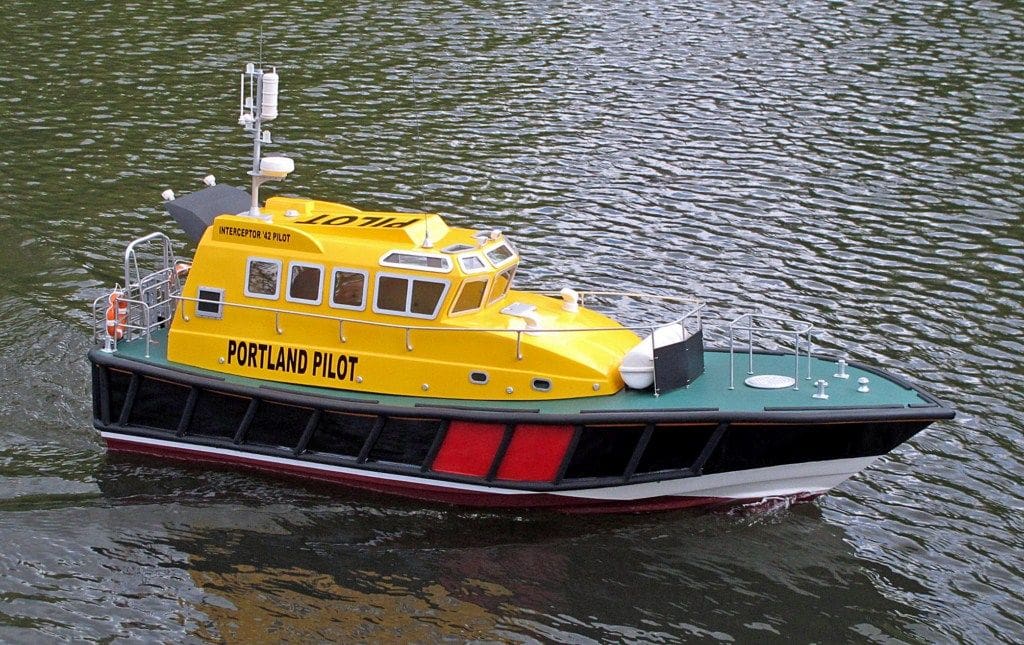
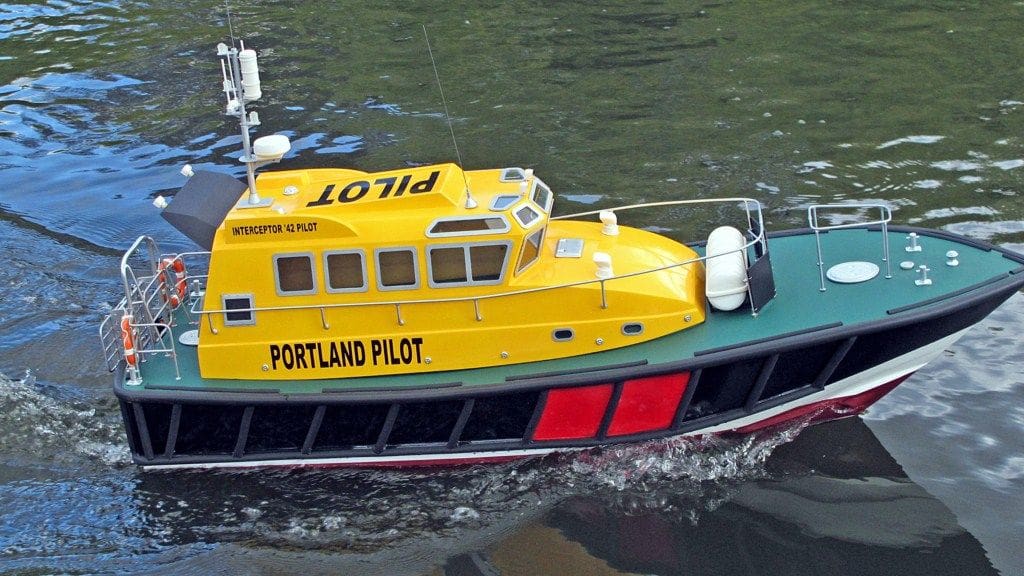
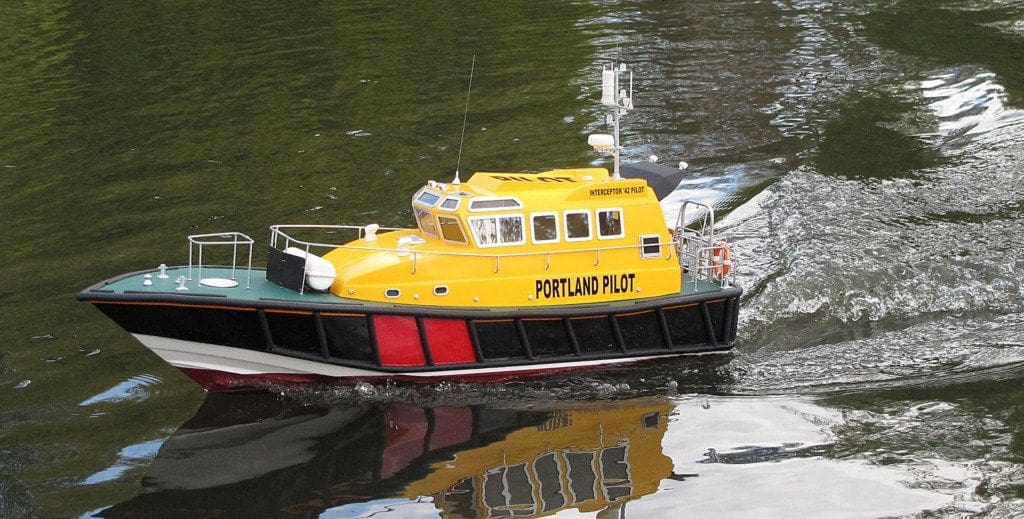
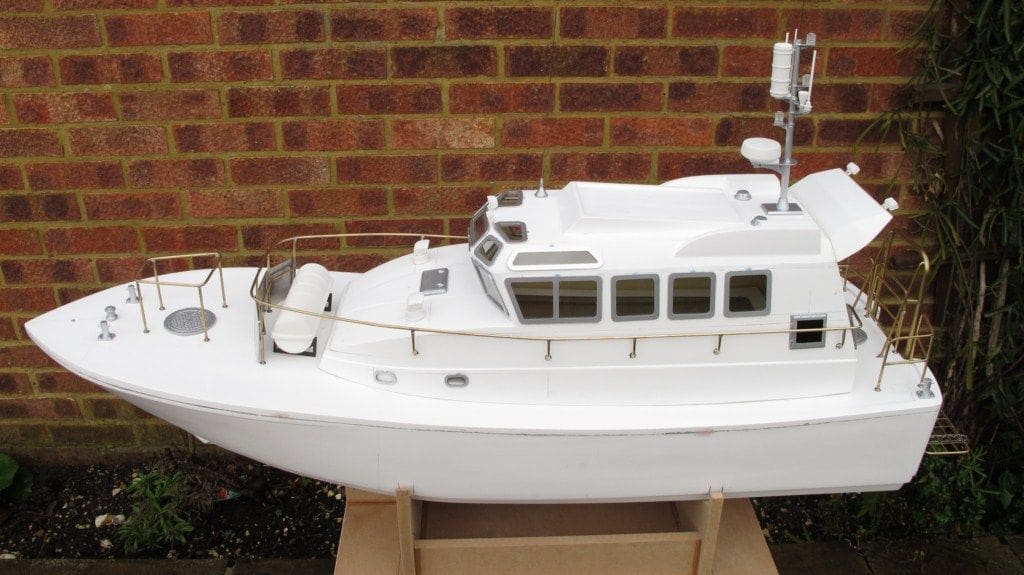
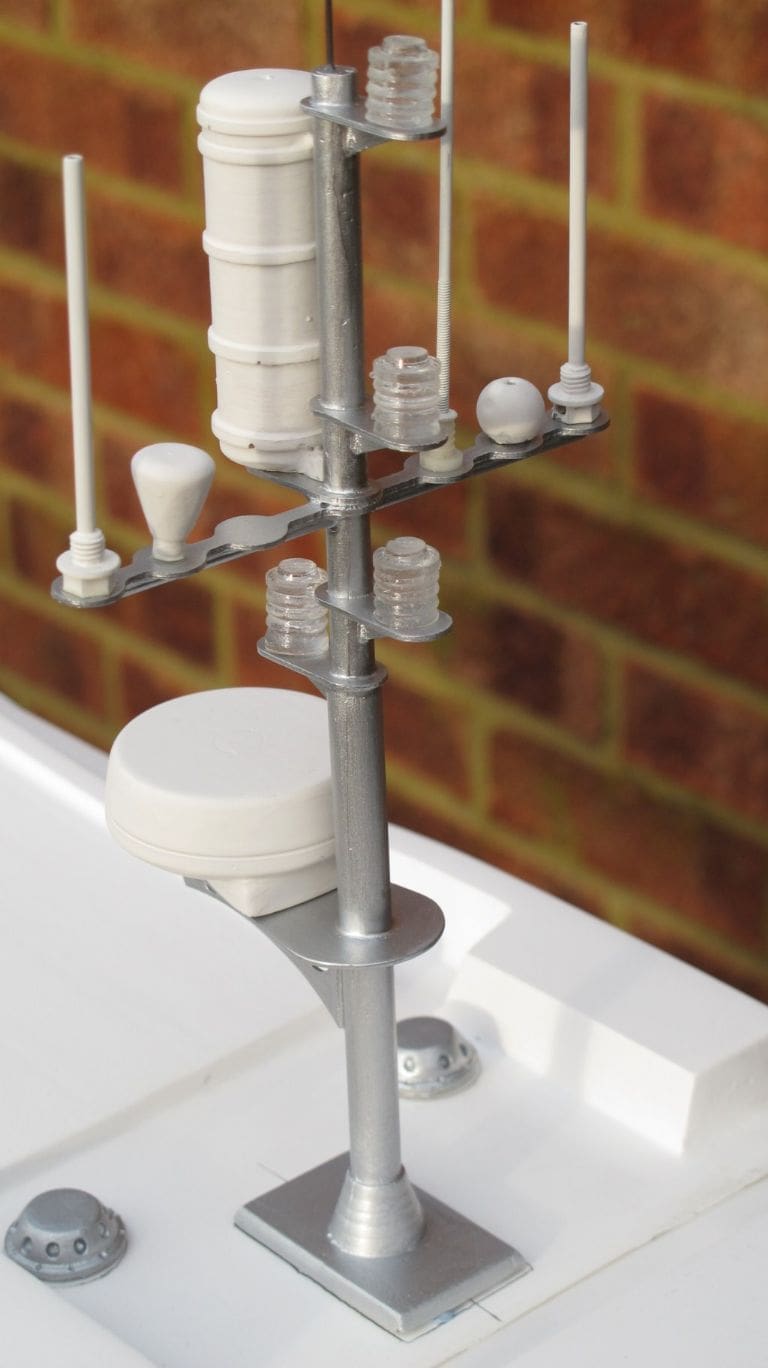
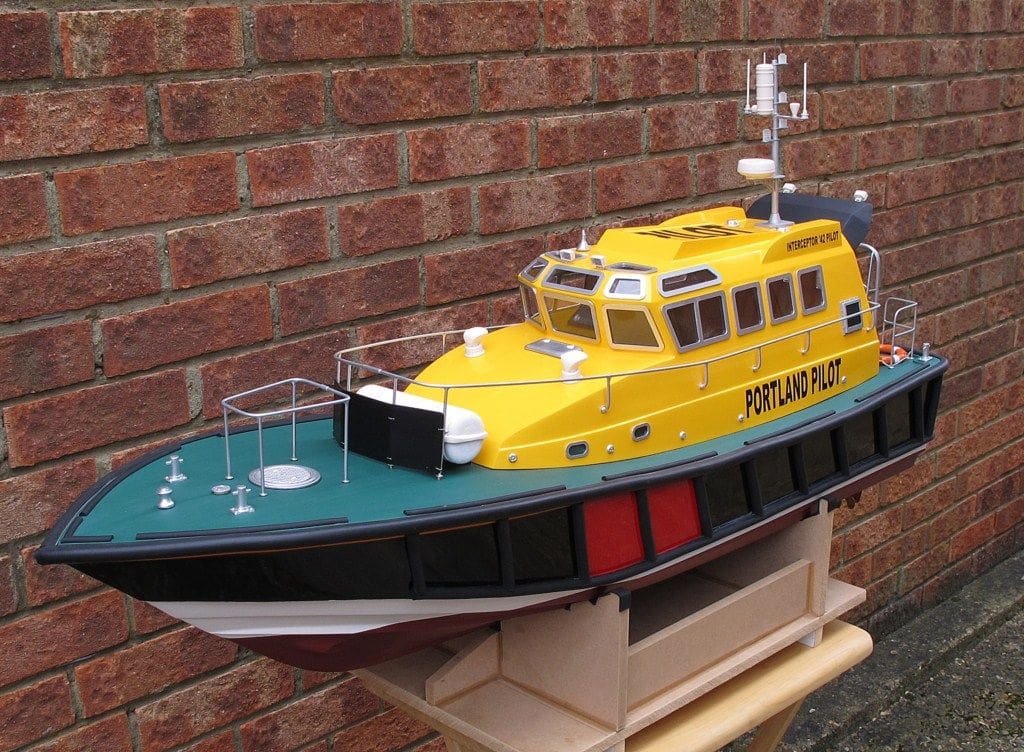
Before painting a model, it is always nice to temporarily position all the fittings (using Blu-Tack perhaps?), so as to check they all really do fit, plus of course you get an impression of what the finished model will look like. Photo 18 is of the whole model and Photo 20 is the mast and Photo 21 is of the foredeck. Painting was by airbrush using Humbrol satin paints, all of which were standard stock colours and overall everything was finished with three coats of Humbrol clear gloss varnish to give the model a smart pilot boat finish. Painting recommendations are included on the plans, but black, green, red, white and yellow are hardly out of the ordinary colours. Once everything was dry after a few days, all the fittings, window frames railings and rub-down decals etc. were permanently fixed into position, Photo 22.
The last task was to install the D-shaped rubber for the rubbing strakes which run along the complete hull and around the transom. The D-shaped section supplied is self-adhesive and only requires to be cut to size and carefully pressed down in position, so no risk of superglue ruining your pristine paint finish.
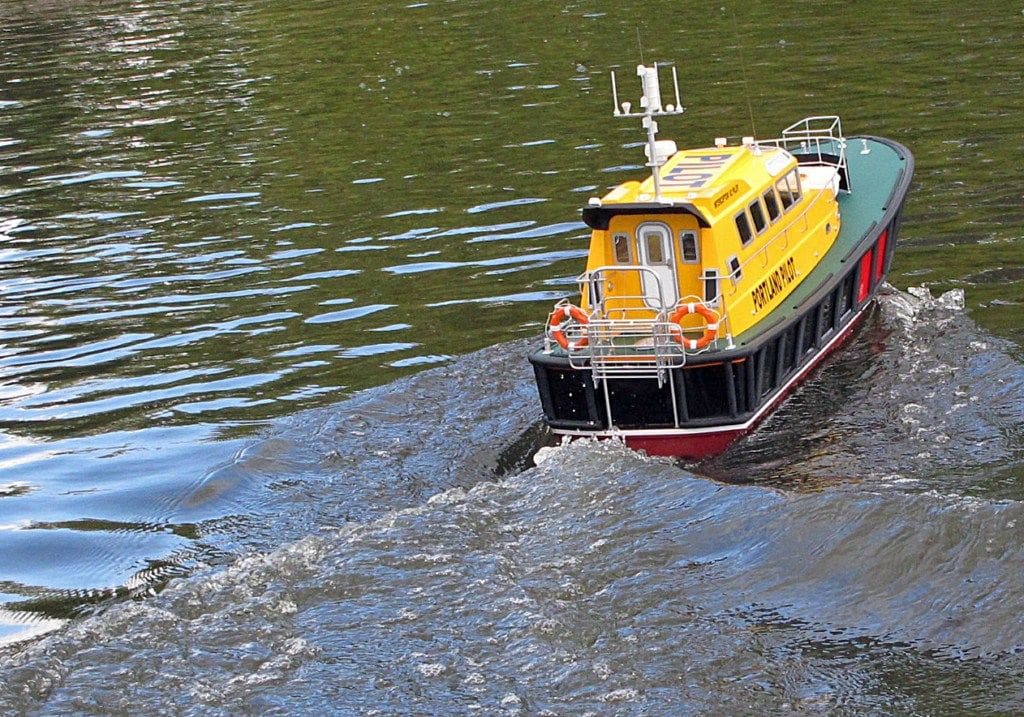
Photo 23 shows the completed model with the D-shaped rubbing strakes fitted and the red flashes added to the sides of the hull. Please note how the top rubbing strip covers the hull to deck join and I have to say that the self-adhesive D-section rubbing strip is a great idea.


Conclusion
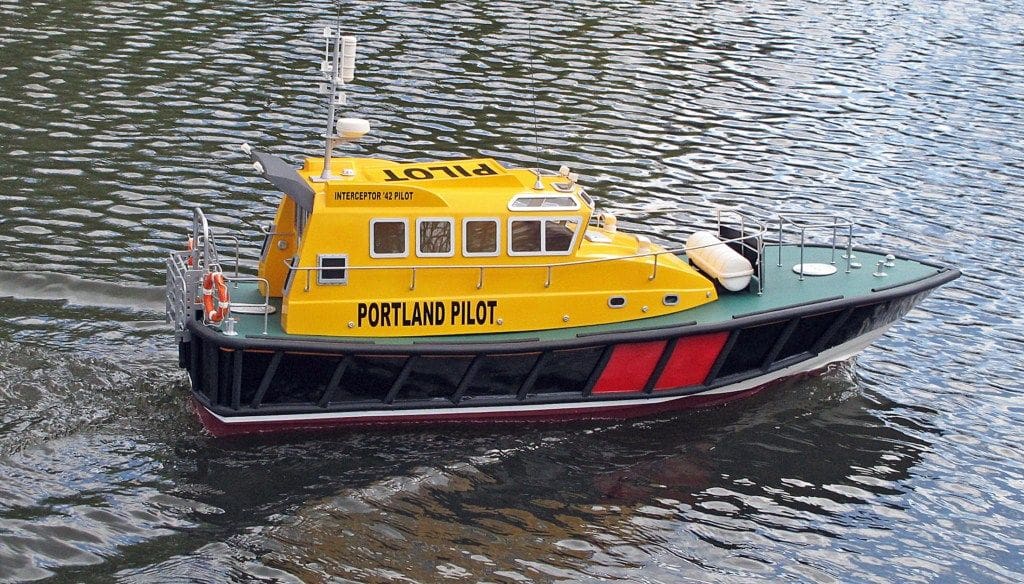
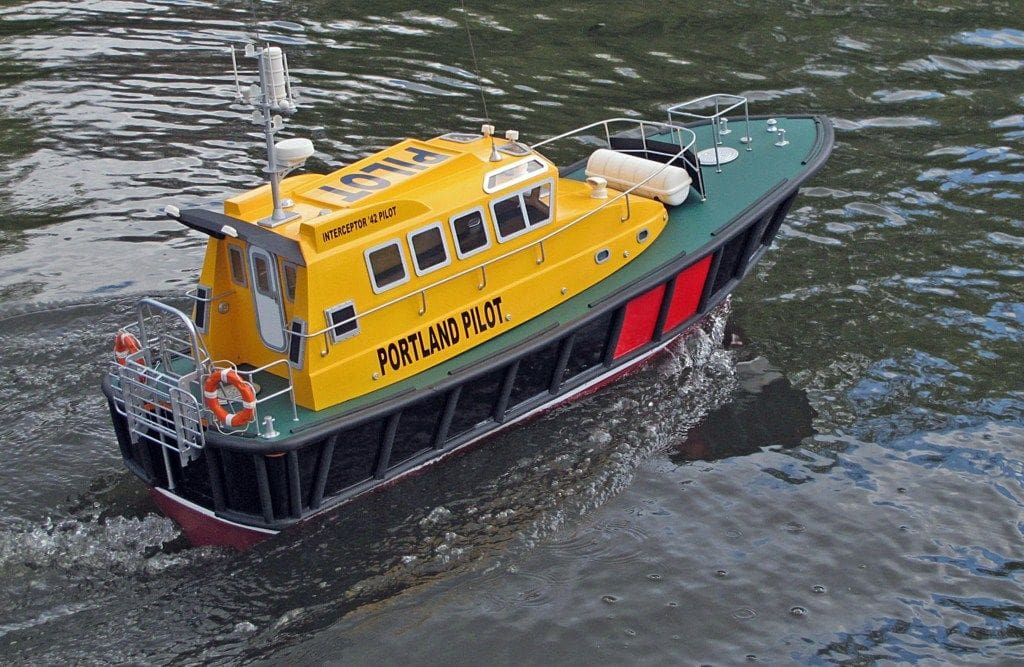
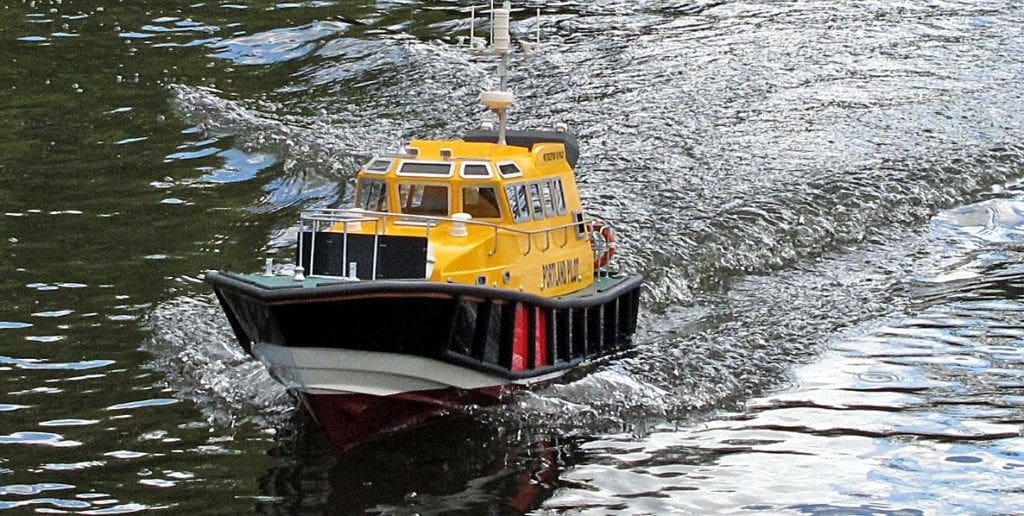
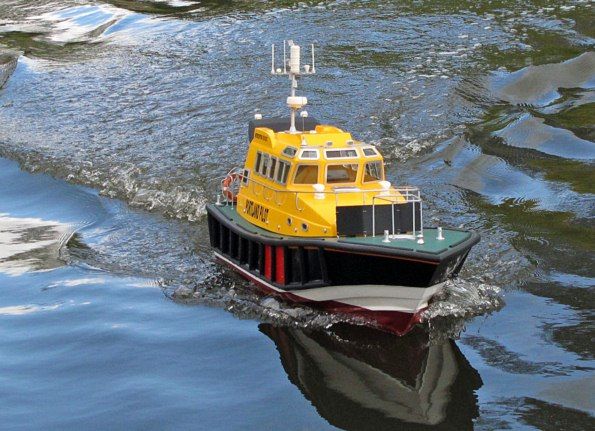
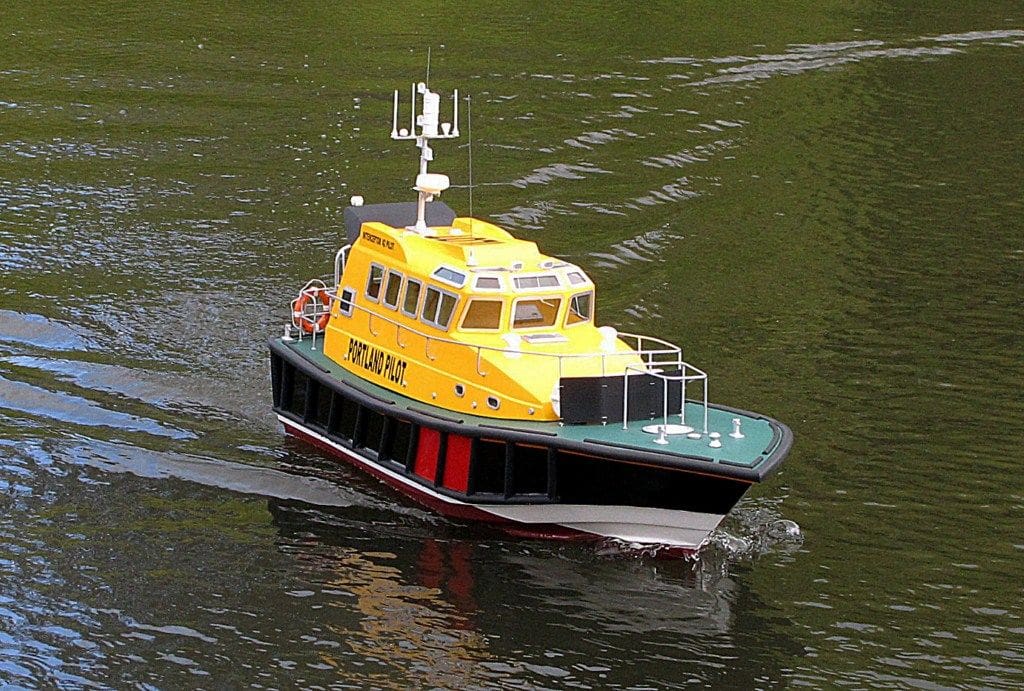
On the water performance proved to be no problem at all as the model is very stable, Photo 24, with minimal ballast required to bring it down to the waterline. This version with brushed motors is not as fast as the prototype brushless model, but fast enough for me and I guess quite a few of the rest of us as well, but the choice is yours!
This is quite a large bulky model, the kit including first class GRP mouldings and fittings. The lack of printed text instructions, seemed a little strange as by definition you would expect a recommended sequence for construction, either by text alone, or by pictures or a combination of both. On the other hand, a purchaser who has built one or two other GRP hull based models and can understand a plan, will have no difficulty. The very big plus of course is that the purchaser can ‘super-detail’ to their heart’s content with internal and external detail and with a little bit of research, build another different version of the Safehaven Marine Interceptor 42 if they so wish.
Kit price is £360 plus p&p only from Models by Design, tel: 01425 476174, website: www.modelsbydesign.co.uk