BRIAN ROBERTS modifies the Caldercraft kit
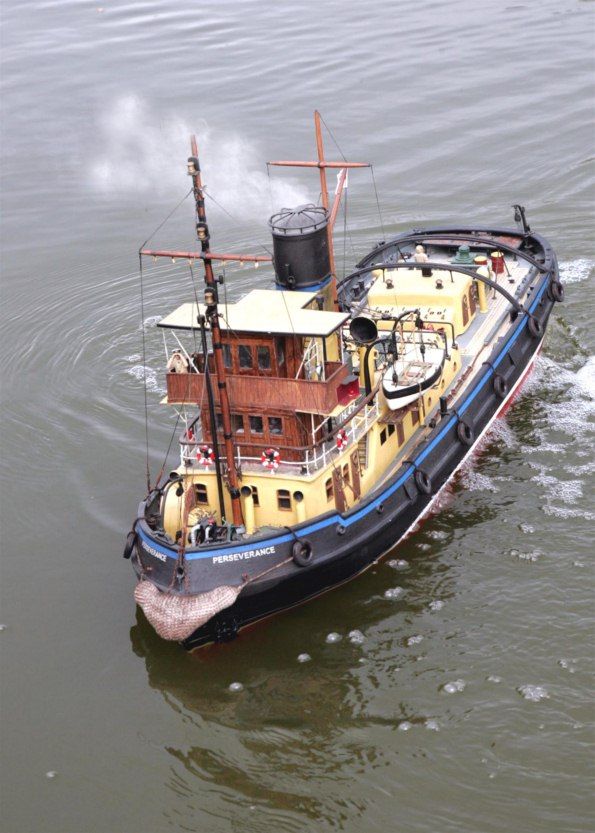
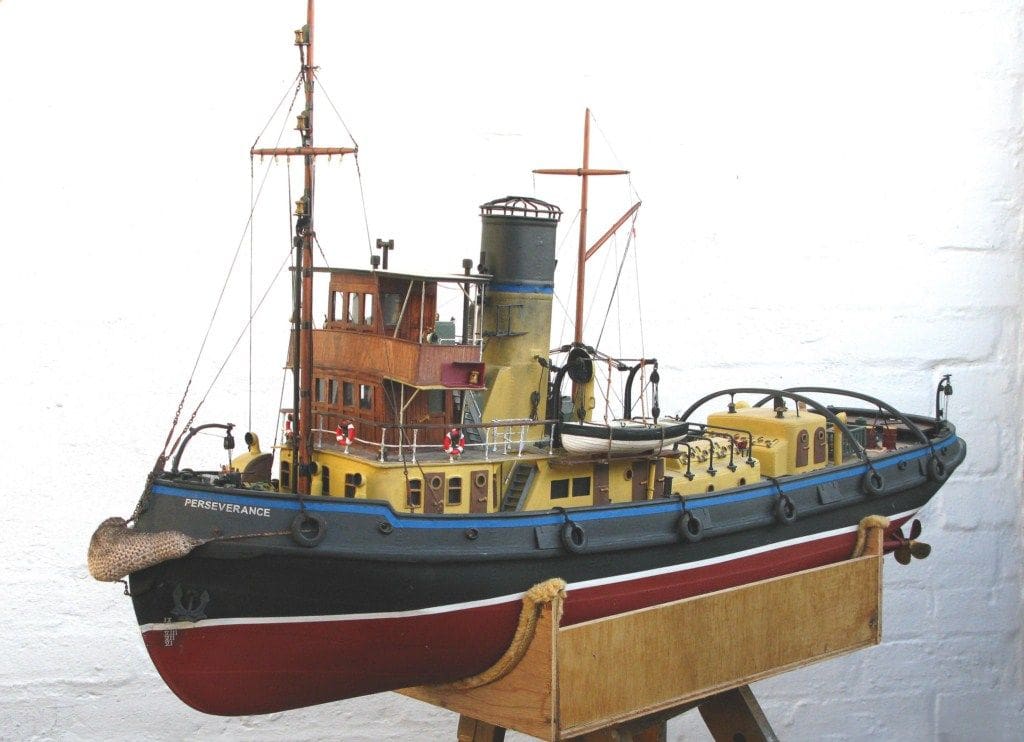
Having built two Severn class lifeboats and other sundry vessels over the years, I decided in 2009 to go down the tug route and build an Imara tug by Caldercraft. After a challenging but enjoyable six months work she was completed, so looking for a new project it seemed like a good idea to go one step further and make the transition from Imara to Perseverance as the Royal Navy did in the early 1930s. You may recall that the full size Imara which cost £29,400 to build, was designed to work in the tropics and after completion in 1931 was delivered in 1933 to the Tanganyika Railway Co. in Dar-es-Salaam for a further sum of £2,142. Truly amazing when you consider that a car can easily cost £30k nowadays. One year later she was bought by the Royal Navy, renamed Perseverance and returned to the UK where she remained in service until the late 1950s when her life was ended in a breaker’s yard.
Enjoy more Model Boats Magazine reading in the monthly magazine.
Click here to subscribe & save.
Getting started
A second Imara kit was ordered and in the meantime some research was called for and this is where I encountered my first hurdle as information on Perseverance is rarer than hen’s teeth!
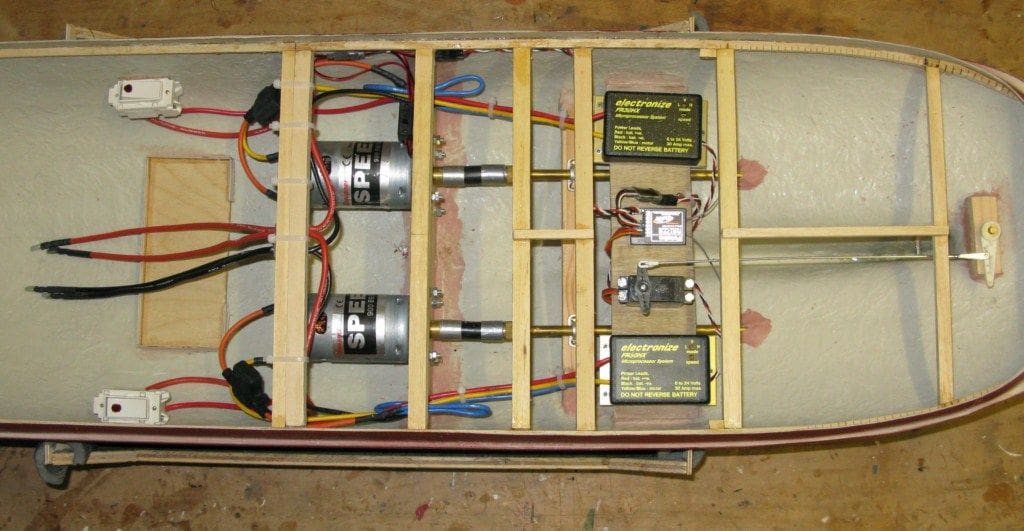
All I managed to glean from various sources including the Admiralty Section of the National Archives, were two grainy black and white photographs of the tug. Trying to enlarge them to get some detail was definitely not on because of the low resolution, so with a lot of head scratching to look forward to, that’s all I had to go on. The kit duly arrived, so undaunted I made a start. The construction was straightforward enough having already built the Imara and I used a similar motor set up with two Graupner 900 BB motors, two 30amp esc’s and a pair of 70mm brass propellers. A mixer was incorporated for manoeuvrability as I’m pretty certain that bow thrusters weren’t invented until a much later date. Photo 1 is of the basic interior layout.
Changes to exterior
There were certain alterations to the hull and superstructure which are obvious even with the poor quality of the two pictures available to me.
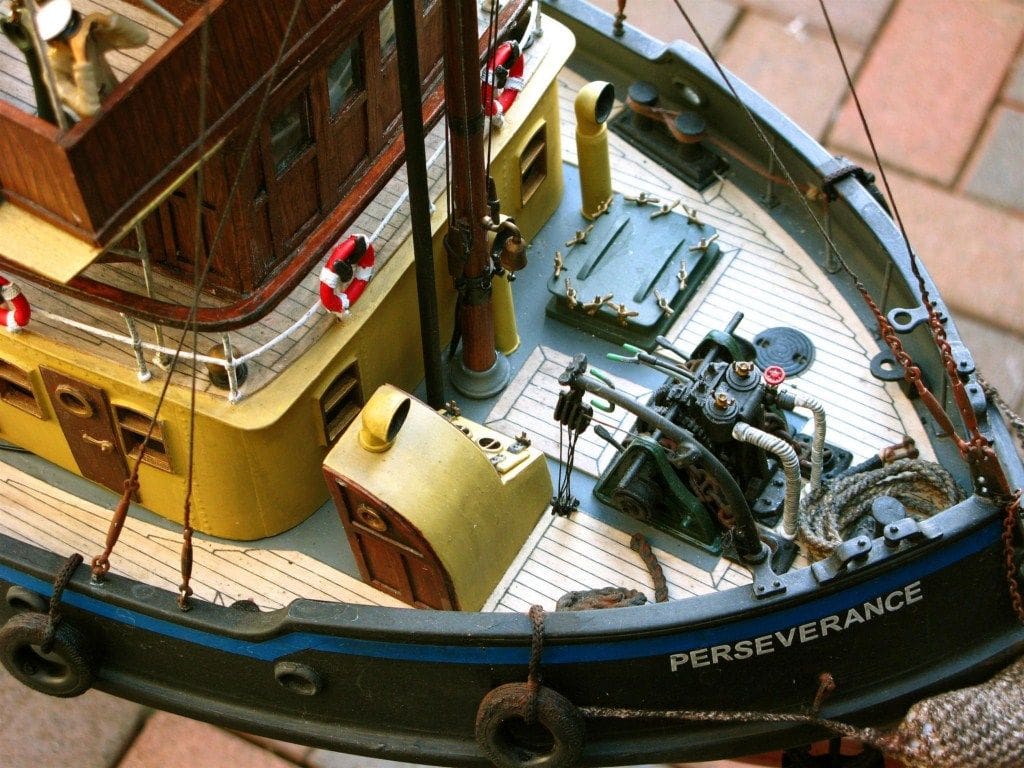
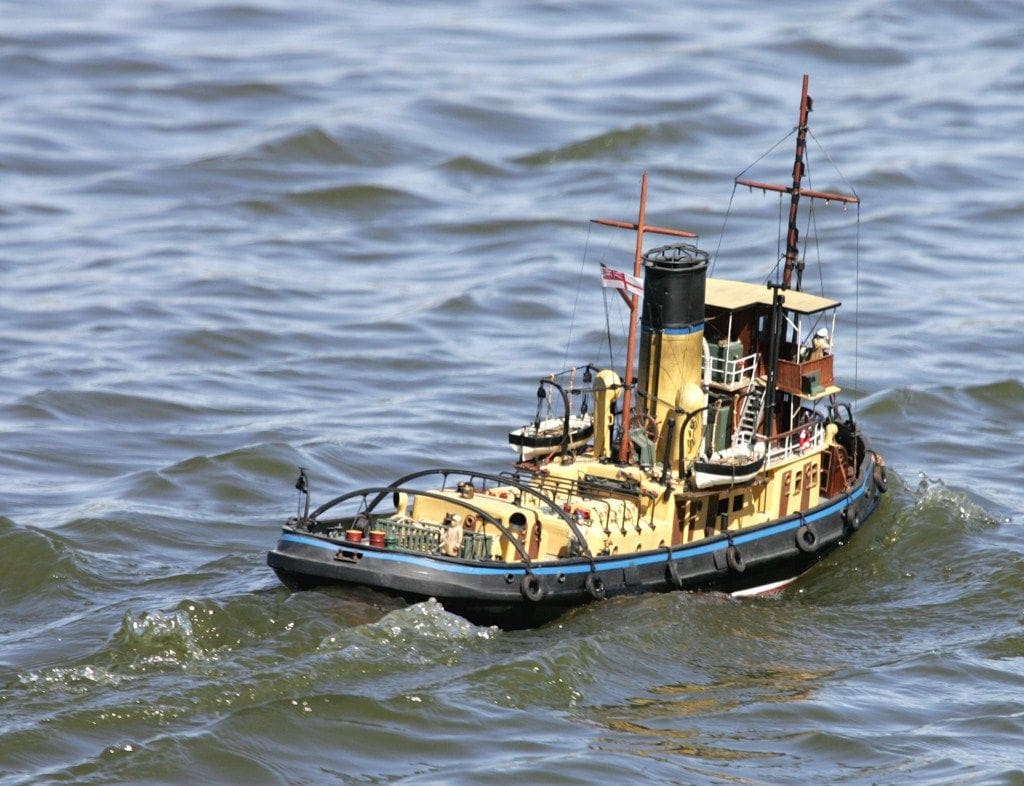
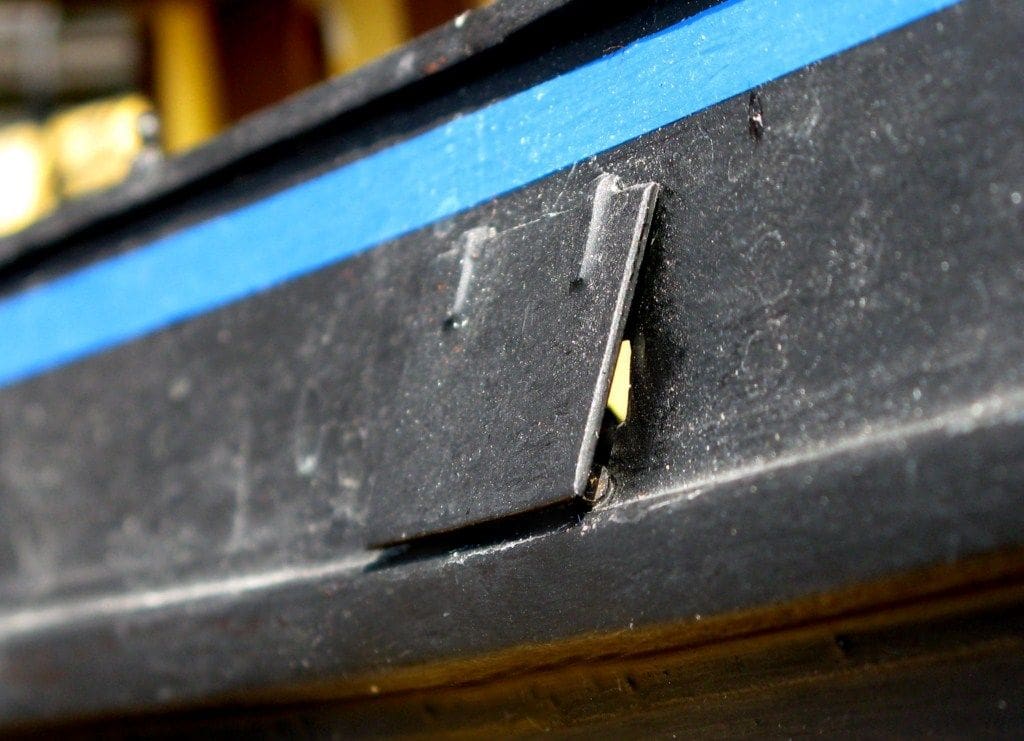
Only four wash ports were fitted, port and starboard, as opposed to six each side on the Imara. It’s worth mentioning that during construction of the model it’s advisable to cut out apertures in the hull at the appropriate points and fit the plates over them leaving a small gap to allow water to escape from the deck. By their very nature, tugs sit very low in the water and in choppy water it doesn’t take much to have the deck awash. I’ve had the Imara out in some dire conditions and not a drop has entered the hull interior thanks to the effective wash ports. Photo 2 is a close-up of a working wash port.
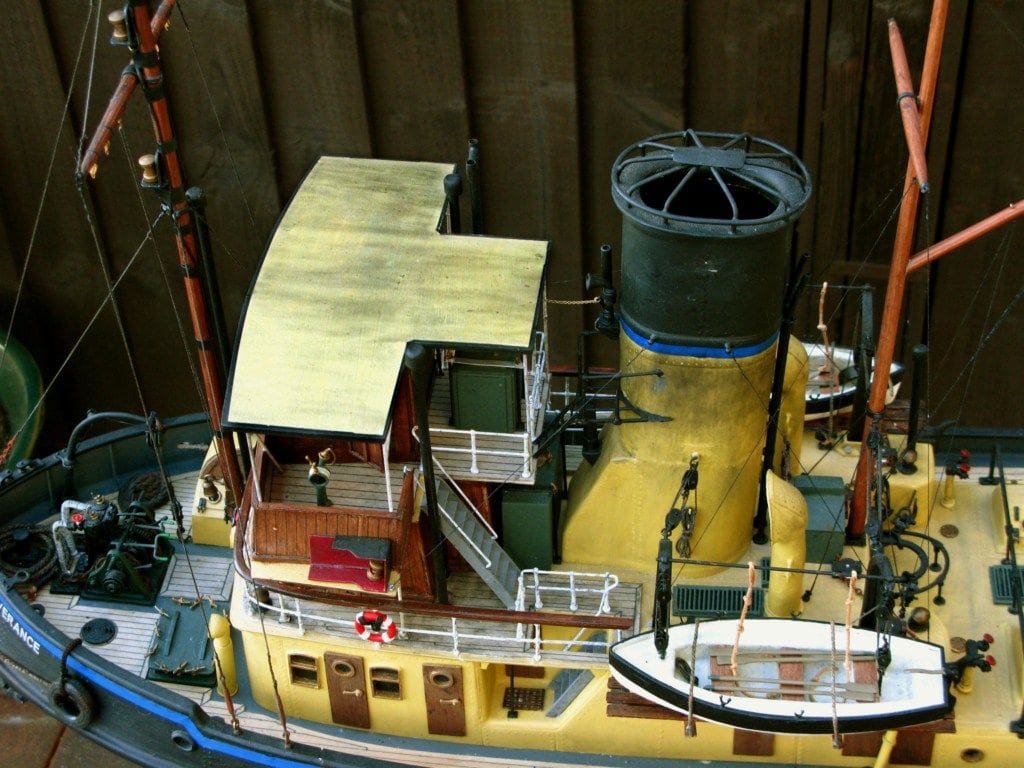
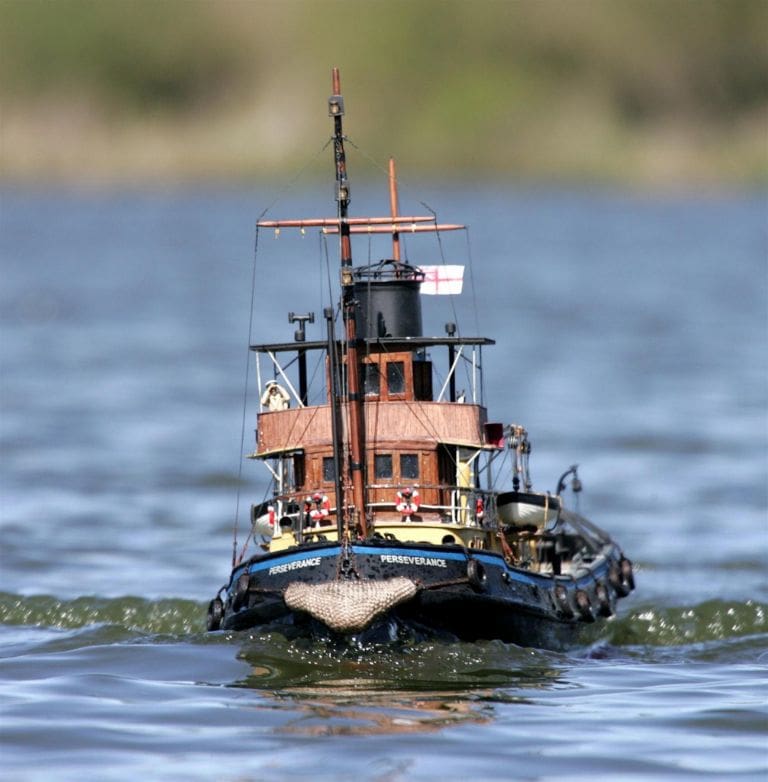
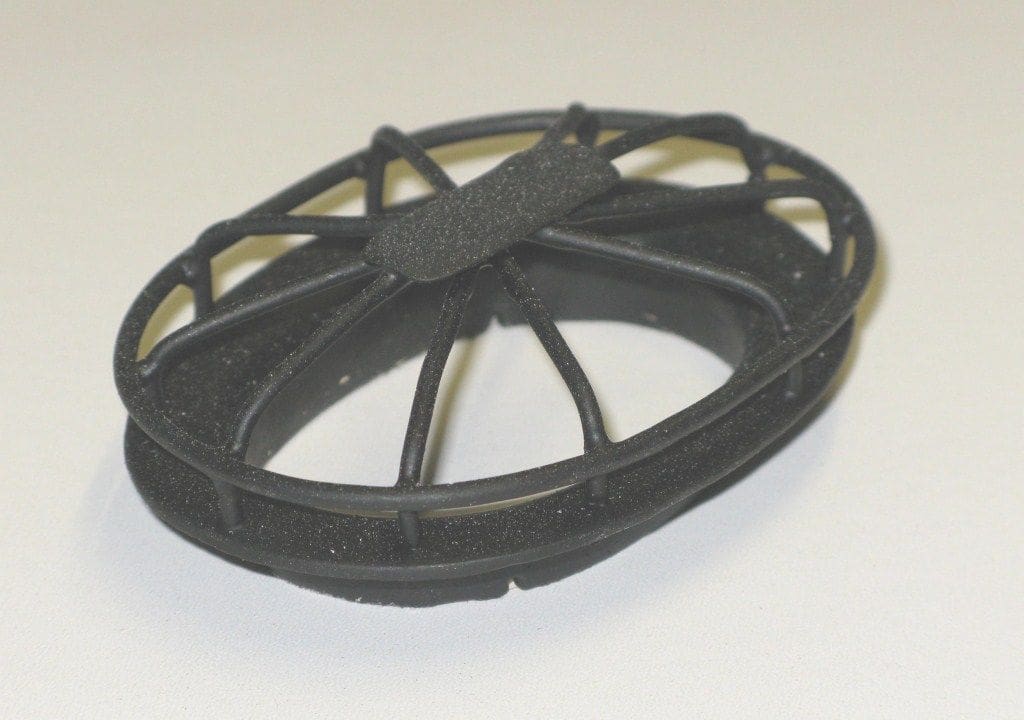
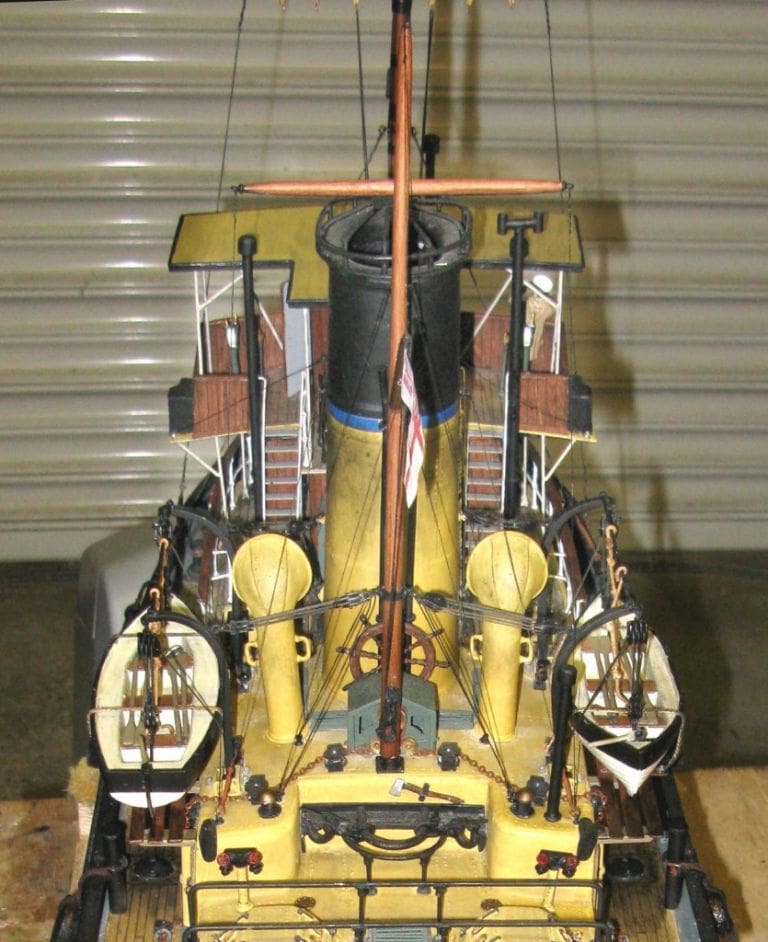
There is a shaped grill on the top of the funnel which apparently supported a canvas cover when she was docked, to prevent rain water entering and creating harmful damage to the boiler uptakes. Mine was made from soldered brass rod and firmly fixed into the funnel top with epoxy glue. A strong bond is essential here, because in practice the superstructure is lifted off using the funnel as a grip. Photo 3 is of that soldered and painted funnel top assembly.
The short jack mast is replaced by a longer one which is about three quarters the length of the main mast and carries the White Ensign and a radio aerial to the main mast. I assume this is the correct flag as it’s on a Royal Navy vessel, but to me it does look slightly out of place on a harbour tug. It is also used to carry the falls to the rear lifeboat davits. Photo 4 is a view from astern of that mast.
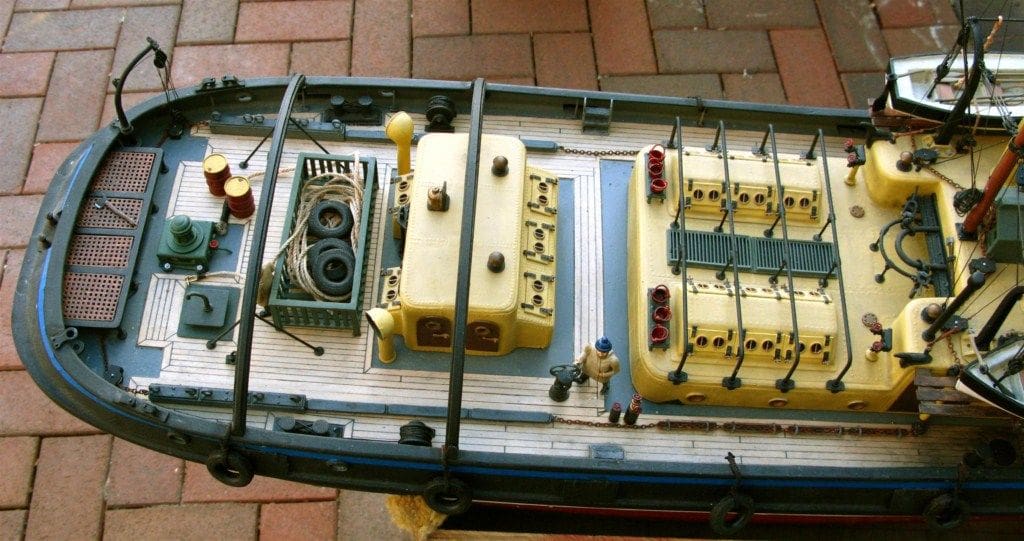
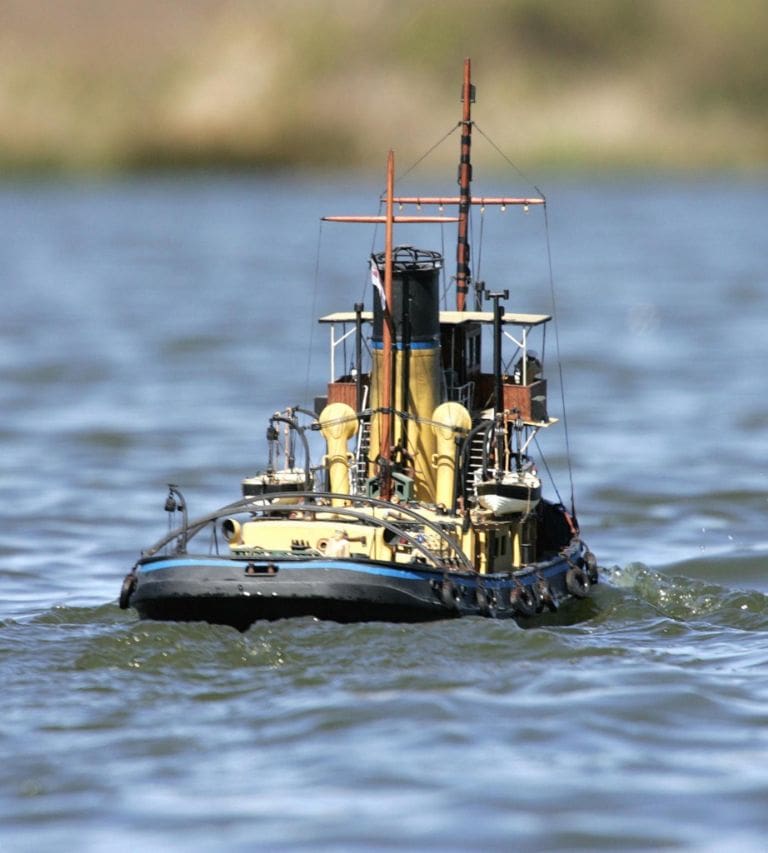
There are a number of extra stove pipes shown in the pictures, evidence of the fact that the tug was returning to colder climes, so these were made from brass tube capped with a small piece of dowel and added where appropriate. Photo 5 shows a pair of these on the starboard side.
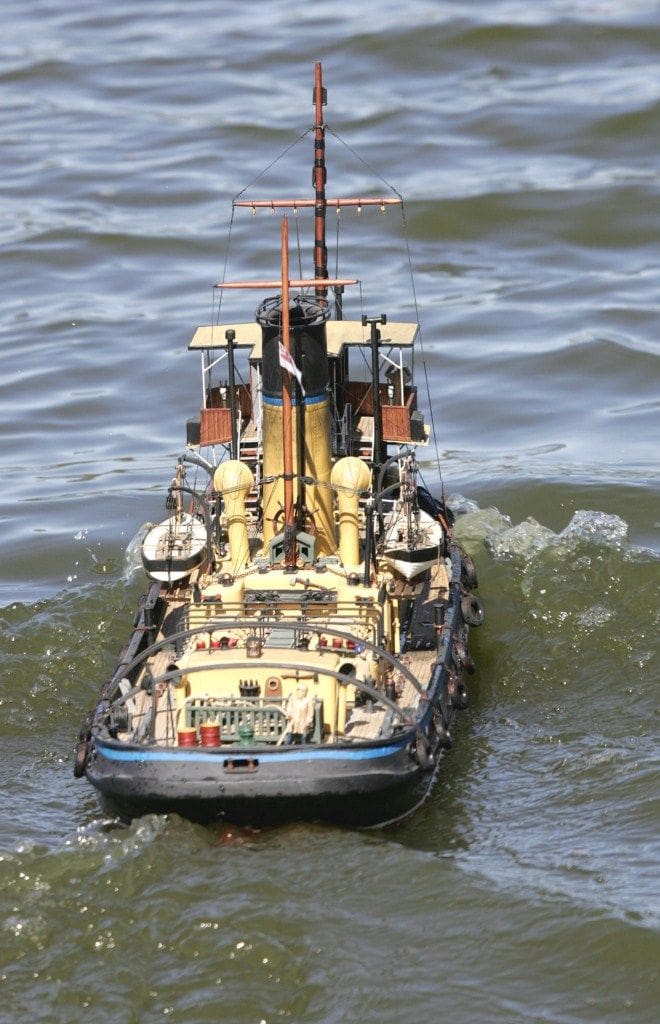
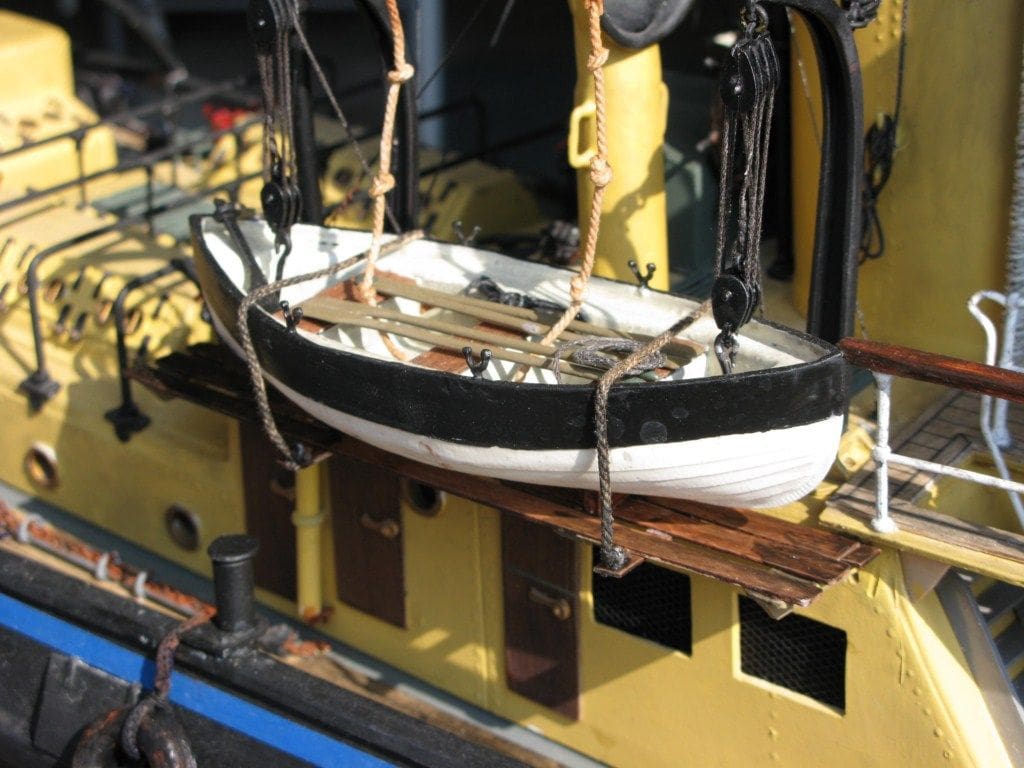
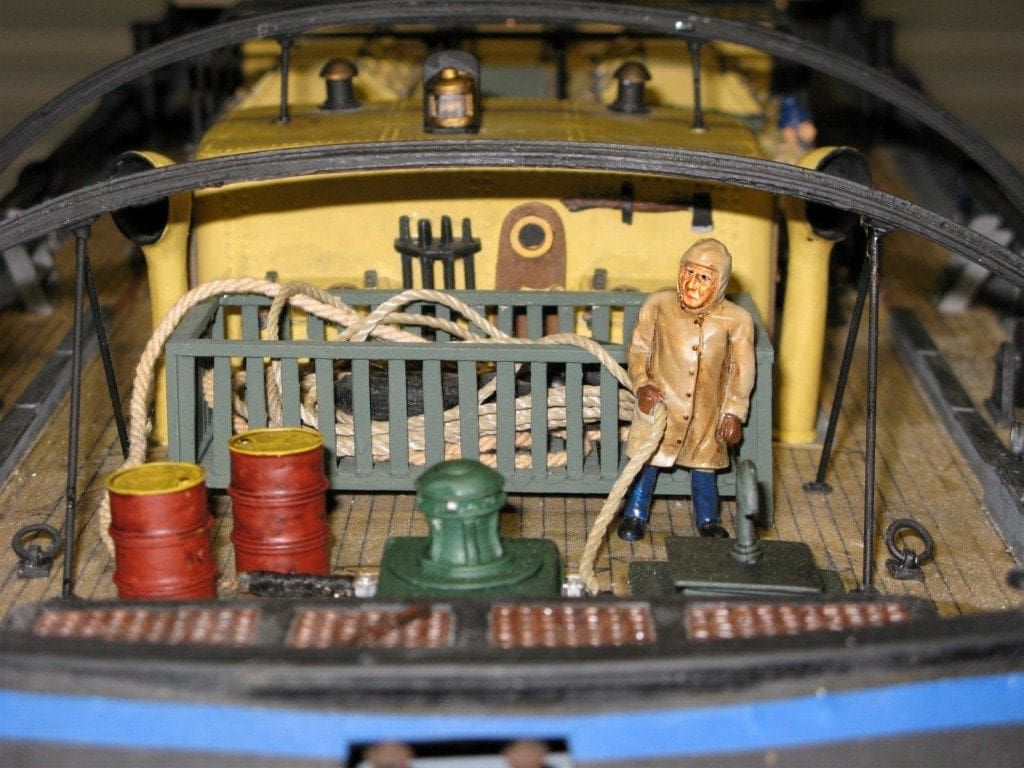
The lifeboats on the Imara were smooth sided and made from galvanized steel, but were replaced with clinker built ones for Perseverance. So, I acquired two polyurethane resin cast lifeboats, one double ended and the other with a square stern. Luckily the vac-formed internal mouldings from those in the kit fitted neatly inside each of them. The interiors may seem a little on the bulky side but they concealed internal buoyancy tanks, Photo 6.
The boats are meant to be covered with a Carley Float on top of each one but as I couldn’t find any floats of the size needed, they were left open to reveal the oars etc. inside. Anyway, using the excuse of ‘modellers licence’, I think the result is much more interesting!
The open wheelhouse on the Imara was designed for the tropics, so on her return to UK waters an enclosed version was fitted. I’ve replicated this as near as possible with the aid of some spare plywood and a little imagination, Photo 7.
Weathering
A modest amount of weathering was applied, to give the impression of the dirty grey effect created by coal smoke. A touch of black paint mixed with matt varnish does the trick nicely and a hint of rust was made by using a little black paint with a touch of matt red.
Extras
With the invaluable help of my friend Rob Davies, lighting has been installed to cover the usual features, i.e. port, starboard and navigation lights, galley and wheelhouse. An MMB ‘Foggy’ smoke unit is fitted giving a very realistic impression of smoke and a set of 1:32 scale figures from George Turner add a finishing touch, Photo 8.
On the water and conclusion
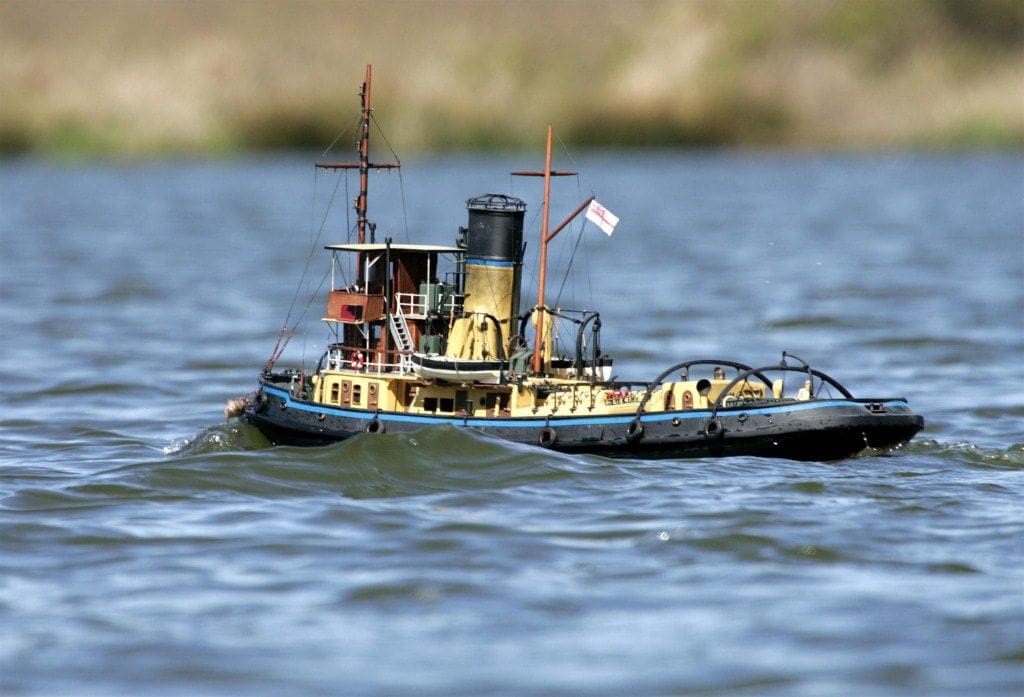
Ballasting the boat to the correct water line was achieved almost perfectly with two 12v lead acid batteries for the motors plus two smaller 12v lead acids for the smoke unit and lights. About 1kg of lead in the stern completed the job.
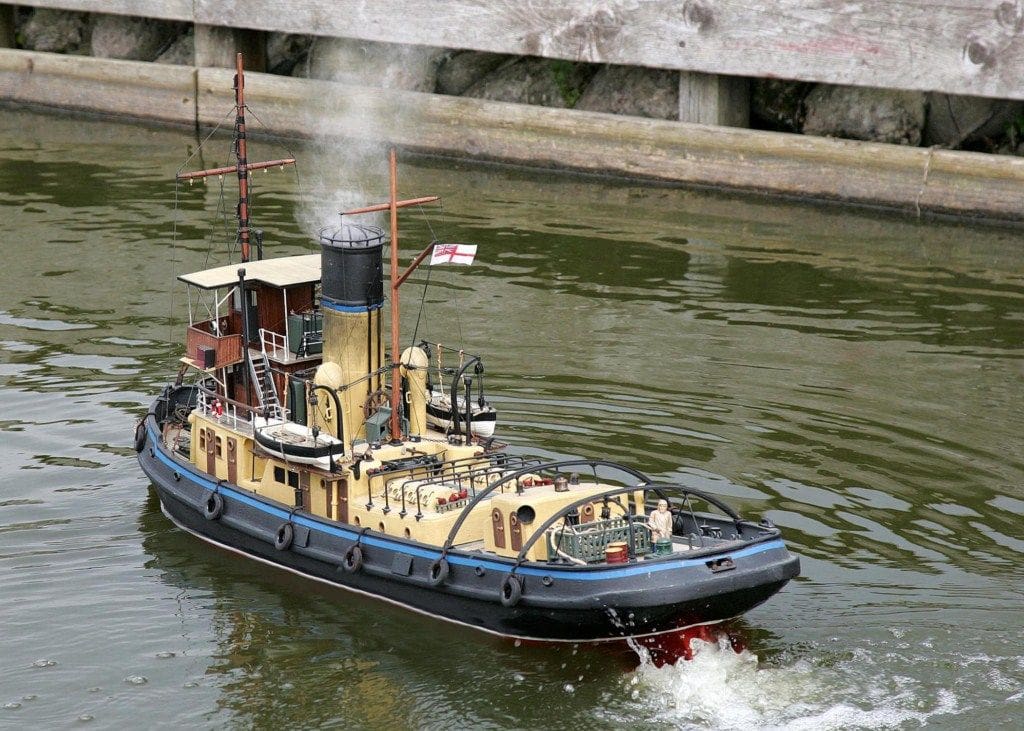
The handling under power is much smoother than Imara for some reason enabling her to plough effortlessly through choppy water, and what a relief to note that there wasn’t a drop of water in the hull after at least an hour on the lake, Photo 9. The rudder response is good for a boat of this size and weight and as a bonus the mixer is particularly useful for tight manoeuvres.
So that’s it! An enjoyable experience which certainly keeps the grey cells active!

Where do I sail my model?
Well, I am a member of Gresford Sailing Club, website: www.gresfordsailingclub.org.uk, which is for full size dinghies, but we have a model boat section and meet on alternate Saturday afternoons and each Wednesday afternoon at about 2.00pm. We formed three years ago and are fortunate in having the clubhouse, slipway, rescue boat, ten acre lake and best of all, tea and snacks during each operating session! The location is just outside Wrexham and the secretary is Dave Turtle, tel: 01978 364657. (Seems like the best of both worlds here then – Editor!)