RON TERLICH describes his model built from a Model Boats Free Plan
First, I would like to make it clear that I am new to scratch building radio control boats and when I built the Flying Dolphin I had not yet joined a model boat club, so although the methods I employed worked for me, I had no way of gauging how good or bad they were.
In April 2010 I found that I had a fair bit of spare time and as I was close to water, I decided to try my hand at building model boats. There were two free plans in the first magazine I bought so I proceeded to build them. First a simple balsa constructed bird class patrol boat HMS Magpie and a plywood sail boat Star Baby.
Enjoy more Model Boats Magazine reading in the monthly magazine.
Click here to subscribe & save.
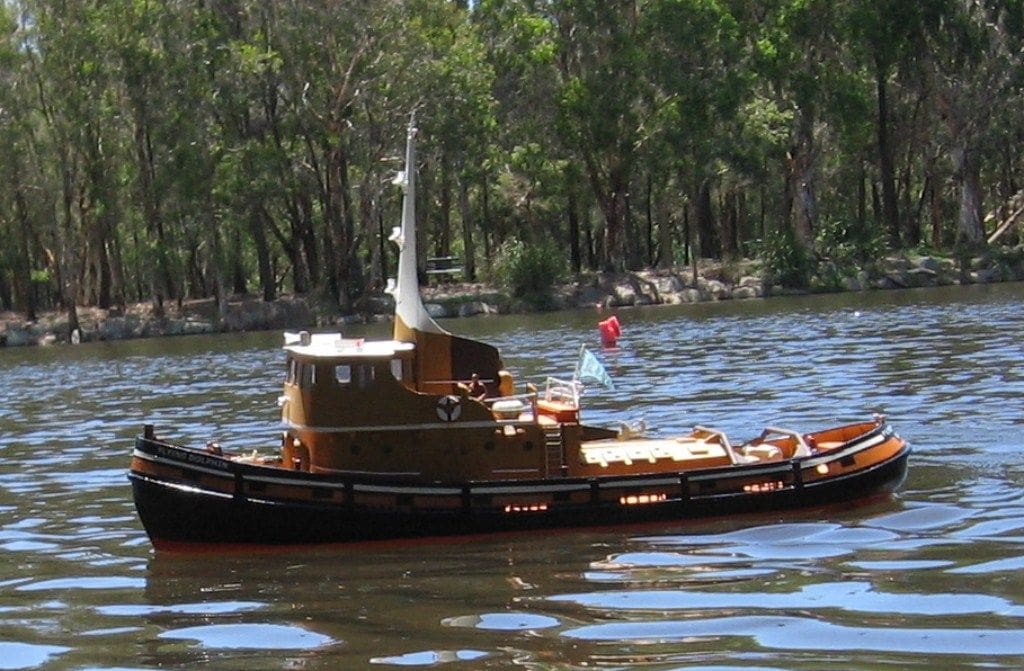
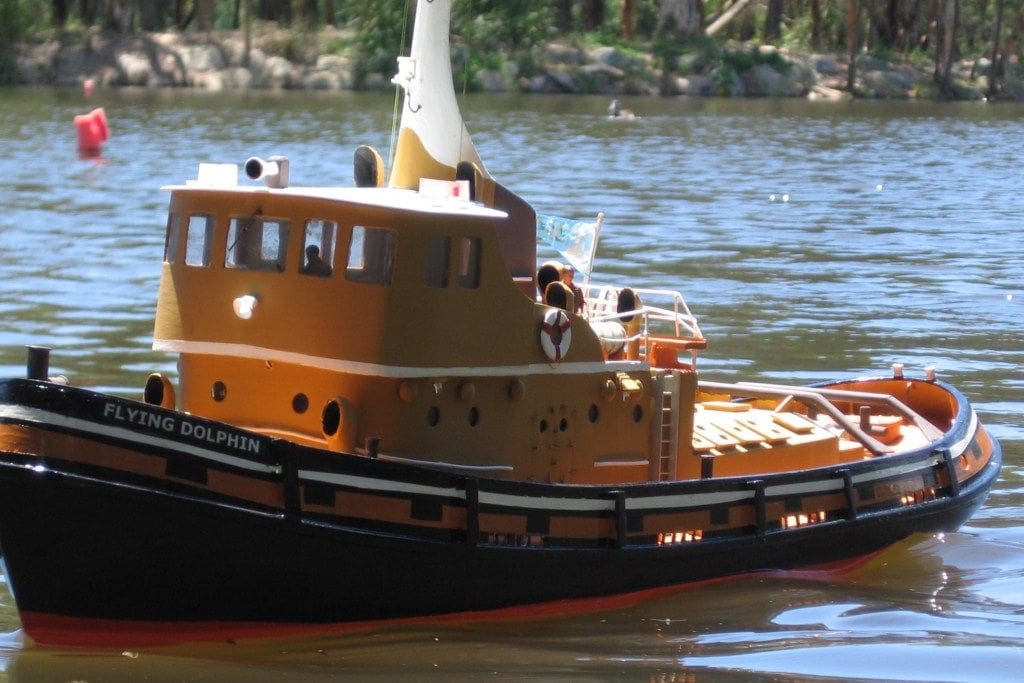
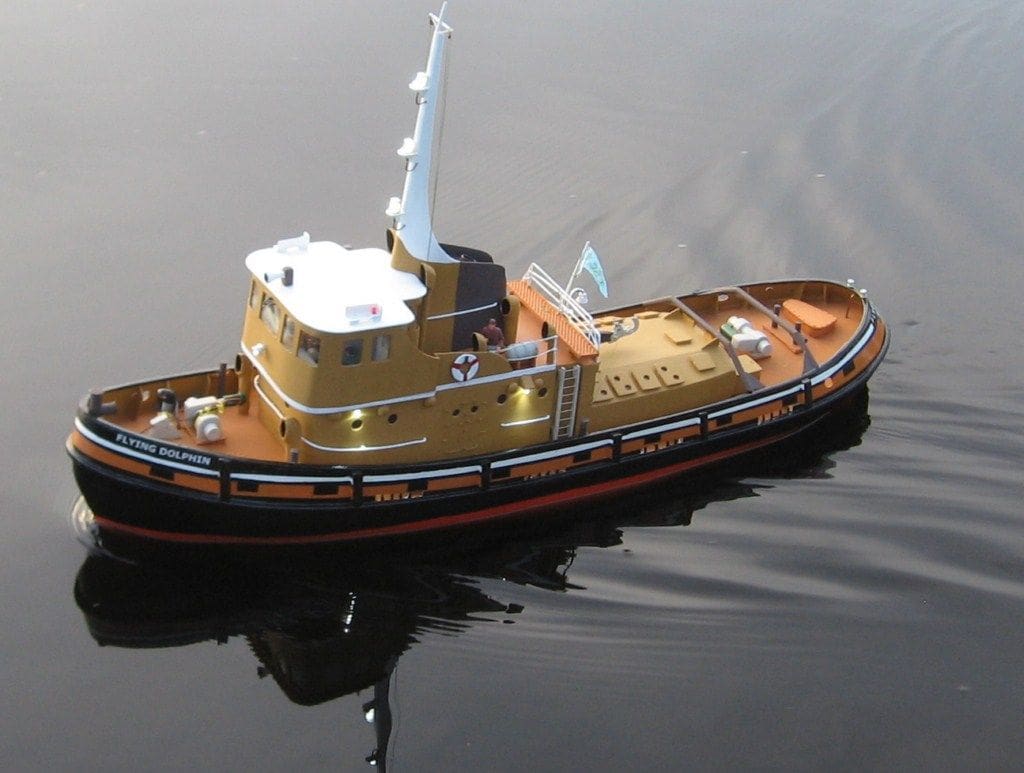
In June of 2010, I was considering what to do next and purchased my first copy of this magazine, namely the April 2010 edition of Model Boats which contained the Free Plan of the James Pottinger designed Flying Dolphin tug and an article on its history. I was immediately attracted to, and challenged by, the design with the complex curved hull, the Kort nozzle surrounding the propeller, lighting and plenty of detail of the deck furniture and wheelhouse.
I decided to build it at 1:32 scale (fifty percent larger than the 1:48 plans provided) which I hoped would give me space for a good sized battery and the controls.
The model
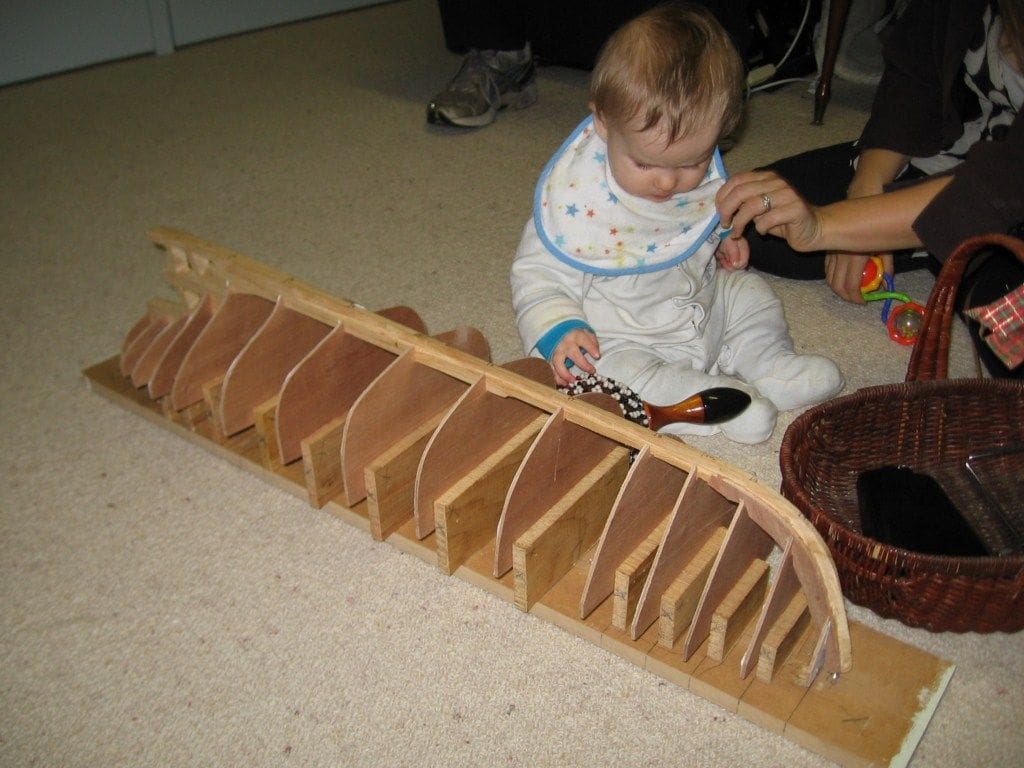
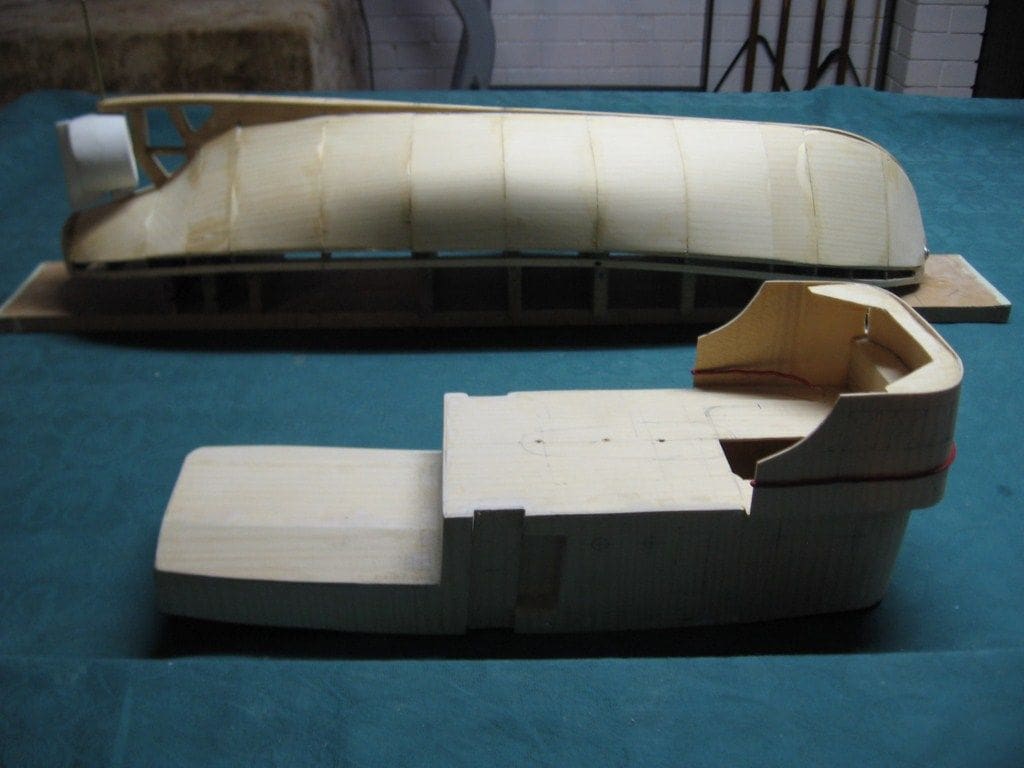
To begin, I glued the various hull profiles of the boat to 3.0mm triple ply and then cut and shaped them.
As there are almost no horizontal surfaces on the tug boat plans I used the waterline level as a reference plane. I made a simple jig where the base was parallel to the waterline and vertical blocks were located along the length at each hull cross section. The vertical position of each of the hull cross sections was worked out from the plan and screwed to the appropriate vertical block and then the keel trial assembled to them.
At this stage cut outs were made in the appropriate bulkheads to provide space for the batteries, controls and drive system. The keel was then glued into the bulkheads and the upper hull stiffening members were progressively bent and glued in place.
Cardboard cut outs of each hull section between adjacent bulkheads were made and then these were used to make 1.5 mm plywood hull sections which were then glued to the hull on the jig. Once the upper hull was covered, the hull was removed from that jig.
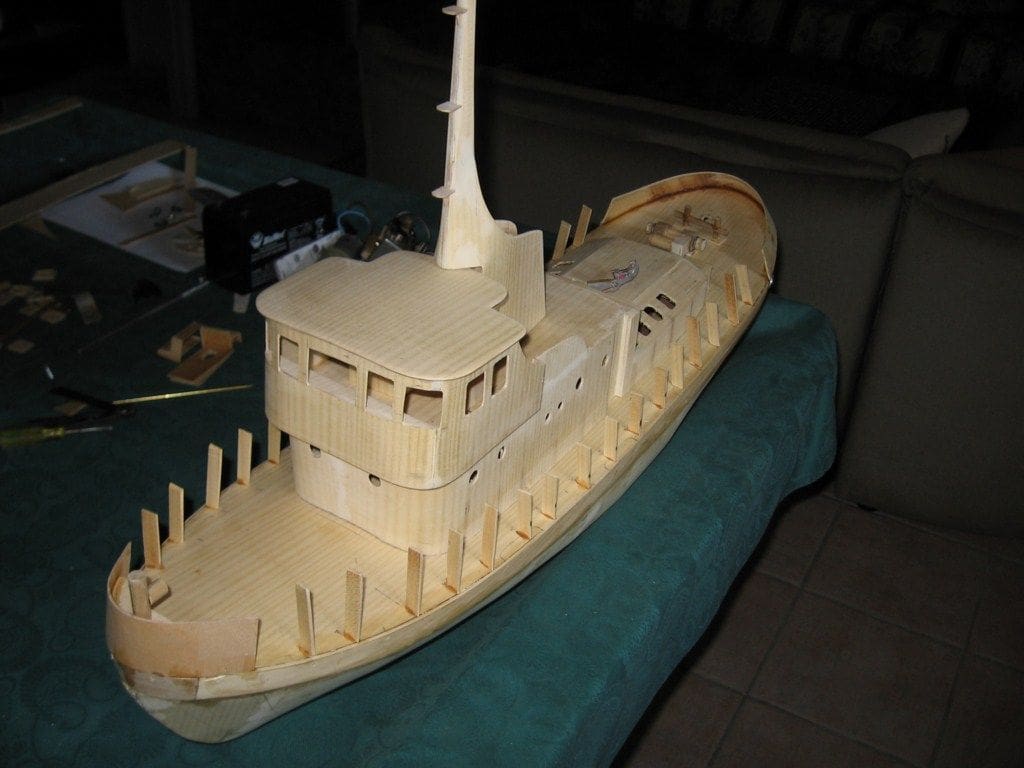
The deck was fitted and included a central cut out beneath the superstructure for access into the hull and then the bulwarks were fitted. Concurrently the superstructure was manufactured from 1.5mm plywood.
Fittings and painting
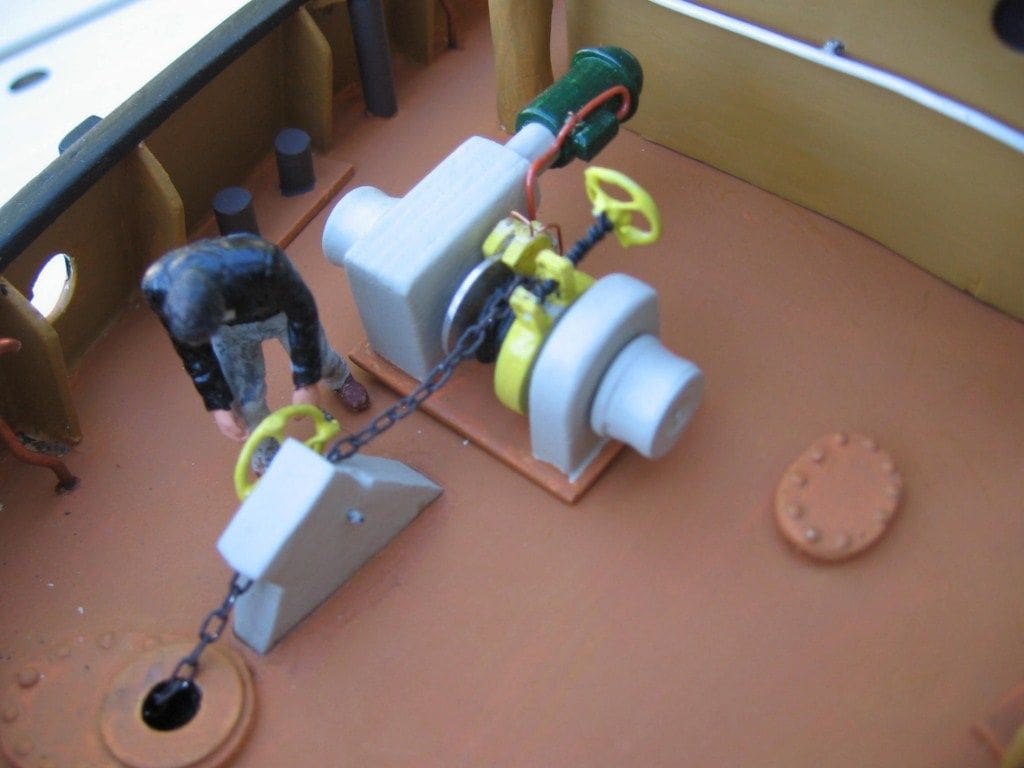
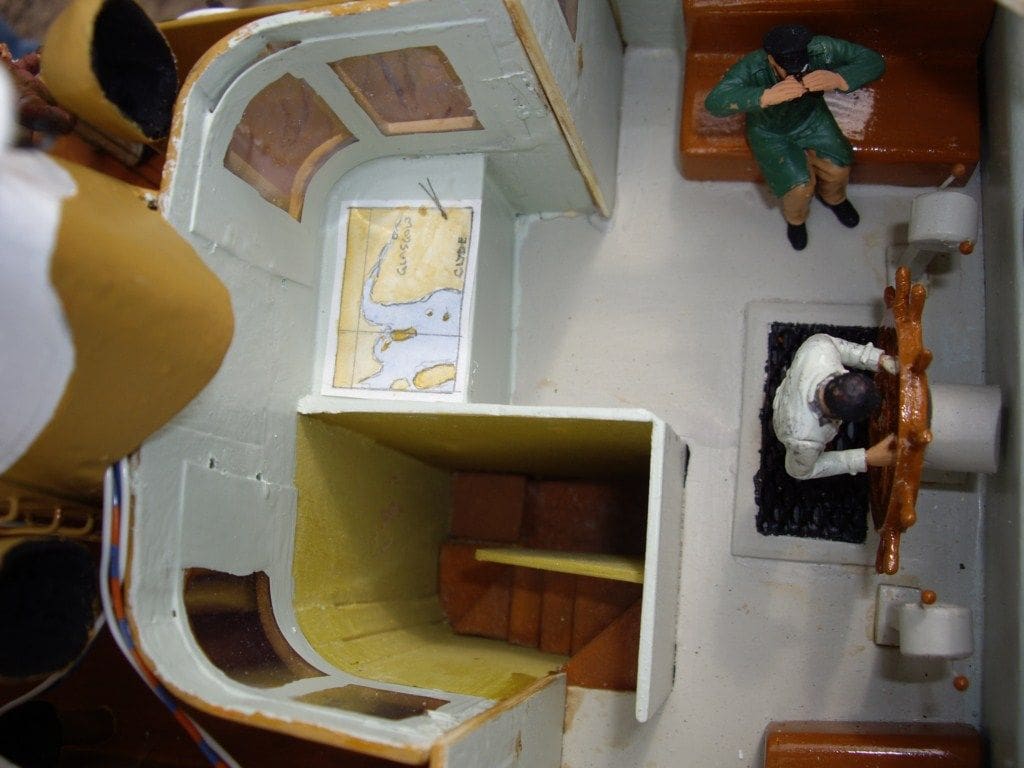
All deck furniture and equipment were made from scraps of wood, aluminium and copper wire, but some figures for the crew were purchased. I used a necklace chain for the anchor chain and handrail barriers. 3mm diodes were utilised to provide navigation and deck lighting. The tug was painted in the Clyde Shipping Company colours as indicated in the magazine article and plans.
Conclusion
This was a excellent construction project and at the larger scale of 1:32 the model is still a nice manageable size.
The plan for Flying Dolphin is available from the MyHobbyStore Plans Service, number MM 2047, price £9.95 + p/p. It may also be that back issues of April 2010 MB are still available from www.myhobbystore.com or telephone: 0844 848 882 or from outside the UK: +44(0)1689 869896.


