If you feel inclined to make a model of a Polperro Gaffer just 5 1/2ins long, I suggest you get a cup of tea and with luck the feeling will pass, but no such luck in my case! You see my wife was determined I should make such a model and you will understand I did not have a chance to refuse, the result of 34 years of married bliss. What is more, I had put it off for so long I had only two weeks left in which to build it.
A bit of history
My wife has traced her family back to Polperro and of course they were smugglers. Almost everyone in Cornwall was a smuggler in those days from 1750 to 1815, when a series of wars with France put duties on tea, silks, brandy and other essentials. Being a smuggler in Polperro meant you were part of an industry. The British Government encouraged private individuals to act legally as privateers, that is to operate privately owned warships to fight the French and molest supplies bound for France. A Polperro schoolmaster became the banker and with partners you would raise money, build a boat with a crew of 50 to 80, arm it with eight cannons and small arms and then happily sail the oceans, under an official Letter of Marque, issued by the Admiralty. Of course the real targets were ships laden with valuable cargoes from the east and so we now have a golden smuggling opportunity. Naturally, the King’s revenue men would be there to stop you, but who knew the coast of Cornwall best and had the fastest ships? In periods of peace, heavy customs duties continued and so cargoes were bought in to Guernsey, which was a free port. There the merchants sold the goods against letters of credit, as in any legal business, for later payment when the contraband had been sold. The banker, Zephaniah Job issued his own Polperro bank notes, which were accepted in London, Liverpool and elsewhere and he never defaulted on payments. He was highly respected, employed top London lawyers if any of his associates or their crew were caught, but he never personally engaged in the smuggling. To cut a long story short , there is a family history society in Polperro that organises an annual weekend of events for about 100 members and I had inadvertently promised in 2006 to make a model of a Polperro Gaffer for the April 2007 event.
What is a Gaffer?
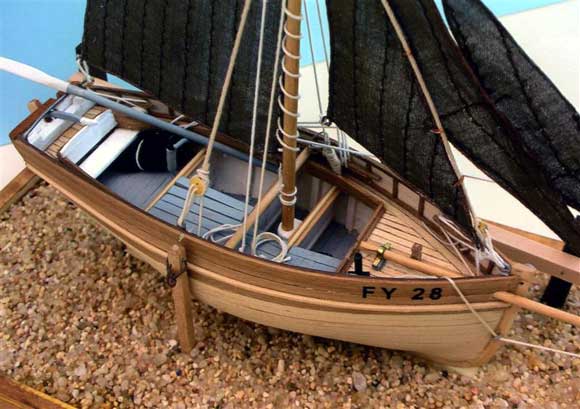
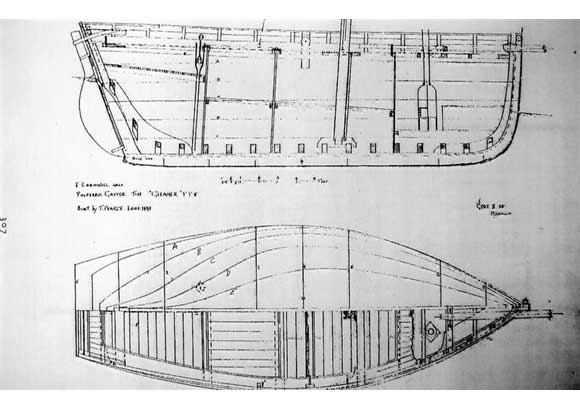
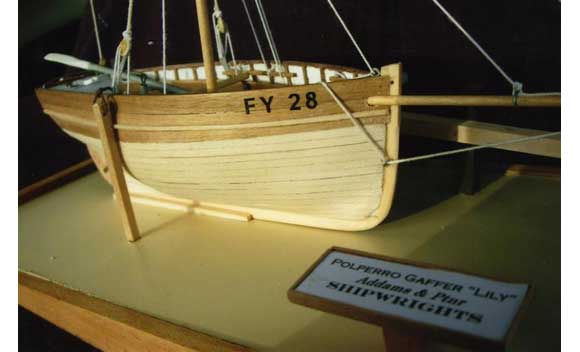
The Gaffer is a design exclusive to Polperro, introduced after the terrible storm of 1891 when all the fishing boats were swept up by the great tidal surge and deposited into the narrow streets. Following that disaster, a new design of carvel built boats with a fixed mast and gaff rig were introduced. Short squat deep sided boats of 35ft in length were constructed in Looe and registered in Fowey (hence the FY numbers). Each cost about £90 and by around 1905 there were 50 boats fishing out of Polperro. The short mast reduced the pendulum effect when quietly fishing for pilchards which were caught in great numbers and salted in the factory which is now the Heritage Museum. The gaff rig and very long bowsprit allowed a great spread of canvas to be set, whilst in calm conditions an oar was sculled over the stern. Typically the boats would sail at 6pm, stay overnight working in teams on the fishing grounds and return laden with fish later next day. Photo 1 shows the completed model. To make the model, first I needed some plans. The Museum advised me to contact Tony White at the Post Office, who emailed me lines drawings, Photo 2, so I now had to get started.
Enjoy more Model Boats Magazine reading in the monthly magazine.
Click here to subscribe & save.
Bread and butter – how I made the hull
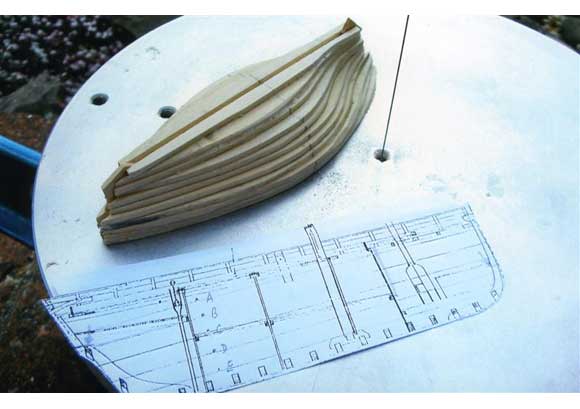
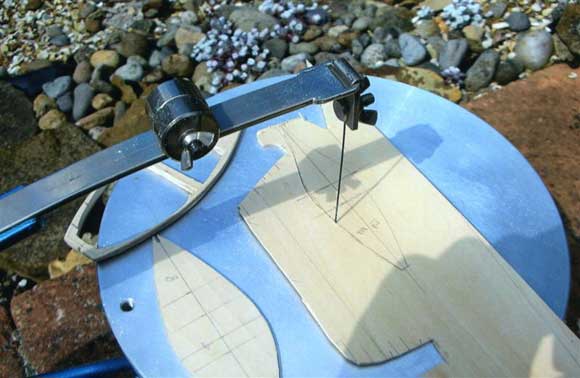
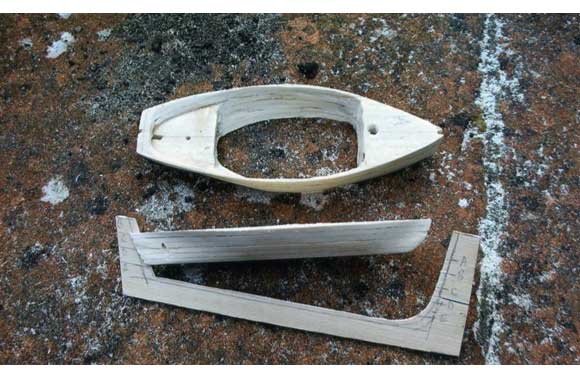
With just a two week deadline, I could put in only 36 hours (theoretically three 12 hour days). Bread and butter was the quickest method I could think of to make the hull. Photo 3 shows the principle of bread and butter, a layer cake of pre-shaped flat wooden pieces. The secret is that the top surface of each layer is exactly the correct shape so that if you file away the unwanted wood the exact hull shape will emerge. I chose lime sheet as a beautiful white, clean, fine grained hard wood and Photo 4 shows cutting the shaped pieces with a vibro saw. This is like a band saw, but the blade just oscillates, allowing thin sections to be cut quickly, accurately and safely. The lime sheet was only 2mm thick, therefore requiring 16 layers from deck to keel. This great number had the advantage of making the finished hull look as if it had been made with individual planks.
As the plans included some cross sections, this allowed me to measure the correct offsets (using dividers) at every station so I could easily plot on the lime sheet the correct shape of the run of the hull corresponding to that particular level. Clearly great accuracy is needed in marking out, cutting and also ensuring the correct vertical alignment as the layers build up. To get one layer to sit exactly as it should above the one below, each piece had a cut out at the bow and stern, for the keel and a cross centreline to ensure fore and aft alignment.
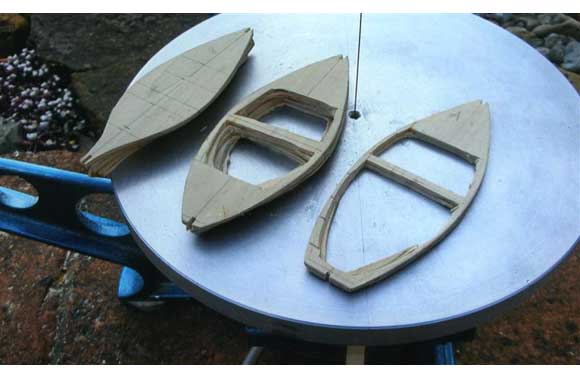
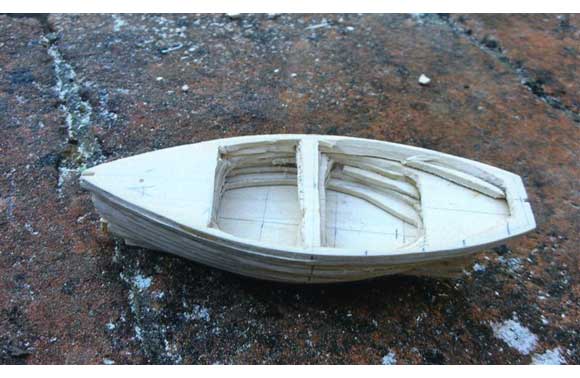
Sorry, but it gets a little more complicated! To properly achieve the relative location requirements, I made a keel jig, Photo 5. Another complication is that the interior of the hull has to be hollowed out, with two different inner deck levels.. The process of internal shaping of what become very thin walls of the hull can only be done when the outside of the hull has been exactly shaped. Therefore the gluing together of the lime sheets is done in three assemblies screwed and dowelled so they can be separated, Photo 6. When screwed together, the keel jig can be removed, allowing easy shaping of the outside of the hull adjacent to the keel. When separated, each assembly now allows easy access to hollow out the inside of the ‘planking’. As the hull is only 5 1/2in. long, the thinness of the hollowed out walls require a cross piece to be left in place for as long as possible to provide rigidity. If all this sounds complicated, it makes sense in practice and simplifies the hull construction. Once all is shaped, the three assemblies are glued together with the keel jig ensuring exact alignment, Photo 7.

Completion of the hull
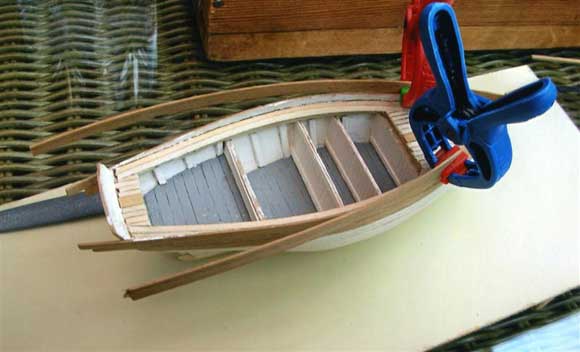
Photo 8 shows construction more advanced. The inner decks have been added and painted, as have the ribs or moulds. The top deck has been planked, with pencilled edges to each plank to simulate caulking. The stern transom, bow stem and keel were built up from several pieces as in full size construction. The upper bulwark planking in walnut is being added. As the line of this planking is higher at the bow than at the stern, the top two of the 16 layers were suitably recessed to correctly allow the bulwark planks to achieve the correct hull form. I said at the beginning I had only 36 hrs. to make the model. Well, Photo 9 shows the stage reached in that time. Unfortunately we had to cancel our trip to Polperro, but the model at this stage would have made a very respectable exhibit. The boat sits on a sloping stand with a quayside effect, such that the waterline is horizontal. The keel is deepest at the stern. Should the stern of such a fishing boat run aground on a sandy shallow, the bow can be swung around to return to deeper water.
The realism of the planking is clear in Photo 10. Originally I expected to paint the hull black, but the contrast of lime and walnut looked so attractive that I left it as it is and only used paint in muted colours to highlight internal features. To have built the model in plank on frame would have taken much longer than the bread and butter method, with little added realism. Using 16 thin sheets made cutting out easy, added accuracy by their great number and minimised the amount of shaping.
Finishing the Gaffer
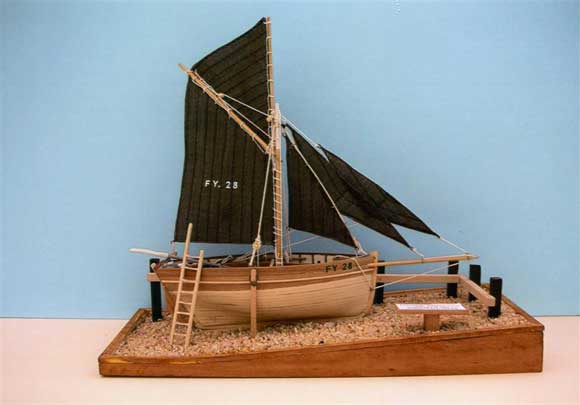
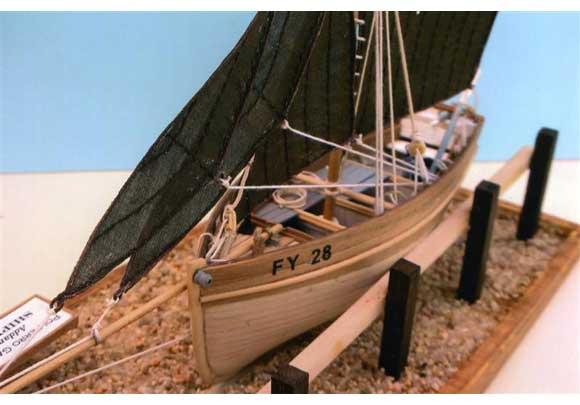
Photos 11 and 12 show the finished model. My research on Gaffers included photos from the Polperro Museum and the book ‘Inshore Craft Of Britain’, Vol. 2. Also Tony White helped with some details. Various small deck fittings, the rudder and so on were fitted as necessary. The sails were made from an old brown handkerchief. My wife sewed seam strips to the correct spacing and then the whole handkerchief was soaked in a pva/water 1:5 solution, and left to dry, flattened on a sheet of glass. The stiffened material could now be cut without fraying. Around the edges of each sail, brown rigging cord was glued with looped eyes as needed. The deep brown colour of the sails results from the annual practice of ‘barking’. The white canvas would have been boiled in a locally made solution made from oak tree bark to provide protection against the elements, hence the word ‘barking’.
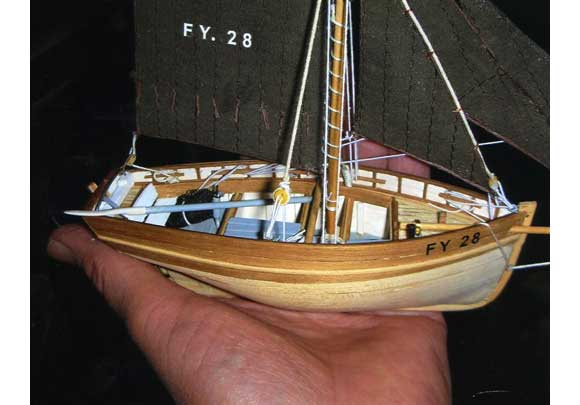
Finally, in case you have any assumptions on the size of this model, Photo 13 shows how small it is. So, something a bit different that can be built without a massive workshop and quite quickly for display purposes.


