Shemarah II

Advert

Shemarah II

Home Forums Scratch build Shemarah II

  • This topic is empty.
Viewing 25 posts - 176 through 200 (of 371 total)
  • Author
    Posts
  • #36971
    mike farrell
    Participant
      @mikefarrell21522

      Now then Gareth ,Thanks for the idea and simple instructions for the makeing of lifebelts.I have been looking for 1/12scale lifebelts for my 1/12 scale Lifeboat .

      Tommorow morning I,lln start make a few and a few spares saving a lot of heart ache and money. You know after seeing Shemarah live, watching your posts are more real and appreciated

      Michaelwink

      Advert
      #36979
      Gareth Jones
      Participant
        @garethjones79649

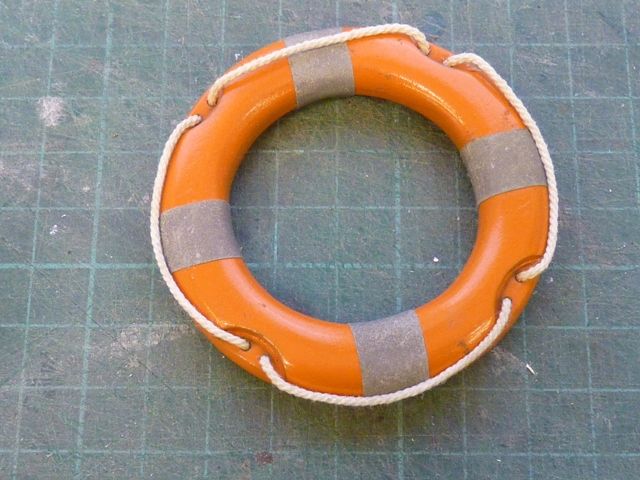
        Glad you like the idea Mike. If you have already started this may be too late but on our 1:12 scale narrow boat I made the life belt using a Mac's Mouldings basic lifebelt ring and then cut the recesses and finished the assembly as described above. The reflective strips were made from a bit of material saved after a high viz safety jacket had been recycled into a night time dog coat. There is a picture of the finished item below (the lifebelt not the dog coat).

        shemarah 281.jpg

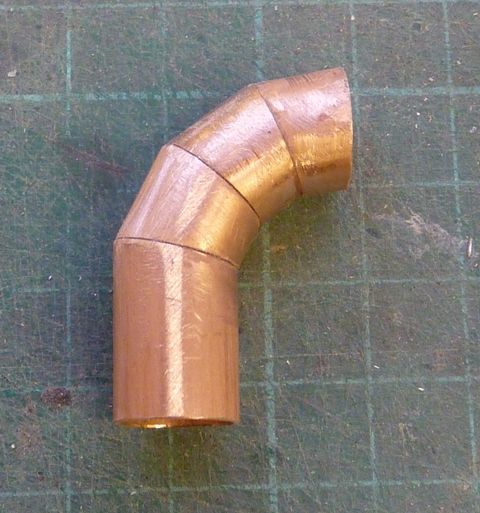
        I spent half an hour scouring the shelves in B and Q this morning while my daughter took her driving test. I could not find any suitable plumbing fittings to turn into a main engine exhaust pipe. The only pipe I had at home which was the right size was a short piece of 12 mm copper pipe. The real exhaust is not a smooth curve but several short sections scarfed together to give 30 degree bends. I decided to give it a go using the same process, cutting the scarfs using my disc sander to get a consistent angle. I scored a line down the side of the pipe so I could get repeatable angles on each piece. I had some nylon rod which fitted snugly inside the copper tube which made it much easier to hold the short sections of tube on the sander. The sections were superglued together as I thought the chance of maintaining the correct alignment of all 4 pieces during soldering was pretty much nil. The final result looks pretty good and a coat of matt black paint should finish it off nicely.

        shemarah 282.jpg

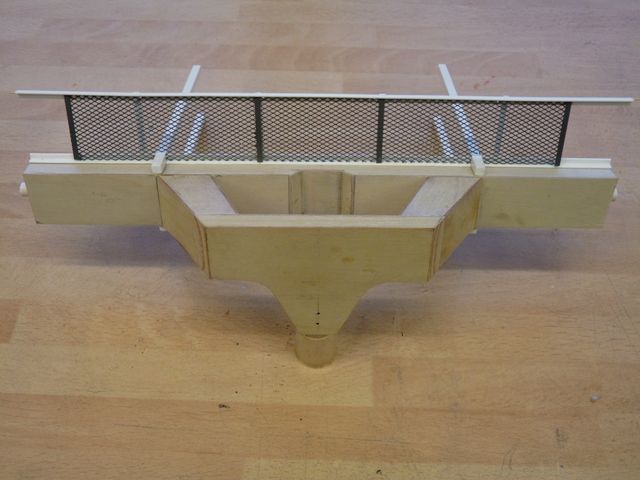
        I also found an excellent material to represent the walkway gratings on the rear gantry and around the winches. It's Isopon reinforcing mesh which has a diamond pattern with holes around 2 mm x 1 mm. Only £2.50 for a sheet big enough to finish Shemarah and probably another model as well., as long as its the same scale. I like building in 1:24 scale as its easy to convert, ie. its 1 mm to the inch near enough, and most of the detail parts are large enough to be self constructed from scratch. Here's the gantry walkway after the mesh had been given a coat of gunmetal grey paint. A bit of light rubbing with some abrasive paper should give it a nicly worn look later.

        shemarah 283.jpg

        #37081
        ARTHUR COLLETT
        Participant
          @arthurcollett48040

          Hi Gareth

          Greetings from South Africa. I am following your build as from day one. We bought the plans a few months ago and i think it is about time I start with this project. Just to comment on you build. It is amazing how you solve problems around material availability, tools etc. I do like the idea of the captive nut or blind nut as we call them to prevent the material frim slipping while you sand it. The laser to determine the position of the cutting bit also a great idea. Overall a exellent build. i think all would agree.

          Regards

          Arthur

          #37095
          Gareth Jones
          Participant
            @garethjones79649

            Hi Arthur,

            Its nice to hear that someone else is planning to build a model of Shemarah. I have not seen any other models of Shemarah at the shows in the UK and I have not heard of anyone else building one. I have had a few enquiries from a gentleman in Italy, via this forum, but I dont know if he has started yet.

            I would be interested to hear how you get on and it would be good to keep in touch through your build. There is quite a lot of information available about Shemarah on the web and it now has its own website which is just in the process of being set up. (http://www.shemarah.com/) I have also sent you a private mail message with some additional information, let me know if you are interested.

            Regards

            Gareth

            #37098
            mike farrell
            Participant
              @mikefarrell21522

              Hi Gareth,

              Just a thought as I read the story of the Shemarah I have thought you should take her around the shows as an example of what can be done with serious diligence . Hoping you do not find me presumptious but as I told you when we met "until you see her live you cannot appreciate how good she realy is"

              I,m sure there is many modellers who would like the privilage as I did seeing her plough through the water not with much speed making a bowwave to delight and showing that speed is not nesessary for a great show . Hope others will encourage you to do as I would like to see yo do

              Keep up the excellent work . Michaelwink

              #37103
              Gareth Jones
              Participant
                @garethjones79649

                Mike,

                Shemarah will get around a few of the club open days again next year, mainly in the Yorkshire area I guess. The target is to have her finished in time for the CADMA show in Doncaster, usually at the beginning of June.

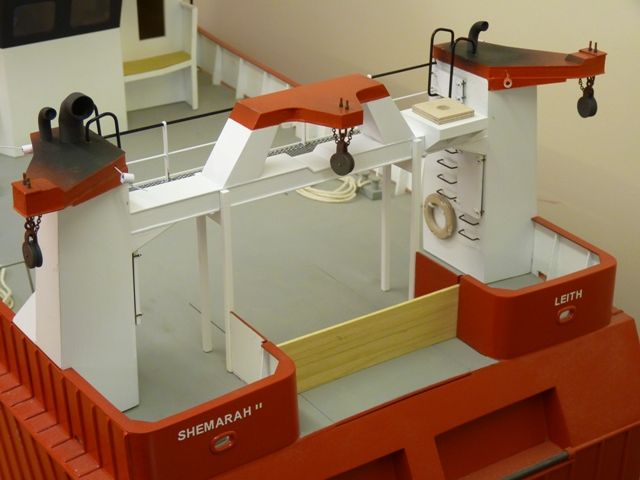
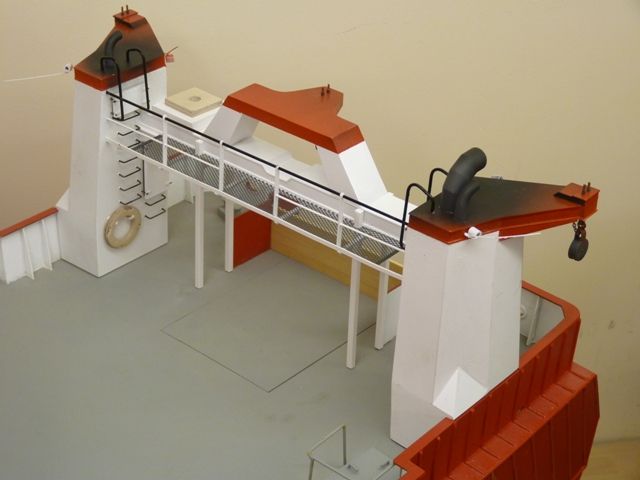
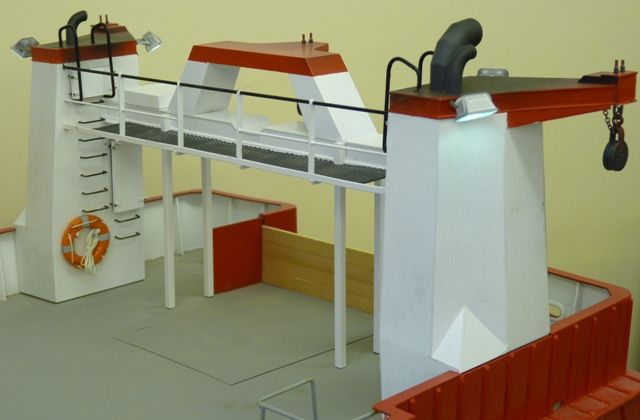
                This week I have been painting the gantry and fitting various bits and pieces to it, all a bit fiddly but it's coming along nicely. I think I overdid the sooting from the exhausts on the top but by the time the whole model has been weathered a bit it should be OK.

                shemarah 284.jpg

                shemarah 285.jpg

                The odd looking bits sticking out of the top are bits of plastic tube tied to lengths of fishing line which will be used to pull the wiring from the floodlights through the assembly to the electrical connection in the bottom of the left hand upright.

                The wooden block on the top right of the cross beam is the mounting block for the crane. I am going to cheat a bit with that as I bought a kit from Bellrock Models some time ago. I was lucky as I ordered it just after they had finished supplying the Thistlelift crane and Powerblock kits but fortunately they had enough bits left to make up what I needed.

                #37206
                Gareth Jones
                Participant
                  @garethjones79649

                  I have now fitted the wiring for the floodlights on the gantry, after a bit of a struggle with the first one. Using monofil fishing line as a pull through was a mistake as it was difficult to tie it to the wires securely. The first attempt to pull the wiring through, which was one of the longest two on the right hand side, ended up with the connection parting somewhere in the middle and I had to pull the wires back out. Fortunately I was able to use the other pull through on that side to pull a pair of braided lines through instead. I then had to fish about in the top of the gantry through the exhaust stack hole to get the two new lines where I wanted. After that everything went smoothly and the floodlights are wired up and working. They connect into the main wiring loom via a small stereo connector in the bottom of the gantry, just like the front mast.

                  shemarah 286.jpg

                  shemarah 287.jpg

                  I have also made up the four lifebelts and fitted the one that goes on the right hand side of the gantry.

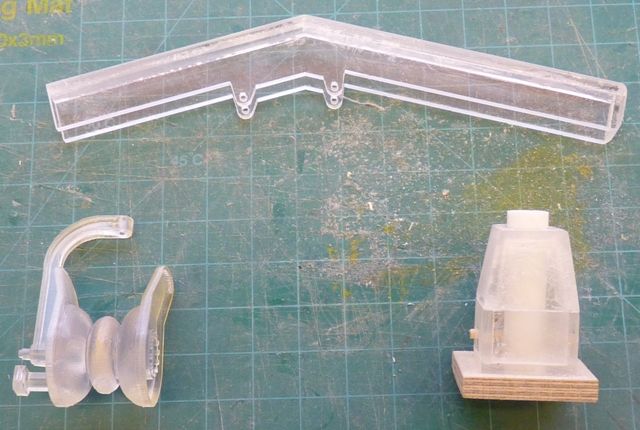
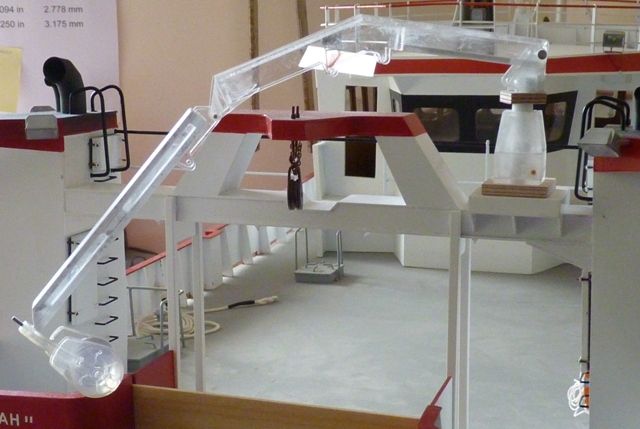
                  The next job is the Thistlelift crane and powerblock, mounted on top of the gantry. This is proving very challenging and understanding the instruction sheet needs a degree in guesswork. I wont say any more as they are no longer available from the supplier. However the powerblock is a very nice piece of stereo lithography and overall its much easier than building the whole thing from scratch.

                  shemarah 288.jpg

                  shemarah 289.jpg

                  #37224
                  Bob Abell 2
                  Participant
                    @bobabell2

                    Gareth…..Whatever it is……..It looks impressive!

                    Bob

                    #37230
                    Gareth Jones
                    Participant
                      @garethjones79649

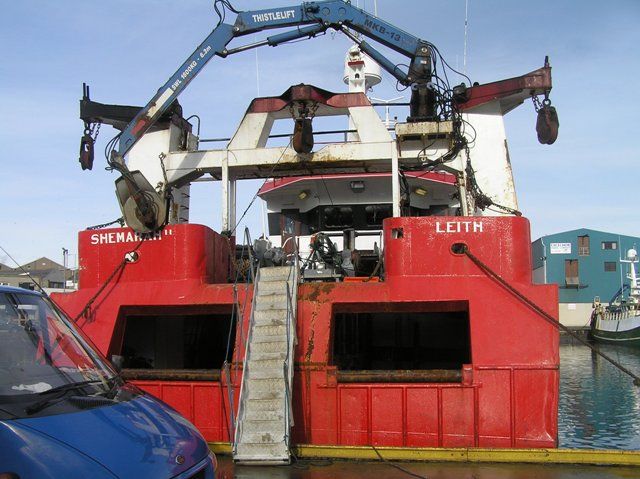
                      Come on Bob, keep up, when its finished and painted blue instead of its current ghostly clear plastic, it will look like the picture on the bottom of page 17, repeated here for convenience.

                      shemarah 270.jpg

                      Its the crane and power block, used for lifting the nets and trawl boards on to the back of the vessel.

                      Gareth

                      #37328
                      Gareth Jones
                      Participant
                        @garethjones79649

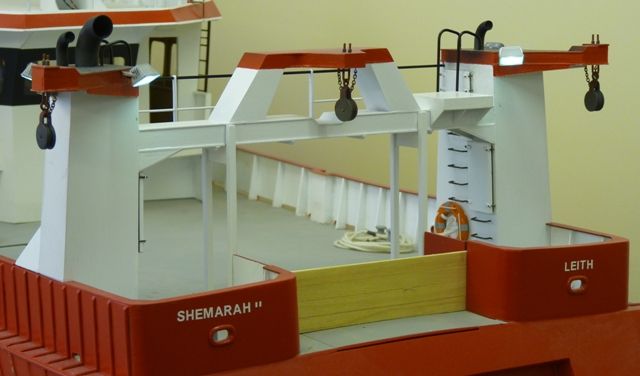
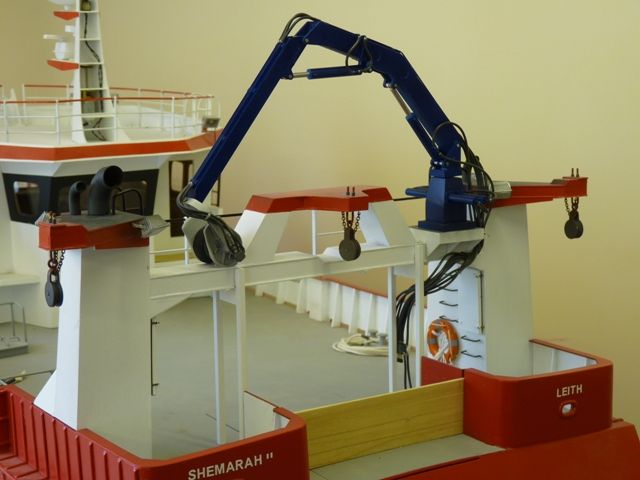
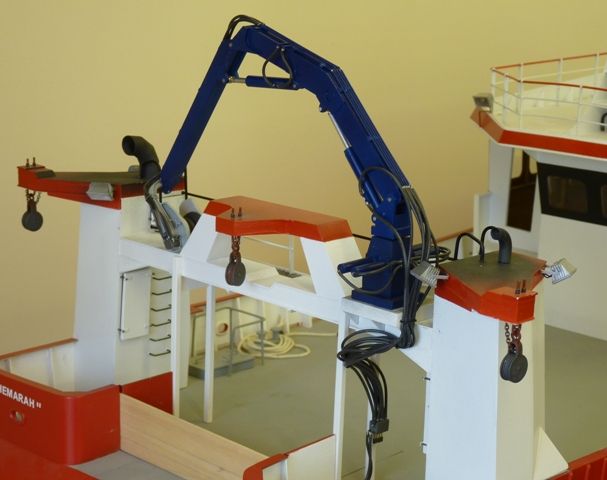
                        The crane and powerblock are now complete apart from adding the transfers. Unfortunately the ones supplied with the kit are not correct for Shemarah as they were for a different model of crane. At the moment I have not made up my mind whether to use them or make up some new ones from Crafty Computer Paper water slide decal sheets.

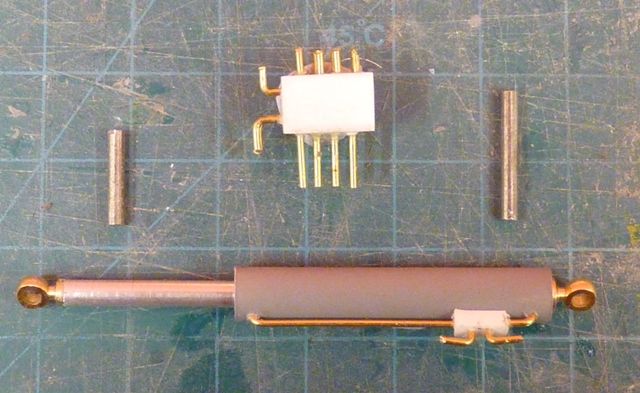
                        The hydraulic jacks were made from 6 mm OD styrene tube with 3 mm OD aluminum tube for the ram rods and Modelling Timbers 2 mm tie downs for the eye ends. The valve selector block was just made using oddments of styrene and 1/32 brass wire.

                        shemarah 290.jpg

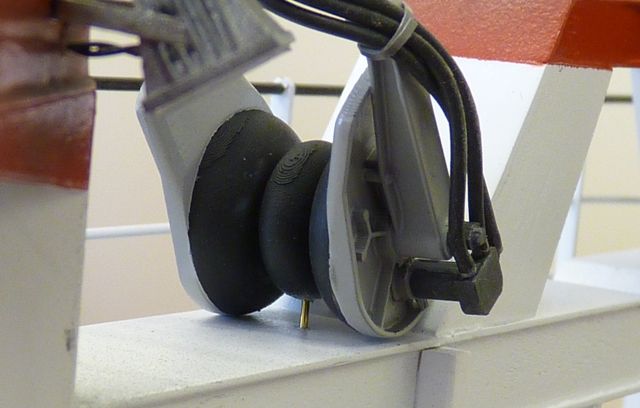
                        There are over 2 metres of silicone rubber tubing making up all the hoses. I can't guarantee that every hose goes to the correct connection on the selector valve block but they are all logically positioned. The whole assembly is not the most elegant hydraulic installation but I guess it arose as a result of the crane being moved from its original position on the deck to up on the gantry.

                        shemarah 291.jpg

                        shemarah 292.jpg

                        The crane can be positioned more or less everywhere the real one will reach as it will swivel and both hydraulic cylinders can be extended and retracted. However it is a bit fragile and vulnerable to damage unless its retrained at both ends so I have set it up across the gantry and located the powerblock pulley on to the gantry using a short piece of brass wire hidden underneath. It will eventually be painted white to disguise it. The tie around the hoses is a thin piece of grey gaffer tape to simulate what look like tieraps on the real installation.

                        shemarah 293.jpg

                        The next job will probably be the bases for the three main trawl warp winches.  However progress might slow down for a while now as, in a surprise move for a man of my age, I am returning to work at my old job next Monday on a 6 month contract.  I have had an entertaining three years in retirement but I suspect after a few days back at work it will feel like I have never been away.  Still it will bring in a few bob to pay the vets bills and university fees.

                        Gareth

                        Edited By Gareth Jones on 01/11/2012 14:22:25

                        #37350
                        Gareth Jones
                        Participant
                          @garethjones79649

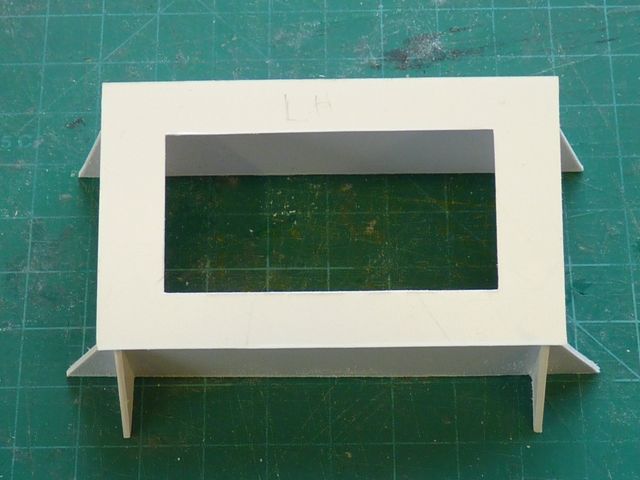
                          Yesterday I made a start on the main winch bases, this is the first one, still needing the stiffening flanges on the webs in each corner.

                          shemarah 294.jpg

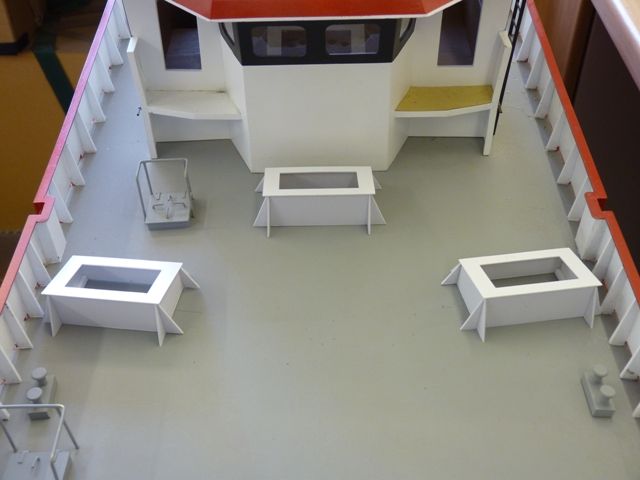
                          Here are all three in position. They may eventually be fixed to the deck permanently but at the moment, like many of the other deck fittings they are retained by a couple of 1/32 brass pins located in holes in the deck.

                          shemarah 295.jpg

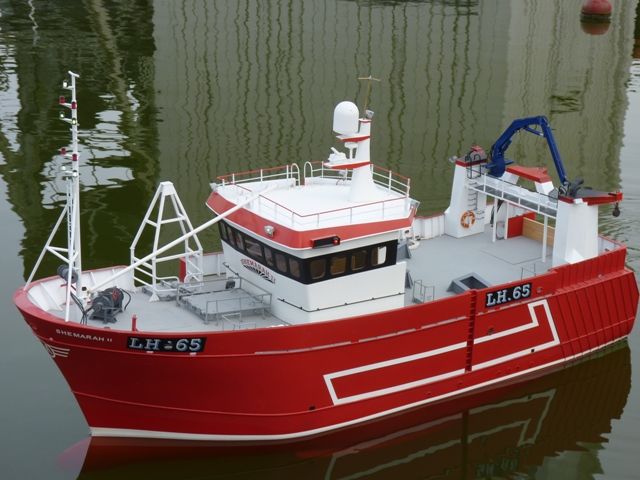
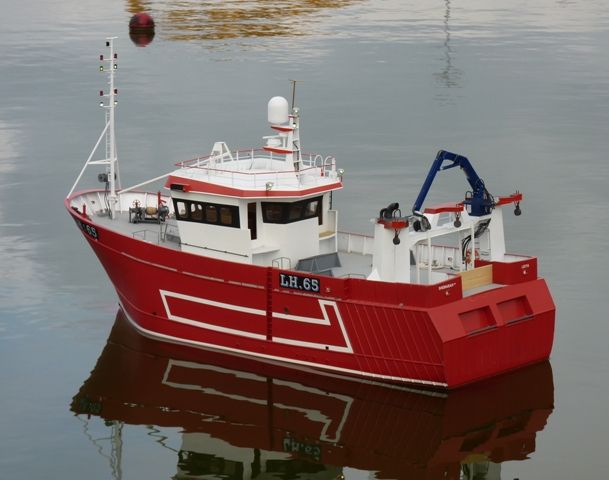
                          This morning I took Shemarah for a quick outing to the pond at Goole so that I could get some pictures of her on the water now that the gantry and crane are nearly complete. Here are a couple of examples to show what she looks like now. You can see that the winch bases have had the stiffners added, along with a coat of grey primer.

                          shemarah 296.jpg

                          shemarah 297.jpg

                          #37356
                          LARRY WHETTON
                          Participant
                            @larrywhetton68737

                            Hello Garath ,

                            Very very nice ……..looks good on the water ………a creditable build Larry…..

                            #37415
                            ARTHUR COLLETT
                            Participant
                              @arthurcollett48040

                              Hi Gareth

                              Greetings from South Africa.

                              Question: Do you plan to scratch build the winches? I have studied the pictures on the actual Shemarah. They look quite complicated to me. Do you plan to put them down on a drawing to work from?.

                              Regards

                              Arthur

                              #37431
                              Gareth Jones
                              Participant
                                @garethjones79649

                                Hi Arthur,

                                Yes I am going to scratch build the winches but I am not sure whether I will do a drawing yet. I would probably start from the major parts shown on the plans and then add the detail of the hydraulic motors, valves and pipes as I go along, based on Jim Pottingers photos and just scaled dimensions and back of an envelope sketches of the bits. One bit I am concerned about is the very prominent lead screw which drives the cable guide rollers. I have no idea how I am going to make that as it looks the sort of thing you would need a lathe for, its well beyond my pillar drill's capabilities. I might try and make a mould for the motors and cast them in resin since there are six identical ones but I have never gone down that route before either.

                                At the moment I am doing the net drums and their hydraulic motors. The plans are not representative of the installation, at least not as it appears in the photos on the net. The motors are much smaller and have 7 cylinders rather than the 5 on the plan. I will send you a link to the best photo I have found sometime in the next few days. The net drums have now been removed from Shemarah as it no longer goes fishing, so if you plan to build it as it is now, you need not worry about that. However she still has the three big complicated trawl winches. I am planning to go the whole hog with all the fishing gear on my model.

                                Just about to wander off to my workshop now to recover from my second day back at work after a three year holiday.

                                Regards

                                Gareth

                                #37438
                                LARRY WHETTON
                                Participant
                                  @larrywhetton68737

                                  Hello Garath,

                                  build is top draw , winches are a great challange,

                                  i made my own for my trawler , cost peanuts compeared to bought ones ,

                                  very interested in your motor gear where did you get gears and belt drive of to Warwick friday ,

                                  so mite pick up some thing there ,

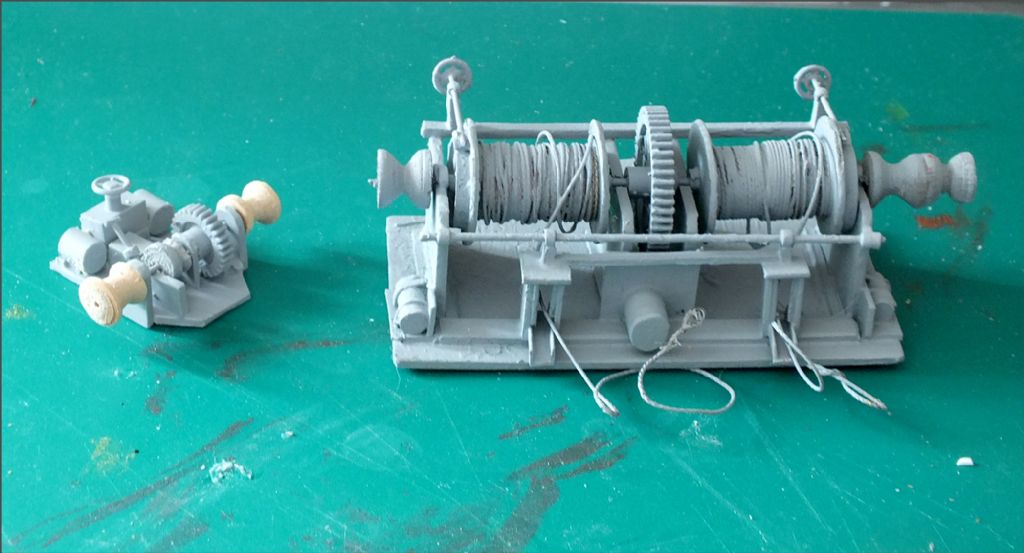
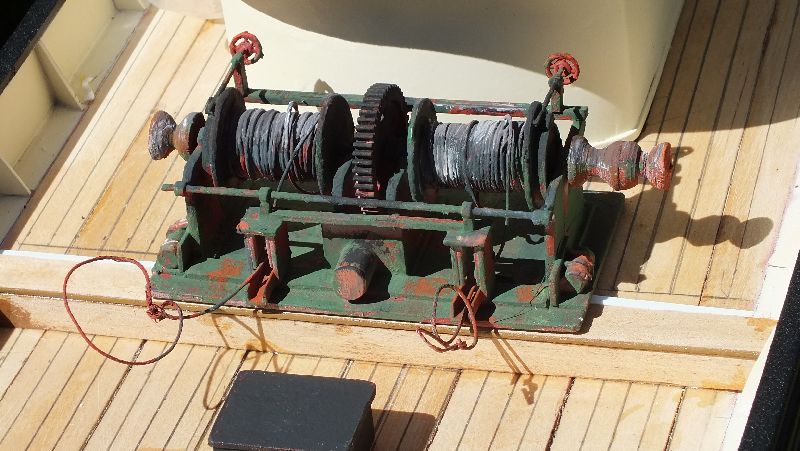
                                  put a picture of my winches for you to look at , cheers Larry….TRAWLER.

                                  harry pool trawler (10) edit.jpg

                                  #37445
                                  Gareth Jones
                                  Participant
                                    @garethjones79649

                                    Hi Larry,

                                    Your winch looks very realistic and convincingly aged/distressed, how did you manage to construct it. The picture at the top where it is all in grey makes it look as though it was a casting. Give us a clue how you did it then.

                                    The geared drive in my model is an MFA unit which I probably bought from Cornwall Model Boats or Model Dockyard, I can't remember which. It was quite expensive but it works well and is reasonably quiet. The pully which sits on the motor output shaft is bored out to 1/4 inch so it is a sloppy fit on a 6 mm motor shaft and you may have to adapt it as I did, if you use a Graupner Speed motor. I dont think we will be visiting Warwick this year as we went to Blackpool a few weeks ago. However we will see how we feel first thing on Sunday morning, as its then or never.

                                    I cannot find the photo I referred to in my last post but I did find one which is very similar, if not quite so good at showing the net drum and motor. There is a link to it here http://www.trawlerpictures.net/gallery/sizes/4924-shemarah-lh-65/large/

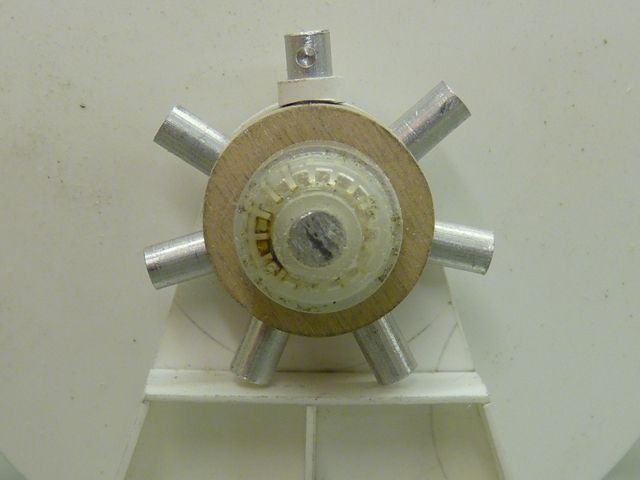
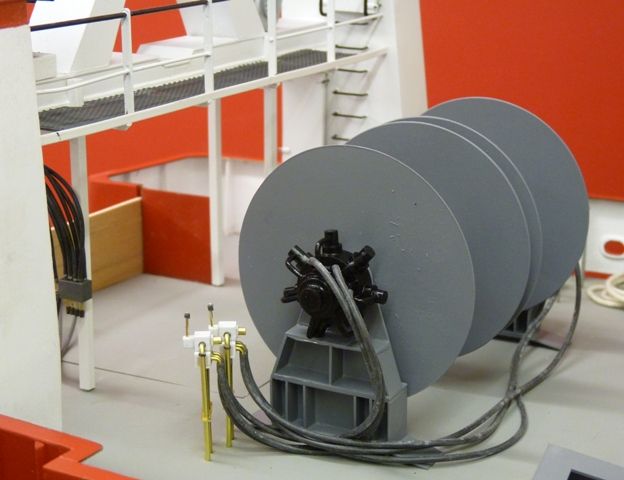
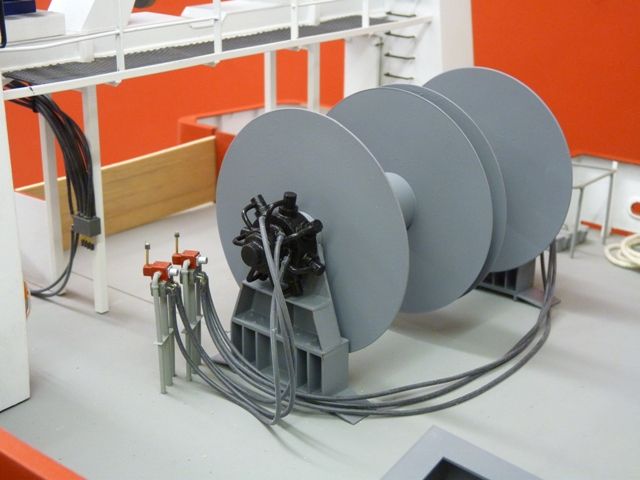
                                    Here are a couple of pictures of the partially constructed net drum and hydraulic motor. The drums are just simple assemblies of 0.75 mm styrene sheet discs with plywood discs to locate the 20 mm tube between the discs. A 6 mm styrene tube forms the main axle.

                                    shemarah 298.jpg

                                    The motor is under construction from a plywood disc, assorted bits of aluminium rod and styrene tube and a piece of plastic cannibalised from a hand wash dispenser. It still needs some work yet to add the pipes to each cylinder from the main motor housing.

                                    shemarah 299.jpg

                                    Gareth

                                    #37449
                                    LARRY WHETTON
                                    Participant
                                      @larrywhetton68737

                                      Hi Garath,

                                      Thank you for reply , my winch is mostly styrene , odd bits of tube , discs cut from styrene,

                                      for drums , centures old biro tubes centure drive out of cheap plastic toys ,

                                      brake rods striped copper wire stiffend using power drill, brake wheels press studs ,

                                      cable builders line , paints acrylic from a shop called THE WORD onlly £3 a box ,

                                      rust is a bit of assorted mix plus a bit of dry brushing ,…..a bit of artistic licence i did attend a art school when a boy ……..when the model is at the complete stage all finishes will get coat of semi matt to make weather proof , thank for info on drive , looking to use it on my paddler…….Larry..

                                      #37660
                                      Gareth Jones
                                      Participant
                                        @garethjones79649

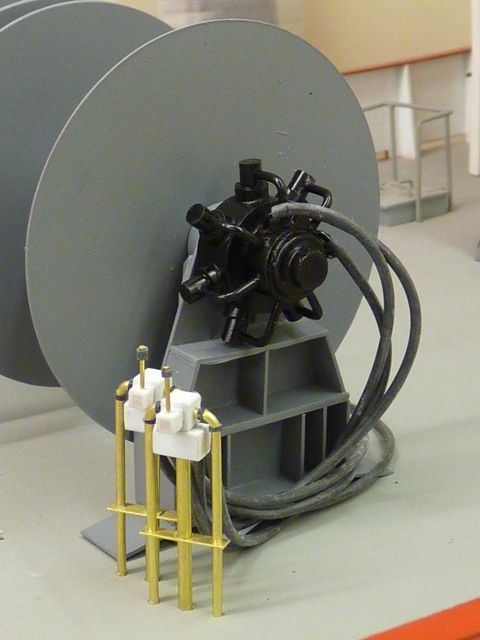
                                        Not a great deal of progress on Shemarah this week. The net drums are just about complete and today I have been doing the control stands. They now need painting and the whole assembly will need quite a bit of weathering eventually. I think the hoses look a bit too thick at the moment and I will try some smaller bore pipe if I can get it over the brass wire used to simulate the end fittings.

                                        shemarah 300.jpg

                                        shemarah 301.jpg

                                        Hopefully I will finish off these bits this week and then start on the three main winches in a few days, work permitting.

                                        #37677
                                        ARTHUR COLLETT
                                        Participant
                                          @arthurcollett48040

                                          Hi Gareth.

                                          What can we say. Working man these days. Was looking forward to your next posting. Love the hydraulic control stand. What do you use for the hydraulic hoses? Looking for ward to follow the build.

                                          Regards

                                          Arthur

                                          #37678
                                          LARRY WHETTON
                                          Participant
                                            @larrywhetton68737

                                            Hello Garath,

                                            Winch is ok , a bit of weathering will have looking even better , hoses will not be noticed,

                                            stillon my build nightmare trawler , no on i think that wiill do stage .

                                            will look good viewed at 2mts cheers Larry…

                                            #37685
                                            Gareth Jones
                                            Participant
                                              @garethjones79649

                                              Glad you like the net drum and controls. The hoses are made from black silicone rubber tubing which is available from various suppliers here in the UK. The smaller diameter stuff I used on the crane is 0.5 mm bore and approx 0.5 mm wall thickness as best I can tell. The tubing used on the net drum motors is 1.0 mm bore and 0.5 mm wall thickness, which looks a bit too fat for my liking. I think the real hose would probably be 1-1.5 inches diameter so I think the smaller bore stuff is a better representation for 1:25 scale.

                                              The net drum controls are not shown on the model plans but they are on one of Jim Pottinger's photos although they are not very clear, so my interpretation is a best guess.

                                              Gareth

                                              Edited By Gareth Jones on 19/11/2012 19:49:41

                                              Edited By Gareth Jones on 19/11/2012 19:52:34

                                              #37847
                                              Gareth Jones
                                              Participant
                                                @garethjones79649

                                                I have now painted the net drum controls and replaced the hoses with a slightly smaller size which looks more realistic. The hoses need restraining with a couple of wire clips to tie them to the deck in a suitable location. The area forward of the drums is covered by a non slip mesh platform which will hide part of the hoses.

                                                shemarah 303.jpg

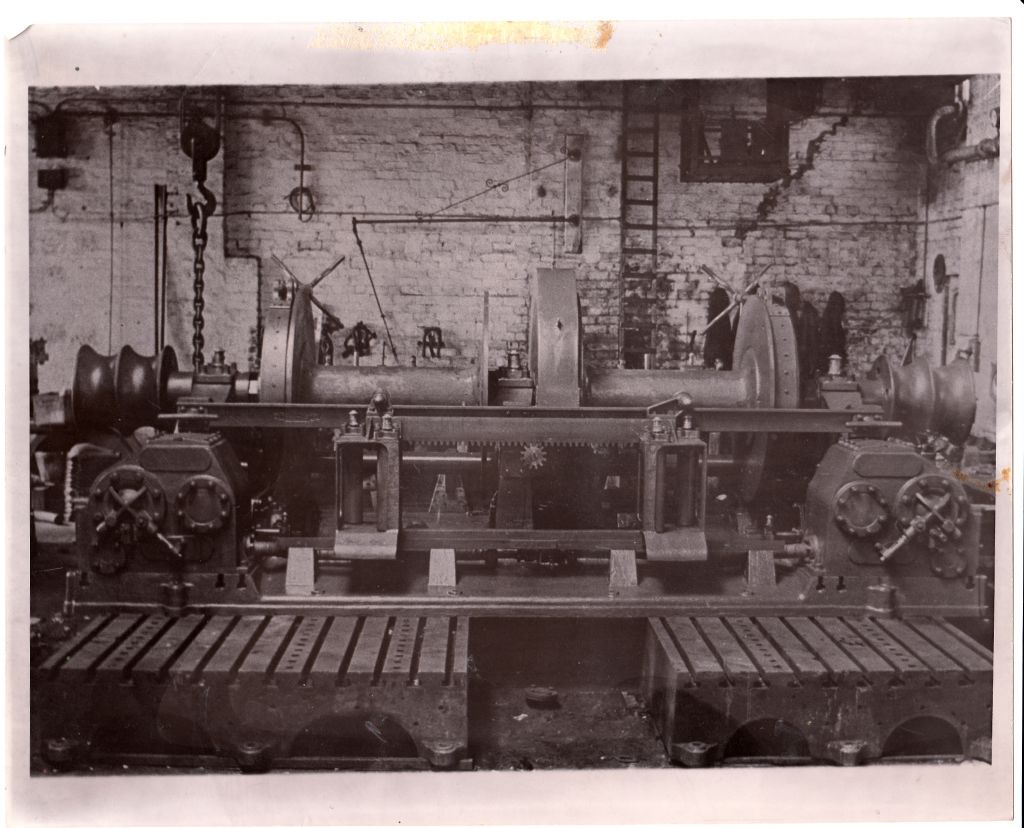
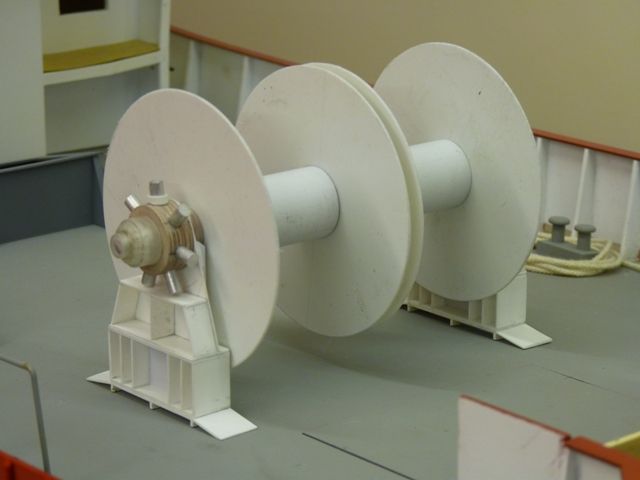
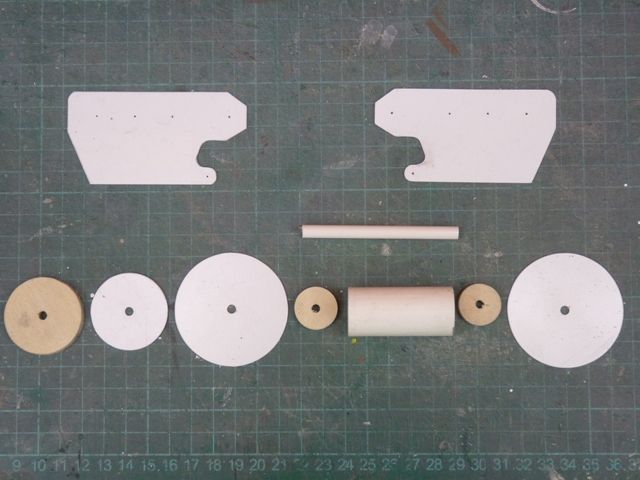
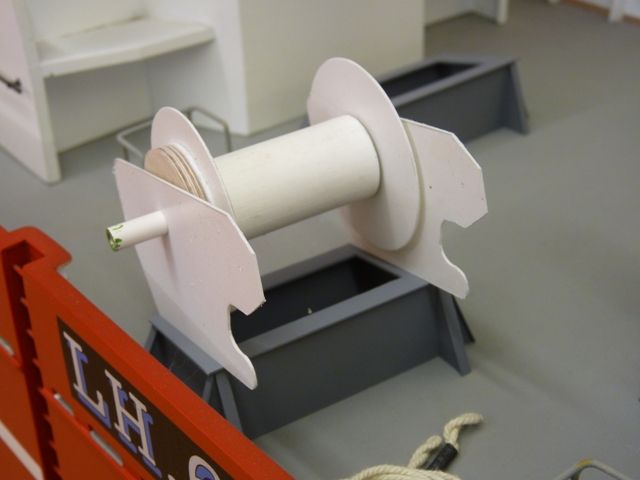
                                                In the last couple of days I have started making components for the main trawl winches. The side frames and drum side discs are cut from 0.75 mm styrene sheet and the main bearing shaft is 6 mm styrene tube. The drum support bearings and the brake are made from 5 mm ply and the centre of the drum is made from a piece of 20 mm plastic waste pipe. The additional white circle is a 1.5 mm thick piece of styrene which fits on the side of the drum and reinforces the centre section. There are 8 ribs which radiate out from this to stiffen the drum sides. There will eventually be a similar piece on the other side of the drum but I have not cut that out yet.

                                                shemarah 302.jpg

                                                Here is one winch partially assembled and stood on the support frame. There are lots of parts to make yet so I expect it will take me a few weeks to complete the three winches.

                                                shemarah 304.jpg

                                                #38261
                                                ARTHUR COLLETT
                                                Participant
                                                  @arthurcollett48040

                                                  Hi Gareth.

                                                  Awfully quiet on the site. hope you are well or the contracting job is taking it's toll.

                                                  Regards

                                                  Arthur

                                                  #38289
                                                  Gareth Jones
                                                  Participant
                                                    @garethjones79649

                                                    Hi Arthur and any other Shemarah fans out there.

                                                    I am fine, but progress has been slow over the last month or so as a result of returning to work, the bad weather and my workshop heater dying so I have not been keen on going out in the evenings to work in the cold. However I have made a few more parts for the winches and dismantled my heater and given it a good cleaning out to get rid of the accumulated dust. It seems to have recovered for the time being but I will have to have a look round for a replacement after Xmas. It looks like work may be a longer term prospect than I thought. BAE Systems have announced another order for Hawk jet trainers for Oman today so that will add to the workload in Flight Systems at Brough and keep me gainfully employed for a while.

                                                    Hopefully I will make a bit more progress on Shemarah while I am at home full time over Xmas and I should have a few more pictures to post early in the new year. All the best to the model boaters out there all round the world

                                                    Gareth

                                                    #38487
                                                    ARTHUR COLLETT
                                                    Participant
                                                      @arthurcollett48040

                                                      Hi Gareth

                                                      Just to wish you and your family a prosperous new year and all the best in 2013. This off course is my wish for all the boat and ship builders.

                                                      Greetings from South Africa

                                                      Arthur

                                                    Viewing 25 posts - 176 through 200 (of 371 total)
                                                    • Please log in to reply to this topic. Registering is free and easy using the links on the menu at the top of this page.

                                                    Code of conduct | Forum Help/FAQs

                                                    Advert

                                                    Latest Replies

                                                    Home Forums Scratch build Topics

                                                    Viewing 25 topics - 1 through 25 (of 25 total)
                                                    Viewing 25 topics - 1 through 25 (of 25 total)

                                                    View full reply list.

                                                    Advert

                                                    Newsletter Sign-up