KEITH JULIER in the third of four parts, continues on the subject of masts
Tops
I have found that in most kits, making the top assembly of a mast as a separate mini-project pays considerable dividends. By first gluing the trestletrees and crosstrees to the underside of the top platform, as well as stabilising the platform, it is then easier to get all relative positions correct and it is also simpler to hold, for drilling holes and fitting eyebolts. In some cases the upper surface of the top platform will have a rim and the actual edge may be required to be capped, the latter being done after notches for the deadeye strops to the topmast and the futtock shrouds have been cut in. In some cases, pre-cut lots may have been provided.
Enjoy more Model Boats Magazine reading.
Click here to subscribe & save.
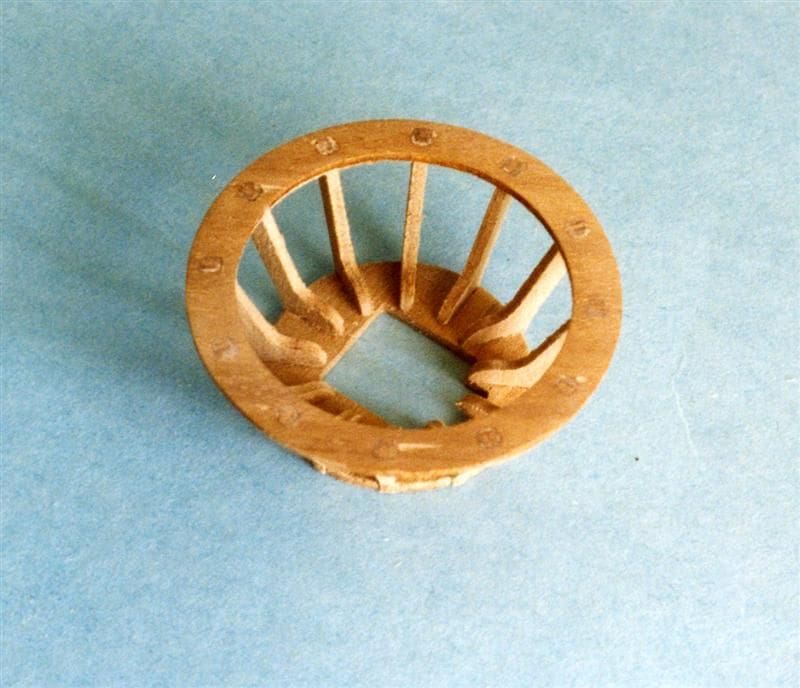
The shape and complexity of construction varied according to the period. On vessels up to around 1700, tops were circular and had angled sides, Photo 48, which were often planked with a capping rail around the top edge, the supports for the sides usually being an integral part of the battens radially spaced around the floor of the top. A good kit will provide these parts pre-cut, but care is still needed to get the spacing correct. The fixing of the top rail is particularly important, since it is through these that the deadeye strops for the topmast shrouds will pass, the angular sides of the top providing clearance for attaching the futtock shrouds below.
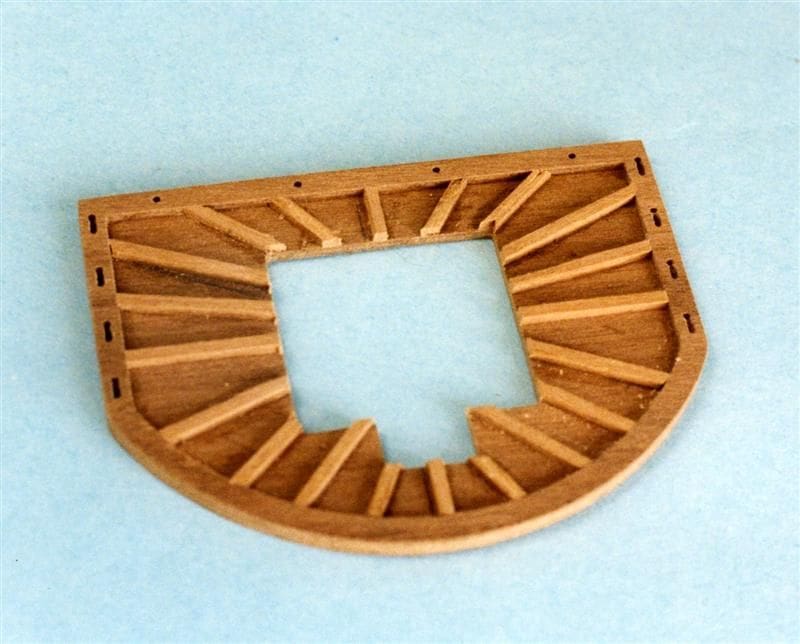
Later vessels had tops with straight backs and sides, although the basic principles of design remained.
Again, there will be a number of battens to arrange in a set pattern on the upper surface of the top. Getting the pattern symmetrical calls for careful measurement and accurate trimming of the ends of the wood strip being used. It is best to start with the central or lateral battens and use a pair of dividers to determine the position of the others. The corners of the lubber holes in the platform proper are useful gauging points for getting the inner ends of the battens in the right place, Photo 49.
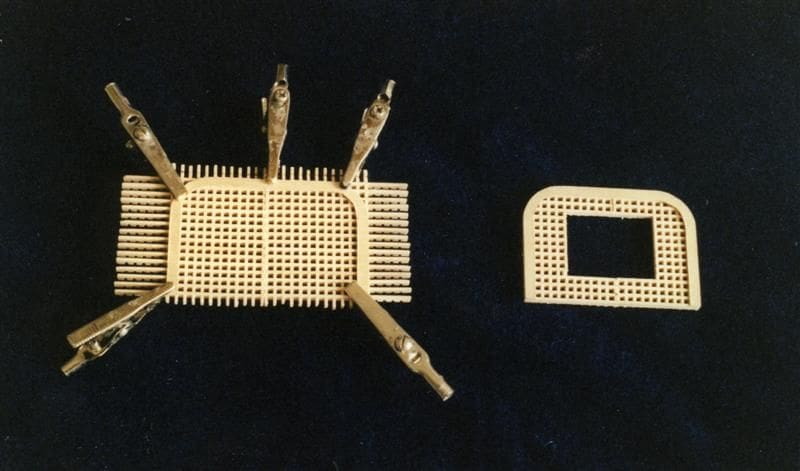
Another variation arises in the case of some merchant vessels where the top may be a framed grating. These are constructed in a similar fashion to deck gratings but without the battens described above, Photo 50.
There will probably be a number of eyebolts to insert on the rear top surface of the top, plus several on the underside of the crosstrees. Reference to the relevant rigging drawing will ensure that these are put in the right place.
Further reference to the rigging drawings may also reveal the later application of crowsfeet, which should indicate that a number of holes around the front edge of the top would be necessary. These should be drilled before assembling the top to the mast, noting that there is always an even number and thus not one drilled on the front centre of the rim.
If at all possible, I like to fit the lower deadeyes for the topmast shrouds to the top platform at this stage, or in the case of models of earlier period vessels, to the rim of the round top. Some kits provide etched brass strops for this purpose, but on many smaller scale models the deadeye is rigged with thread, the tail of which then passes down through the top to become the futtock shroud. In this case it is important to ensure that the thread is well secured into the hole in the top since it is disastrous if the deadeye joint becomes loose while attaching the lanyards to the topmast shrouds.
The top assembly may then be glued in place on top of the hounds, again checking that it sits parallel to the waterline when the mast is stepped. Do not glue the mast cap on to the spigot on the masthead at this stage, but the masthead iron hoops may now be put in place. The futtock shrouds may be left hanging down until later.
Bolsters
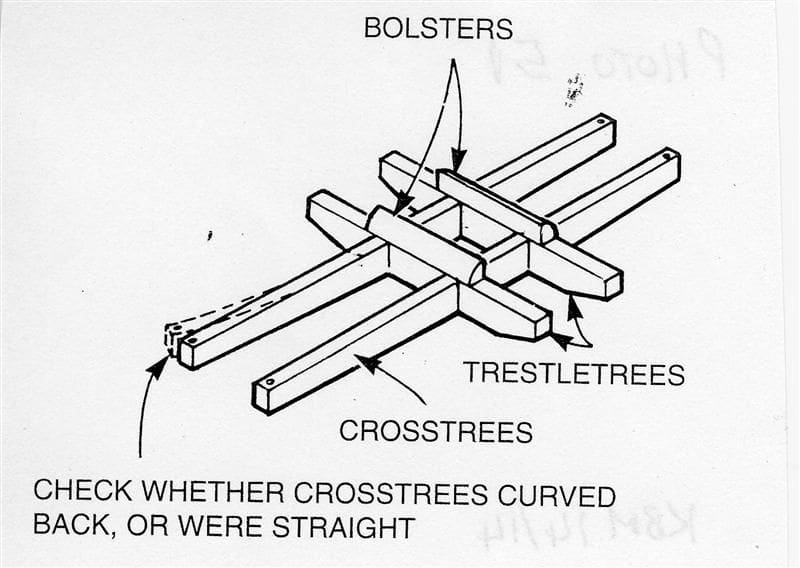
These were strips of timber, quadrant shaped, and fitted to the top surface of the trestletrees to protect the lower shrouds from the sharp edges of the structure as can be seen in the drawing in Photo 51. You can normally expect to form the section yourself using a suitable piece of square sectioned strip.
A final look over the lower mast assembly will identify any missing eyebolts prior to doing any further painting that may be specified. Such painting may involve painting the doublings, i.e. that area between the bottoms of the hounds to the mast cap, with matt black paint. Alternatively, this painting may be left until the whole mast assembly has been achieved.
(Extracts and photographs from the Period Ship Kit Builder’s Manual are reproduced with the kind permission of Special Interest Model Books Ltd.)

