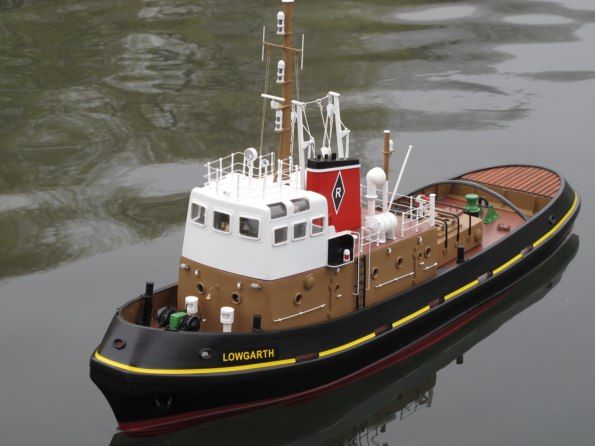
Motor Tug Lowgarth
DAVE ABBOTT reviews the Mountfleet Models kit
Enjoy more Model Boats Magazine reading in the monthly magazine.
Click here to subscribe & save.
This is the latest addition to the range of model boat kits from Mountfleet Models.
History
The full size vessel was originally built by Richards Shipbuilders of Lowestoft and launched in 1965 as a further development of the Plumgarth and Avongarth Class. The great success of the vessel’s design led to a further four ships of the same design. She was powered by a seven cylinder oil engine produced by Ruston and Hornsby driving a single fixed propeller operating within a steerable Kort nozzle. Following her sale by Cory Tug Company and then a number of years moored on the River Weaver, she was then sold to Rigg Shipping and converted for coastal towing. Latterly she was sold again to Fendercare and now operates in Nigeria under the name of Charles Plane.
The kit
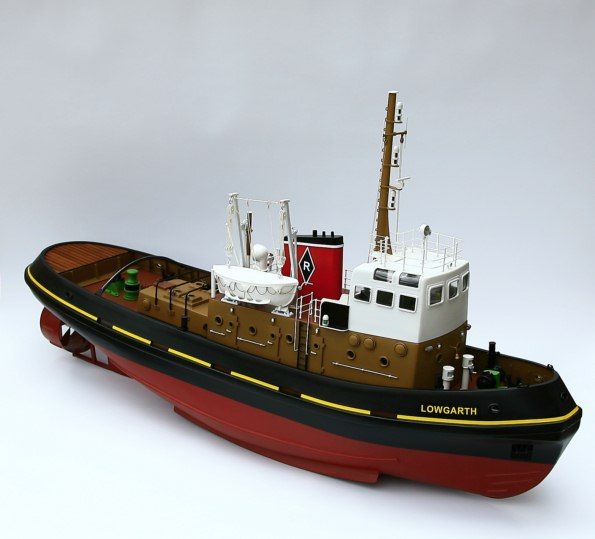
The model is to a scale of 1:32 with an overall length of 950mm and beam of 270mm. The hull comes as a one piece GRP moulding with the lower superstructure, wheelhouse and Kort nozzle also as GRP mouldings. The fittings, boxed separately, include a large number of white metal items such as the anchor windlass, towing hook, stern capstan, bridge details and bollards etc. The kit also contains all the printed plywood and plastic parts required, rigging cord and a moulding for the ship’s boat. A 70mm four bladed propeller and propshaft is included, as is a full size plan, plus an excellent step by step instruction manual, Photo 1.
Hull
The superstructure lower body which is a GRP moulding, requires little attention, other than drilling holes for the portholes and other minor surface fittings to be added later. The wheelhouse, also a GRP moulding, is the next item to be worked on. This does need some careful planning as there are a large number of windows and openings to be cut out. The same method of chain drilling, joining up the holes and then careful filing as for the hull wash ports will be necessary, Photos 13 and 14.
Fittings
All these are white metal and require a very small amount of cleaning up with files and wire brushes. I will not go into detail about all of these as it is straightforward assembly job. I did however leave the wheelhouse GRP moulding removable so that the bridge interior detail could be clearly viewed. Photos 15, 16 and 17 show the detail of the superstructure.
Painting
All the main colour coat paints were Humbrol satin enamels from their huge range. 85% of the model was spray painted with the small items being brush painted. All the painted surfaces were finally given two protective coats of Humbrol satin varnish. I have had no problem with Humbrol paints, provided they have been properly stirred and the surface underneath is clean and dust free.
Motor and r/c installation
The choice of motor is entirely in the hands of the builder, however Mountfleet Models can supply a suitable motor at extra cost which is a large 12v d.c. brushed can type with very low current drain and low rpm, but high torque. This drives the large four bladed propeller very well. Also, a heavy duty motor mount can be supplied by Mountfleet Models together with a suitable heavy duty flexible coupling to match.
The steering servo was a Hitec type (as good as any) and this was mounted on a plywood platform, along with motor and coupling, Photo 18, and Photo 19 shows the tiller arm and linkage under the stern platform. The 12v 10 Amp SLA battery is under the r/c panel. Radio is 2.4GHz Hitec system using two channels, one for speed control and one for steering. The electronic speed controller (esc) is an Mtroniks 25 amp unit, more than enough for this installation. Mounted at the front end of the r/c panel is a fuse carrier with a 20 amp fuse to protect the system in the event of the motor stalling.
Ballast and on the water?
This is a very manoeuvrable model benefiting from the steerable Kort nozzle and the torque and power of the large relatively slow turning propeller. At low speed, the model is perfect for really tight turns and when sailing normally, the model has an authentic ‘tug look’. The size and weight of the model is also very acceptable, as Lowgarth will fit into the boot of an average sized hatchback with no problem and the weight of the model is not back-breaking!