
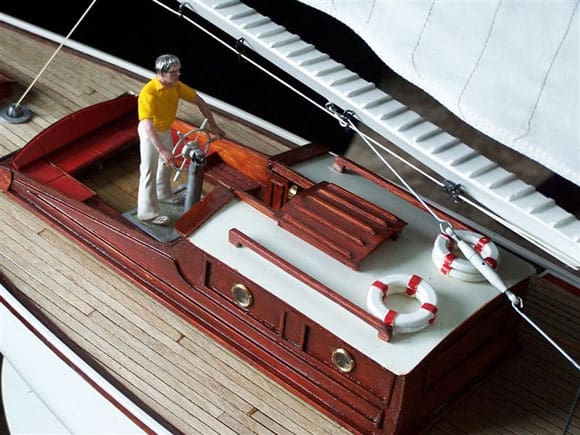
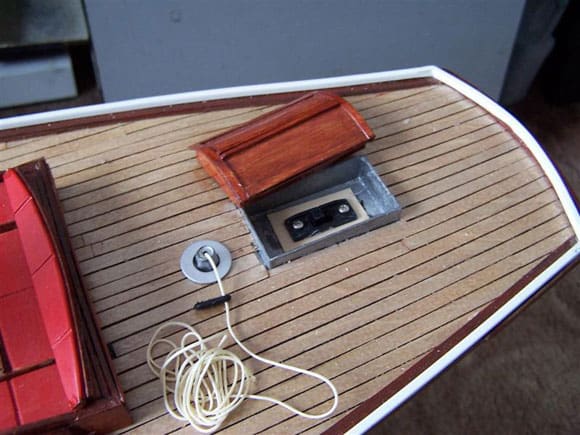
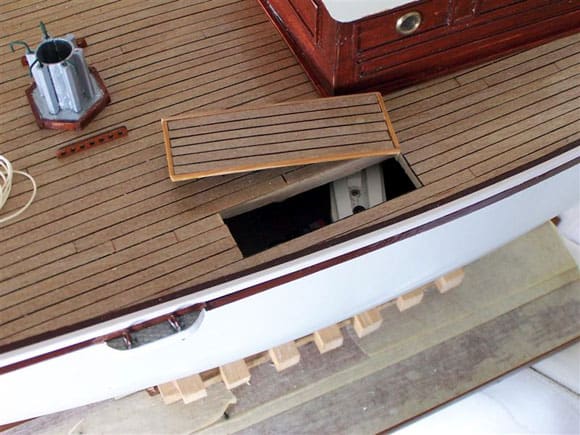
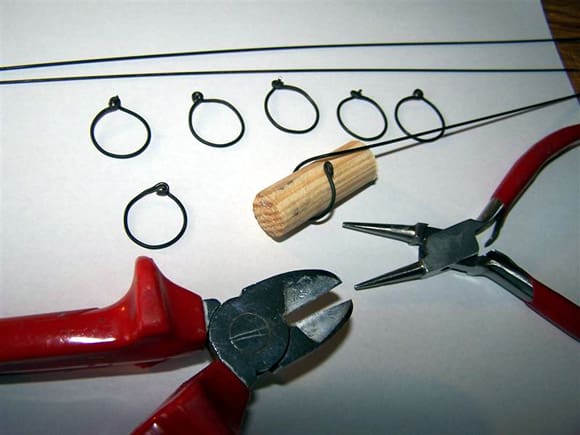
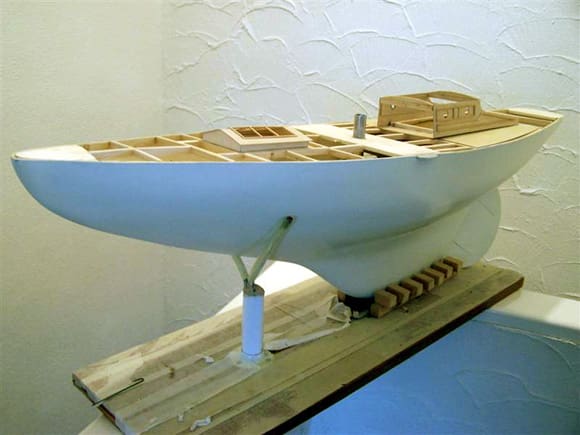
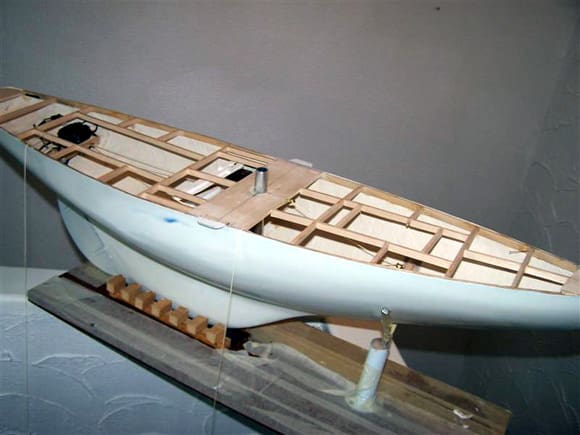
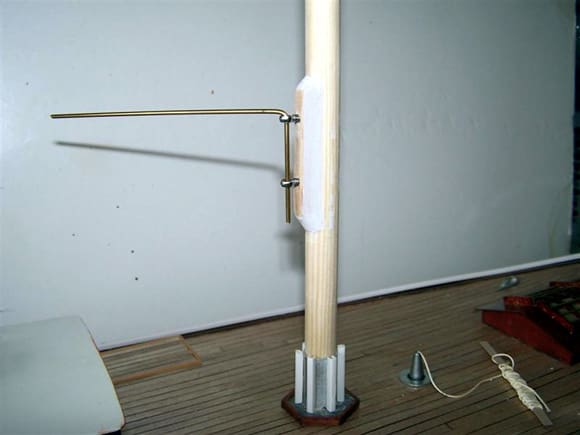
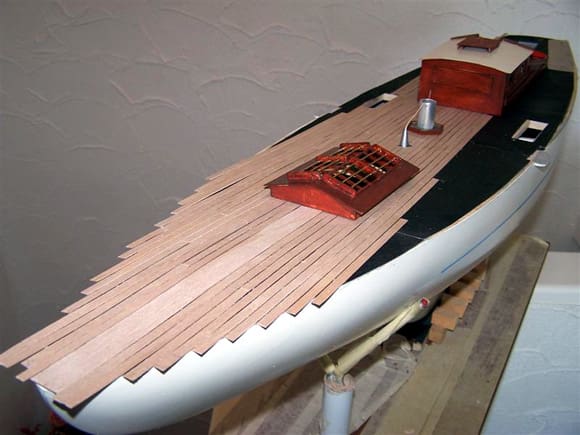
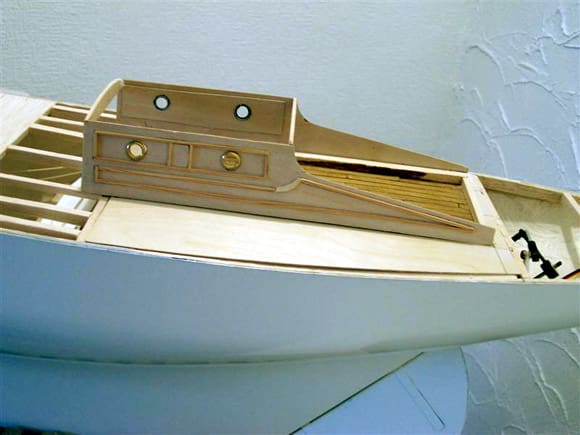
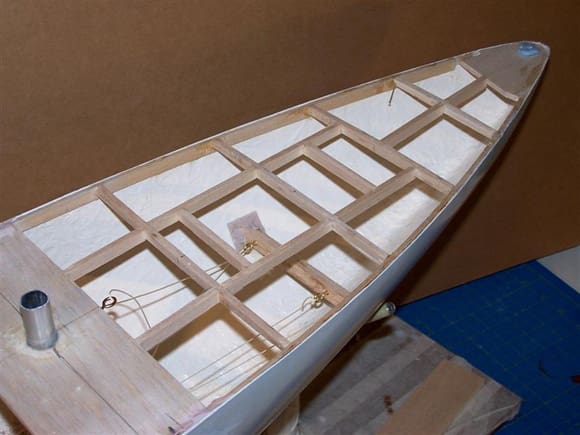
Pic 1: Monica II shows off her fine hull lines. Pic 2: Main cabin and cockpit. Pic 3: Stern hatch that houses the receiver switch. Pic 4: Deck hatches for access to sail winches. Pic 5: Soft wire formed around dowel to make mast attachment clips. Pic 6: Hull and deck supports taking shape.
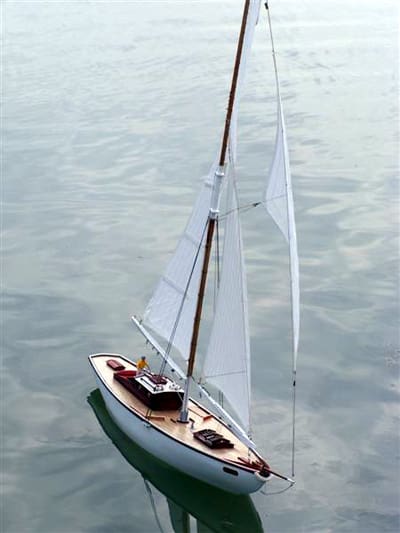
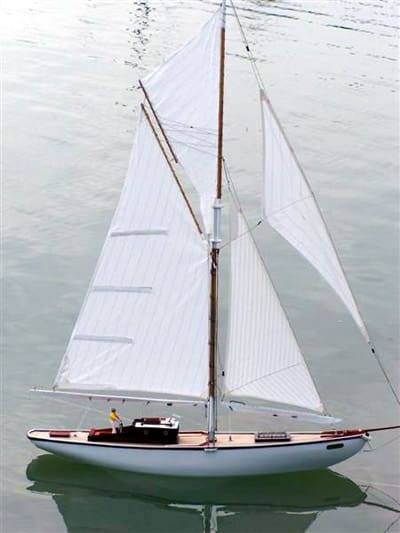
Monica 11 is based on one of the attractive pond yachts that were so popular during the 1920/30’s and contributed greatly to the development of today’s working sail models. This is available from Metcalf Mouldings as a hull and plan package for building a working model. The new hull follows closely to the same lines as their previous yacht Moonbeam (now available as a full kit -Editor), although Monica II is 12ins shorter in overall length.
Monica II is however still quite a large model, with an OAL of 40ins and a beam of 9ins, the large deck area lending itself nicely to an enthusiast of this style of sailing model, to scratch build from a plan, or to build to his own design. Being 40ins long, which is roughly a metre, the model should fit in the average hatchback fairly easily. The two part mast is 52.5ins high above the deck, so with care the model can be carried laid down and fully rigged in such a car. The method of building to ‘own design’ is fast becoming a popular choice and is producing some attractive models with both style and performance.
Enjoy more Model Boats Magazine reading.
Click here to subscribe & save.
For a good number of years I have had a great interest in building 1:24 scale Thames barges to sail in competition, where I enjoyed a fair amount of success in the Bowsprit Class, due much to my building ultra lightweight models. This was achieved in the main, mostly by having a lightweight timber construction of balsa and 1/64th inch (approx 0.5mm) ply sheet. As much sail was carried as the 6lb lead keel would allow for the maximum size of polyester/cotton sails on the pine mast and bowsprit. All this helped me enjoy good sailing.
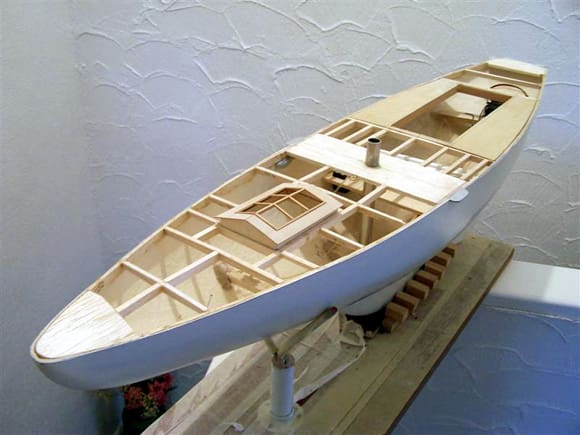
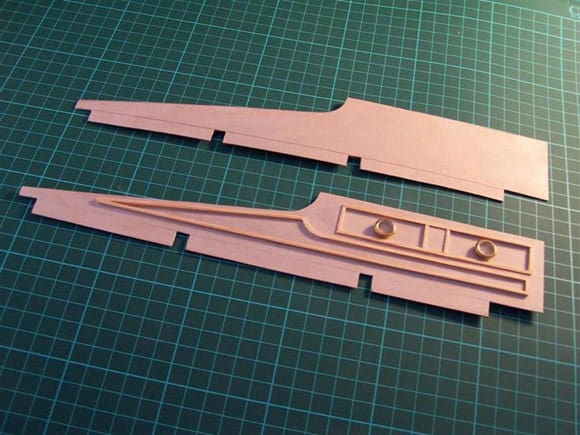
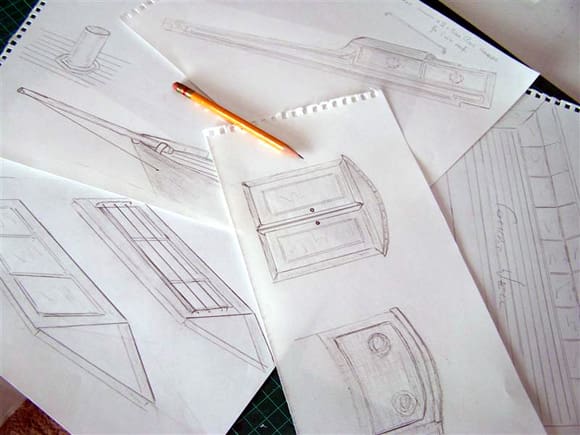
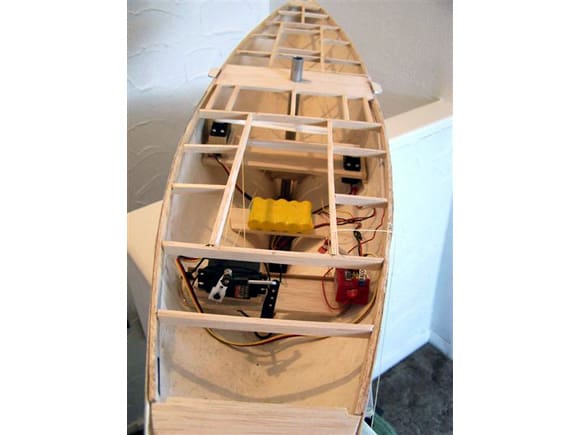
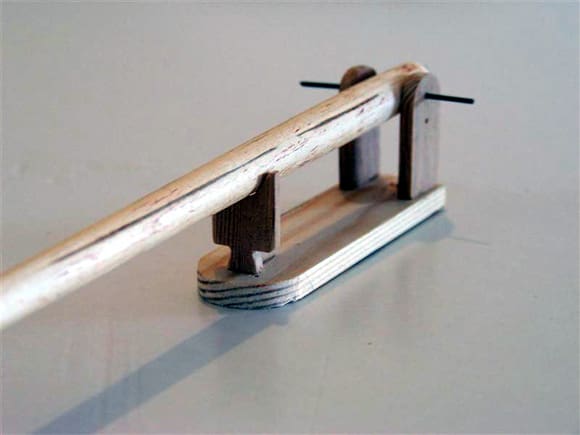
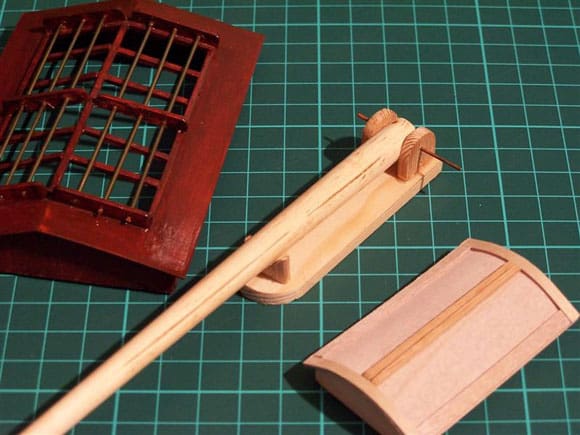
Pic 7: Deck beams ready for sub-deck to be glued in place. Pic 8: Ply shaped to form cabin sides. Pic 9: Sketches for intended designs. Pic 10: Radio equipment positioned. Pic 11: Completed balsa deck supports. Pic 12: Mast and Boom attachments under construction. Pic 13: Bowsprit and its cradle made from pine. Pic 14: Some completed deck fittings.
Staying with the same formula when building the Moonbeam, I was rewarded with good performance and nice comments when sailing her, so I found no reason to alter the construction method or choice of materials for Monica II.
To get the build started, the well finished fibreglass hull was rubbed down with fine wet and dry paper, then into the fish pond to find the water line. Seven pounds of medium size lead shot was poured into the inner keel space and proved to be the correct amount of ballast which was then removed and stored until needed.
The well moulded hull is already finished in white, but I decided on having a bright white gloss finish. Before the spray work is started, it is as well to build and complete the rudder, together with its associated fittings, so as to have the same overall paint finish. The rudder tube enters the inner hull at a laid back angle and mounting the shelf for the rudder servo at the same angle proved to be the best method for easy connection and movement.
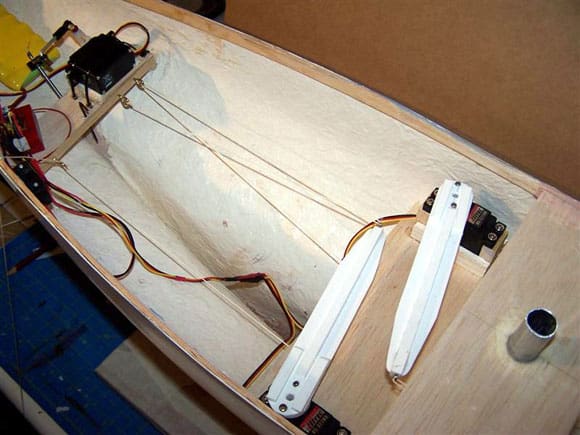
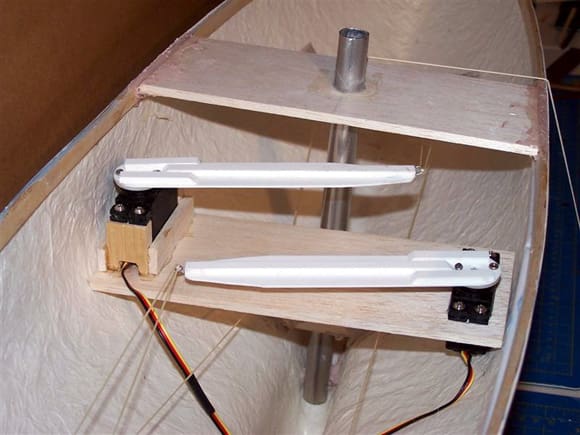


Pic 15: Deck planking being laid. Pic 16: Main rear cabin sides. Pic 17: 0.25ins sq. balsa strip for deck supports. Pic 18: Winches and rudder servo positions. Pic 19: Arms of the winch servos. Pic 20: The positioned rudder servo. Pic 21: Fixing and supports for the mast tube.
If it’s your first build, take time when fitting out the inner hull with the radio equipment and battery positioning etc. Some thought should be given to planning a layout with the equipment affixed near to cabin hatches. Easy access to radio control items at the pondside in times of need can be very useful. The removable main cabin on my model allows easy entry into the on board equipment area and the forward deck skylight is easily removed for adjustment or repair of the sheeting/winch lines etc. The radio switch has been fitted above deck and is housed beneath an imitation hatch cover. Extra work was made on the entry area covered by the cabin with a 0.5ins wide gutter built around its edge, hopefully to cope with and ultimately prevent any rapid ingress of water over the deck as the model heels over in a wind. Aluminium paint was used to waterproof the gutter and a tube is fitted that has been routed to exit at the stern and drain the unwanted water.
Another tube used during the build was for the mast support. An eight inch length of 0.75ins diameter aluminium tube was cut to leave an inch protruding above the deck. The bottom section of the tube is held in place with a mix of Isopon P38 body filler and along with a touch of epoxy resin adhesive at the mast/ deck section, the assembly makes for a good strong fitting. Care to set the tube straight and upright is important, to ensure the sails set correctly.
With the inner hull and balsa deck supports in place, a shaped sheet of 1/64th inch ply with the cabin and hatch areas cut away was glued to the deck supports having been carefully positioned and weighted down. I then proceeded with the deck planking, but before the planks go down, it’s a good idea to enhance the finished detail of the deck by giving the fitted ply sheet a coat of black paint which serves to represent calking when the planks are in place. The planks were all cut from 1/64th inch ply sheet and held place with yellow tube UHU adhesive. This is not liked by some for model work, but I find it very strong and waterproof. A few off-cuts of the planking can be used as spacers when laying the planks and they help produce a neat and tidy finish. Two coats of clear gloss varnish completed the deck areas.
With the decision to complete the model as an ‘own design’, it’s an enjoyable task creating which shapes and sizes you think will suit. Another of my many pastimes is sketching and painting and a pleasant few sessions were had with pencil and pad bringing to fruition shapes that look the part. If ideas do not come easily to you, check out some of the magazines that specialise in full-size sailing craft. Many of the older style yachts featured are fitted with the best of detailed timber work with all the dark stained sections polished to a high shine and contrasting with the salt water bleached decks.
Better still if you can find one of these lovely craft at one of the popular marinas and can take a few photographs. There is no need to photograph the craft from bow to stern, but a few pictures of fixtures and fittings will greatly help with your model.
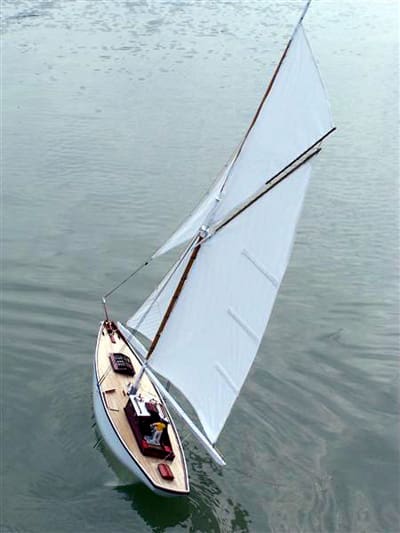
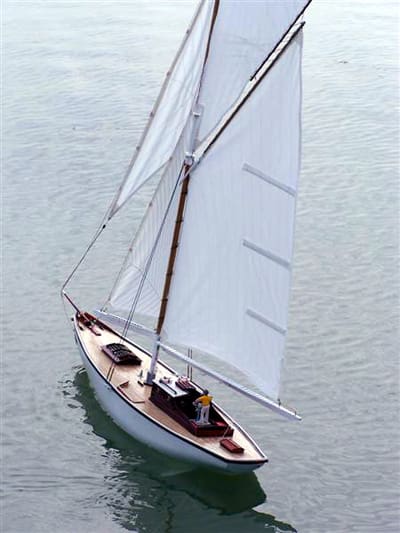


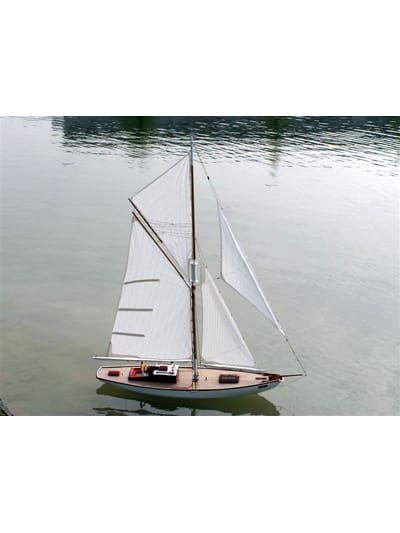
Pic 22 to 28:On the water!
Sails for all my scale sail models I make from polyester/cotton. The material is easy to obtain, being available in most haberdashery shops in a variety of colours and is easy to work with. The sail plan on the model is a touch of guess work, along with a mix from established rigs I have used on other models. I intend adding a larger jib sail to the sail set, not as a permanent fixture but to suit the wind of the day.
Winches for the model’s sail control have proved somewhat testing. To start with, I fitted two Supertec metal geared servos with extended arms. One to control the jib with the second working the main sail. They worked fine in light winds but would not handle a stronger blow.
This was solved by changing them for larger and more powerful Supertec servos.
These servos are distributed by J. Perkins. I purchased mine from The Dockyard Model Shop at Chatham, Kent. They advertise regularly in this magazine.
With her neat hull and high rig, Monica II builds into an attractive and practical model.
As I write, the March winds are still a little boisterous, but with the few outings so far, I feel confident I will be spending many more hours with Monica II in the coming months.

