DERMOT CURNYN investigates the latest technology
Say goodbye to the band saw, jig saw, fret saw and Vibro saw. Even the days of the craft knife and drill may be numbered and your whole toolbox could one day soon be replaced by a laptop and a 3D rendering kit as this is the coming age of laser cutting and 3D printing.
Laser cutting provides the facility to cut large or very small components with a previously unheard of precision, slicing through metals and plastics just as easily as the more traditional wood and it can simplify the production of multiple identical components. The well-developed and established technology is at least ten years old now and currently finds varied and extensive use in industry, including model kit production. Many schools, colleges and other institutions not only have the equipment, but also make it accessible to the public. As an alternative there are several online sites willing to cut components at varying and sometimes inflated fees, but costs are now reducing all the time.
Enjoy more Model Boats Magazine reading in the monthly magazine.
Click here to subscribe & save.
First steps
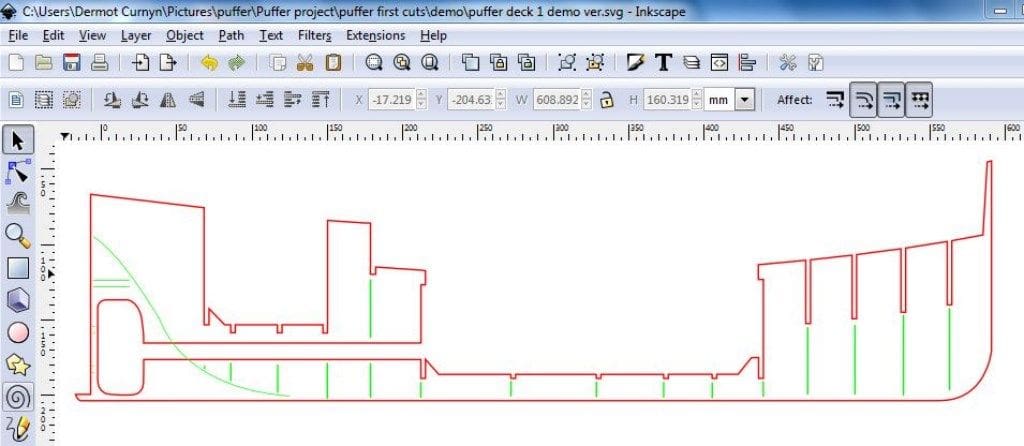
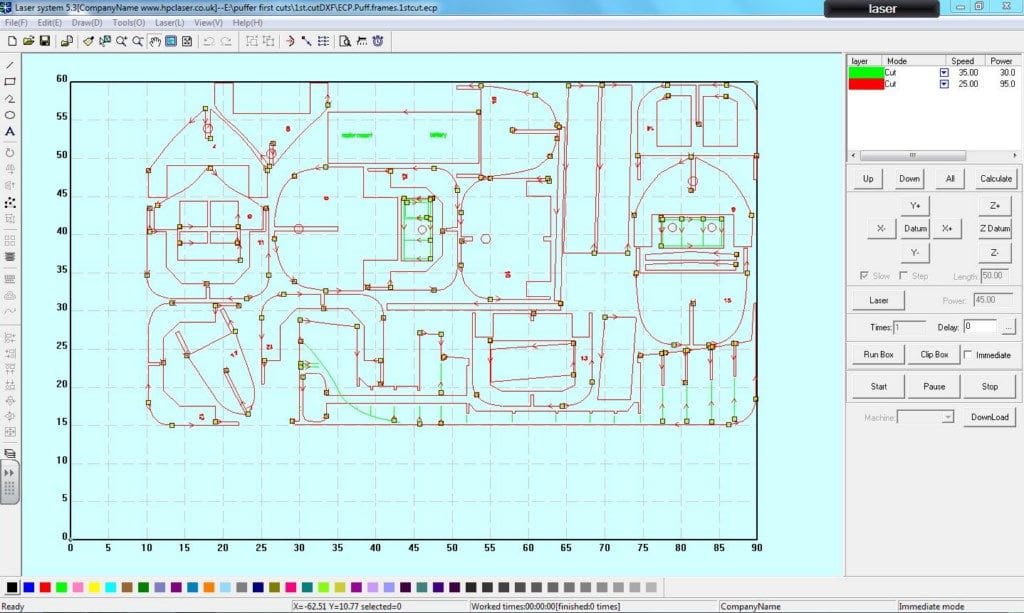
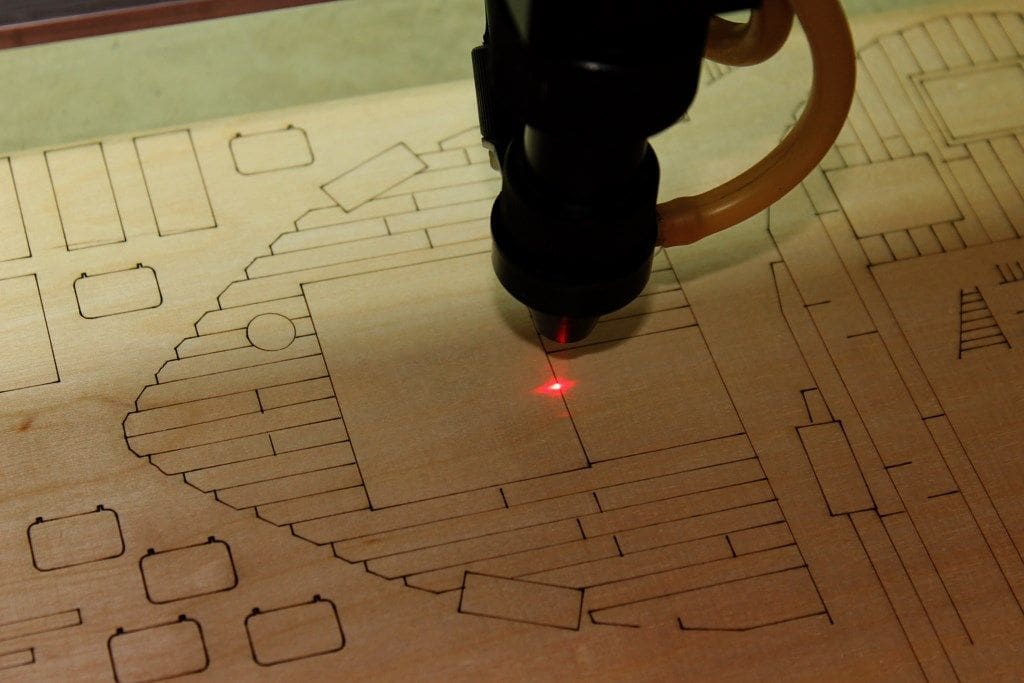
Any kind of laser cutting project starts with the drawings which must be produced on a computer, Photo 1.
Generally, the drawing process only requires the use of rudimentary on-screen tools, such as drawing lines, curves and basic rectangles or circles. In addition it is necessary to set line colours and thicknesses as well as rotating, copying and pasting objects.
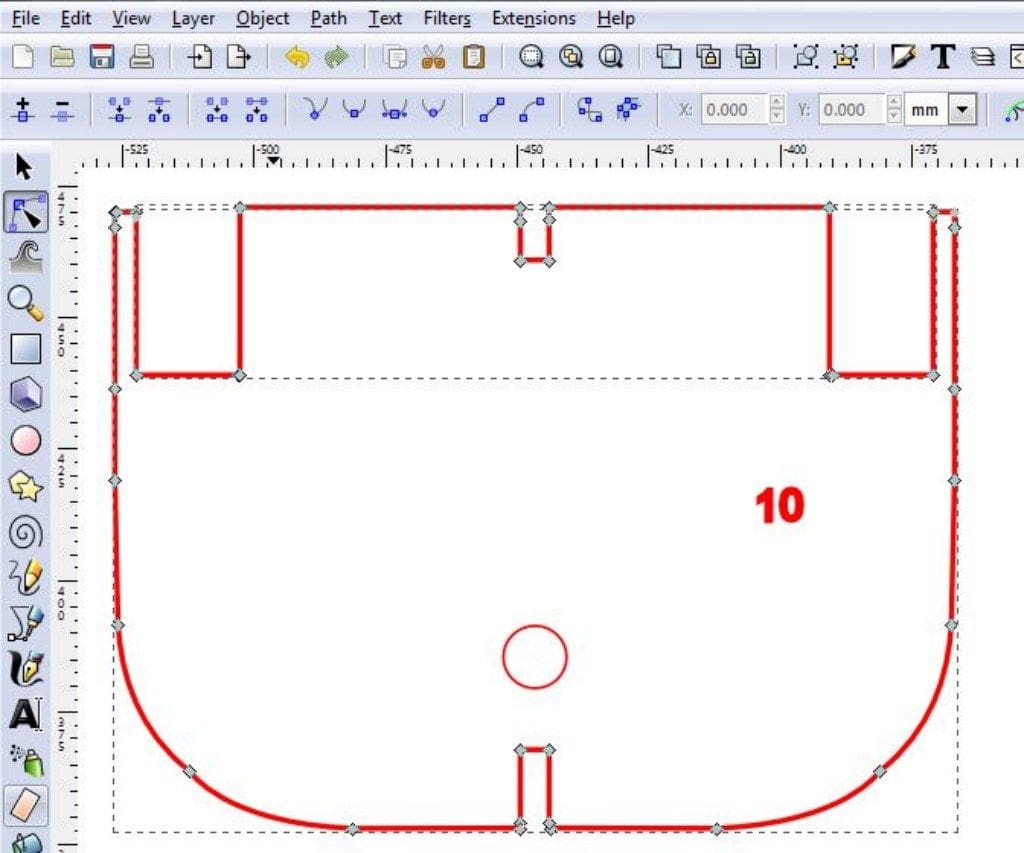
All lines are joined at corner nodes so that drawn shapes have fully enclosed outlines with no gaps or fill colours. This ensures that the laser cutter will cut smoothly and continuously. Many of the online cutting services will reject files if they are not drawn with this kind of ‘gap free’ precision, Photo 2.
Different colours of line can be set to correspond to different power and speed settings for the laser. One line colour might produce a shallow cut, to perhaps mimic deck planking or to show the position of deck fittings. Then by assigning a different colour a full depth cut can be produced.
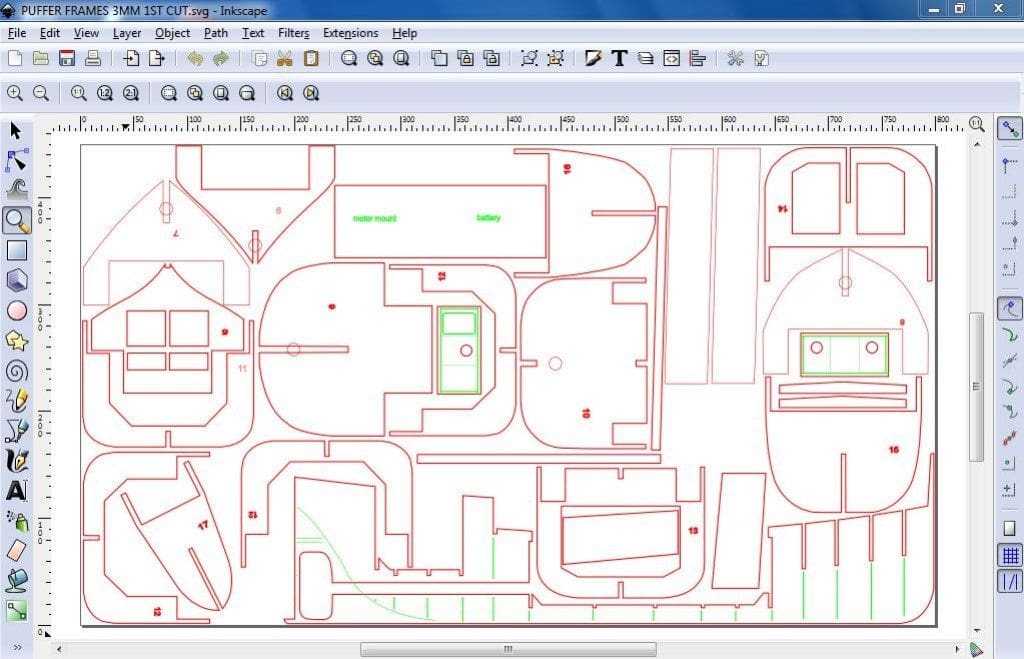
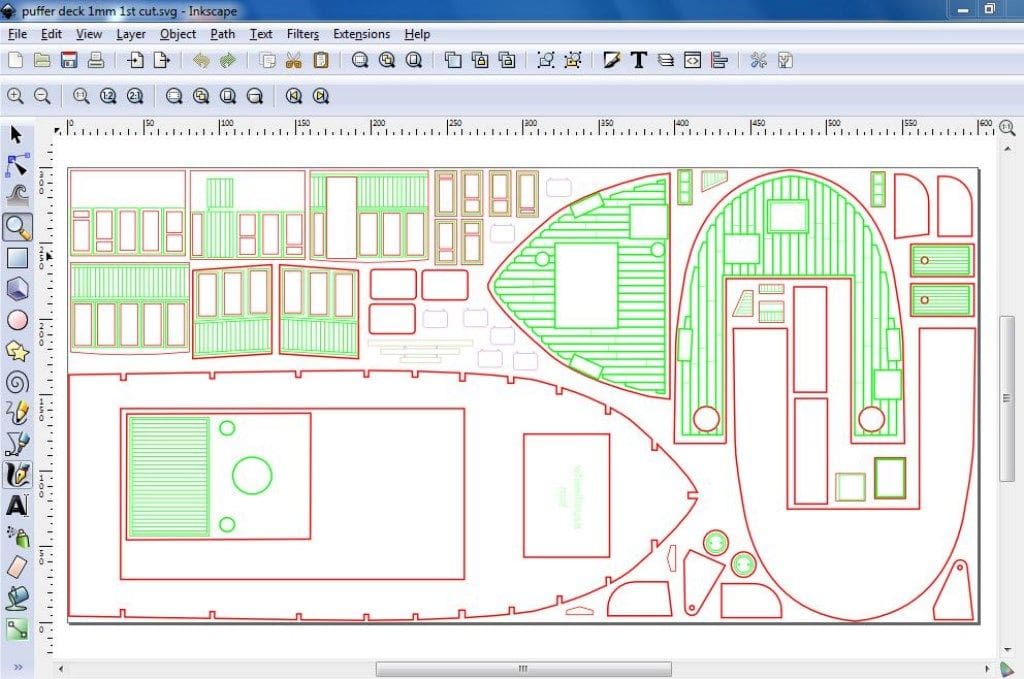
In these drawings here, red represents the full-depth cutting colour of line, and green is used for the shallow cuts. Sticking to standard red, green or blue ensures the line colour is easily recognised across different computer platforms, Photos 3 and 4.
To reduce cutting time and save on wood as well as laser cutter maintenance, it is advisable to create a drawing which shares lines. Centre cut-outs in frames and decking areas can also form components of the hull and setting out the components in a configuration which makes best use of the plywood sheet reduces wastage to a minimum.
All drawn out?
The drawings need to be produced with a vector type program to give a file type which will be recognised by the laser cutter. An advantage of vector program files is the ability to re-scale a project by simply stretching or squashing the completed drawing without any loss of image quality. This means that from the one set of master drawings, it should be possible to re-produce the ‘kit’ in a variety of scales, or even adapt a basic hull type into different forms, producing new shapes and proportions of frames for different projects.
The laser cutting machine
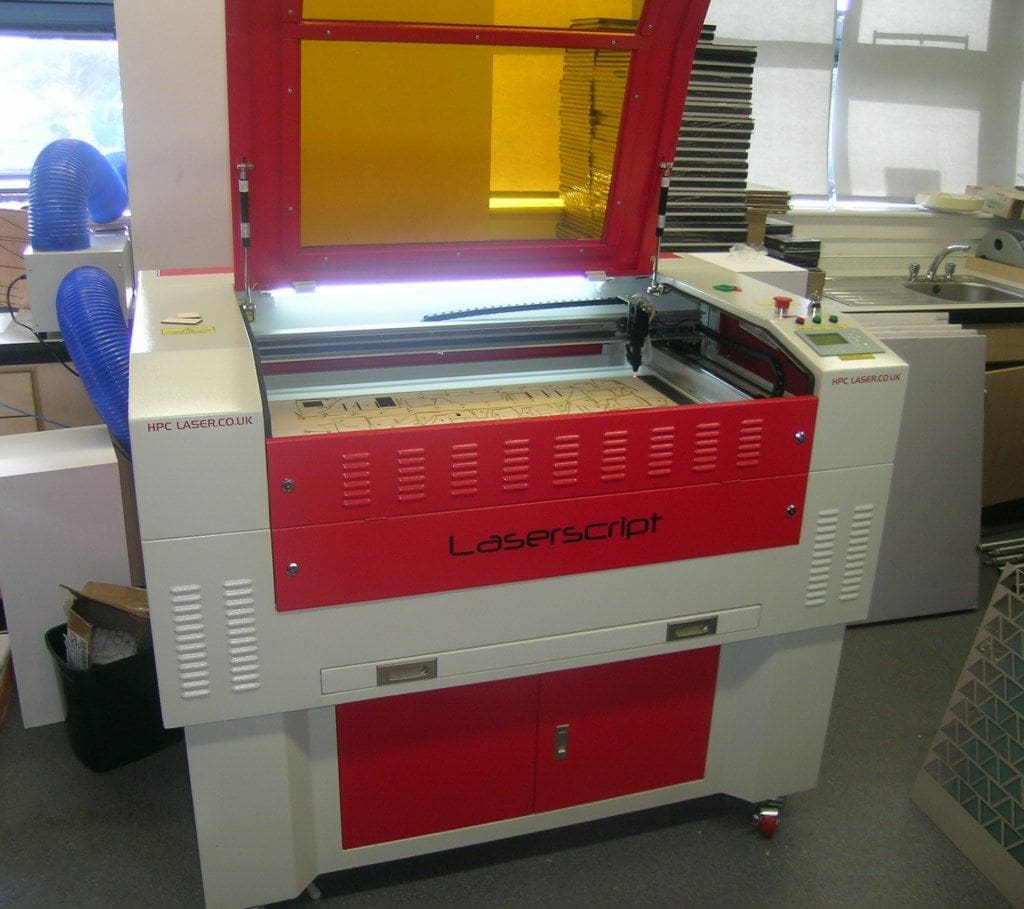
The laser cutter I have used, has a bed capable of holding sheet material up to 900mm (36ins) by 600mm (24ins) in size. I favour 3mm and 2mm thick birch plywood for model making, but a range of recommended materials can be cut, up to about 25mm thickness, Photo 5.
A computer, connected to the laser cutter, displays the drawing to be cut and the various controls which govern power and speed settings, dependent on the assigned line colour. Once these commands have been entered, they can be saved together with the drawing file, so that the operation can be easily repeated. Photo 6.
Laser cutters work very much in the same fashion as inkjet printers, with computer guided stepper motors providing the head movement. However, whereas the inkjet head only has a lateral left to right movement, the laser cutter has a second track allowing the additional simultaneous movement of the cutting head in a forwards and backwards direction. So, the laser is capable of traversing the entire cutting surface, creating simple or very complex shapes.
The laser itself is situated in a light tight box at the back of the machine. The light beam reflects off a 45 degree mirror at the end of this box emerging through a narrow opening to reflect in turn off another 45 degree mirror which directs the beam on to the last mirror on the moving head, set at a 45 degree angle to the horizontal. This reflects the beam down a short tube through a focusing lens on to the cutting surface. All this means that the cutting head itself is very light in weight and can zip around quite nippily depending on the depth and nature the of material to be cut.
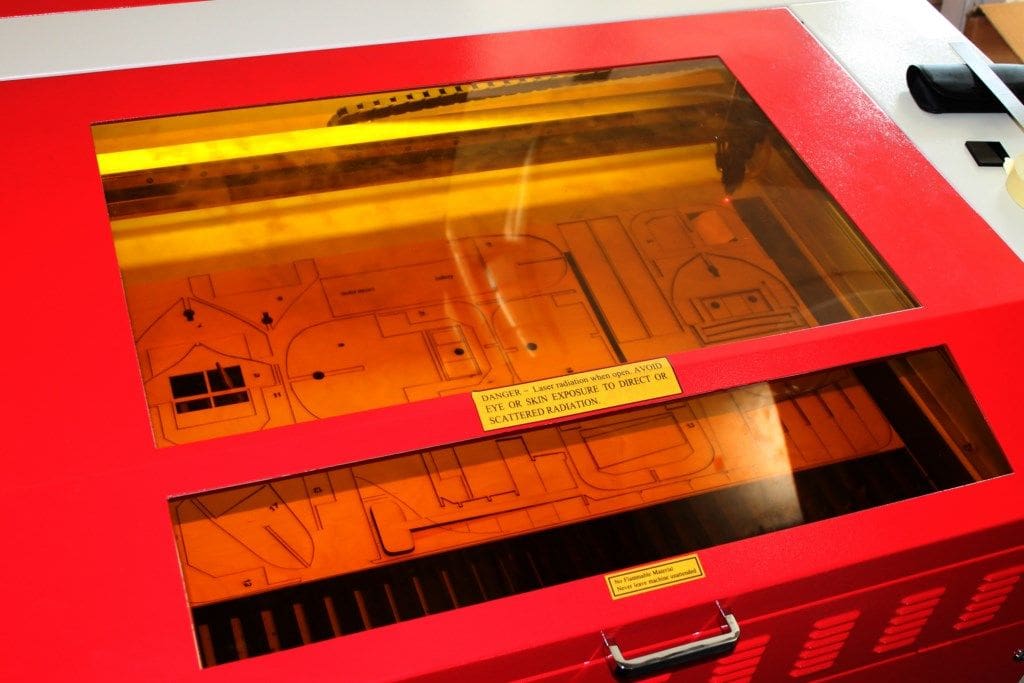
A tinted glass cover prevents any eye damage from the glare of the cutting flame as it does its business. The laser light itself is invisible, so the whole lot is contained in a weighty housing with micro-switches to cut off the laser should you decide to lift the lid for a closer look, Photo 7.
Materials
Making the first cut in cardboard saves costs, allowing any inaccuracies to be addressed and fine adjustments to be made to the computer drawings before proceeding to make the final cut from laser quality birch plywood, as in Photo 8. Only laser quality ply should be used, as anything else doesn’t cut as cleanly and small detail will not resolve well. In addition the vaporised glue from the plywood adheres to the innards of the machine and can soon build-up into a sticky marmite-like gunge on the mirror and lens’ surfaces, which is tricky to remove. Poor quality plywood also spits and sparks giving off a lot of smoke in the process. These fumes are at the very least obnoxious and potentially quite hazardous, so an efficient extraction system is a must.
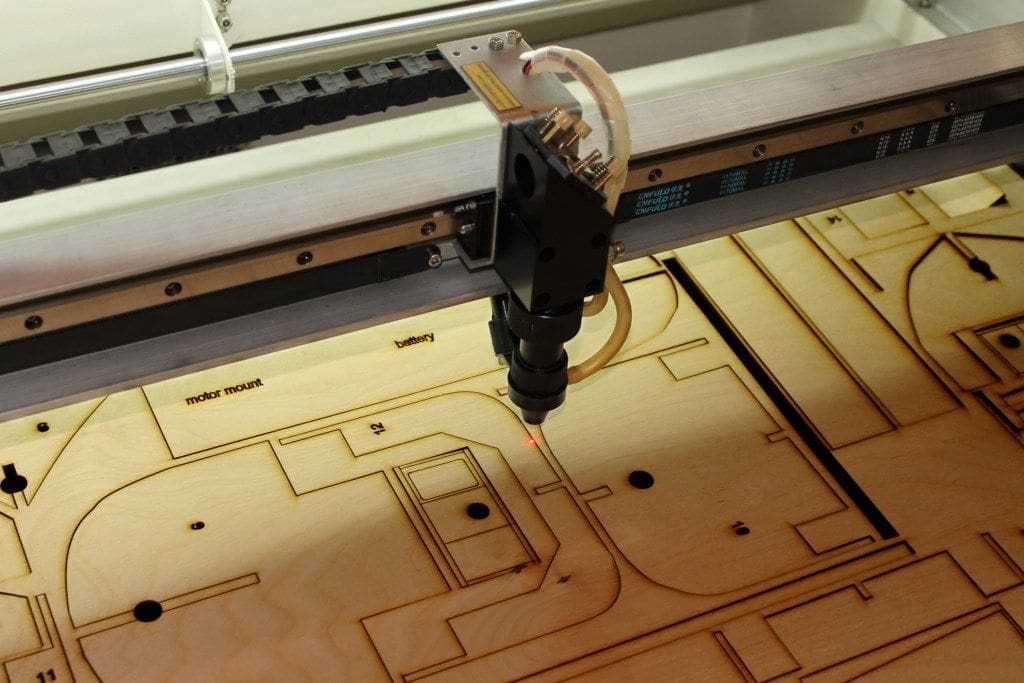
Photos 9 and 10 are close-ups of the laser cutting head doing its work.
Examples of what can be achieved
Photo 11 is of a Clyde Puffer sheet and here the printed and cut stern deck overlay is being removed from it.
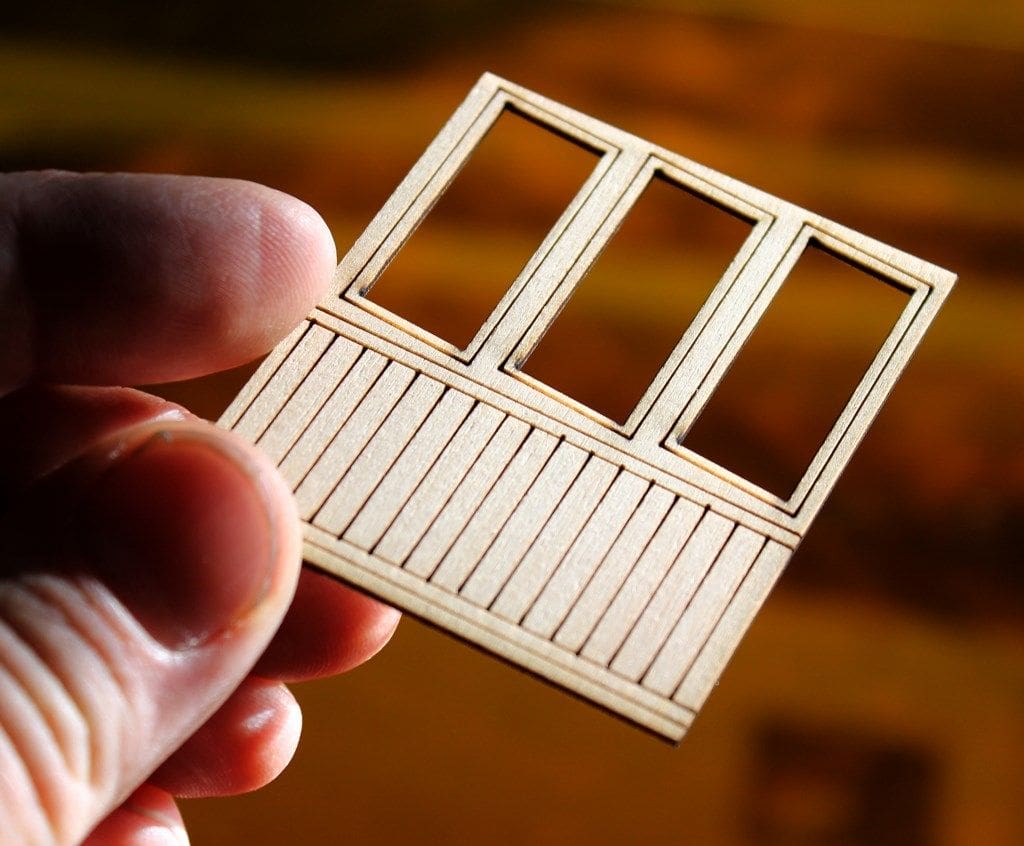
Photo 12 is of a wheelhouse side panel and note how easy it is to get the angles of the window frames all matching one another as the ‘real work’ was done on the computer.
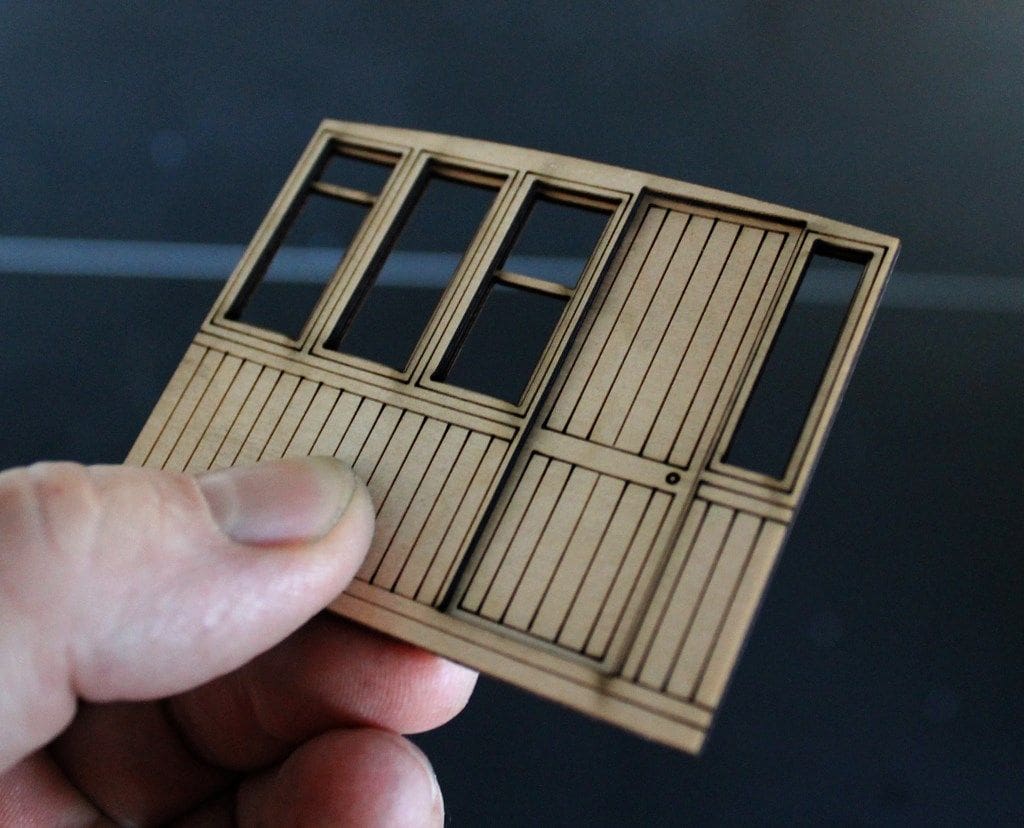
Photo 13 is of the rear panel of the wheelhouse with the door and window openings cut out.
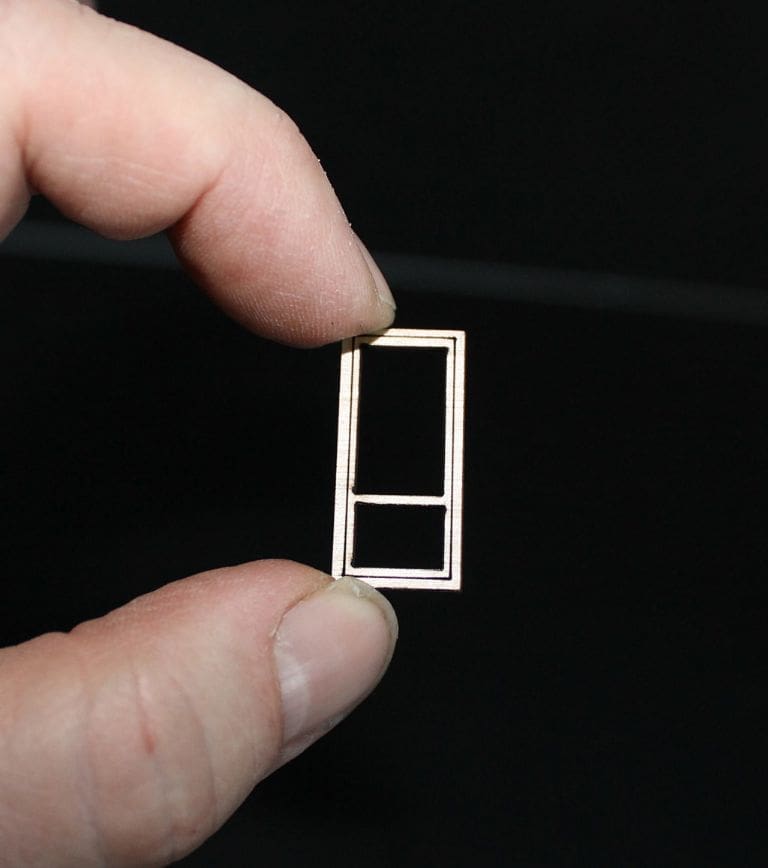
Photo 14: Wood of course burns, so there is a limit to just how small you can laser cut pieces from thin plywood. It’s quite difficult to get the balance correct, providing enough power to cut through the material without obliterating the fine detail. The window frame illustrated in this picture has slightly radiused corners as a result of this process.

A bright future?
Laser cutting is part of the continuing development and blending of old and new technologies, introducing a fantastic degree of detail and accuracy for model makers. In addition, the speed of component production allows for quick assembly, with very few alterations or corrections, but costs are still pretty high. I obtained quotes for cutting from plans in 3mm plywood from an online service and they were looking for over a hundred pounds for the components of just one model. So, prices are still prohibitive but they are dropping as competition increases in the marketplace, and a scratch builder might feel the money to be well spent in terms of accuracy and time usage.
If you can find a local service to do the laser cutting, the overall costs can be dramatically reduced. My local Contemporary Arts Centre allows access to their laser cutter for around £10 per day and all you need to do is to supply the material and of course the computer files.
Greater savings can be made if the drawings are kept simple with less cutting and fewer parts as the online laser services base their quotes mainly on the ‘cutting time’ required. A complex drawing with many more cuts taking more time on the laser machine is a much more costly venture with the material costs being the least expensive part of the whole process.
It wouldn’t be surprising if the day is not too far distant when purchasing a model kit will consist of going online to the manufacturer, choosing your model from the range, perhaps with bespoke variations, making the payment then waiting for the complete kit and instructions to download to your home 3D printer or cutter. These inevitable advances are in the pipeline, so please don’t be apprehensive, embrace the new technologies as it’s only progress after all!
PT 18 ELCO boat
For your interest, I am also including some pictures of my current project which is from a Model Boats Free Plan for an ELCO PT 18 drawn by Al Ross to a scale of 1:32, first presented in issue No. 569, published 1st May 1995.
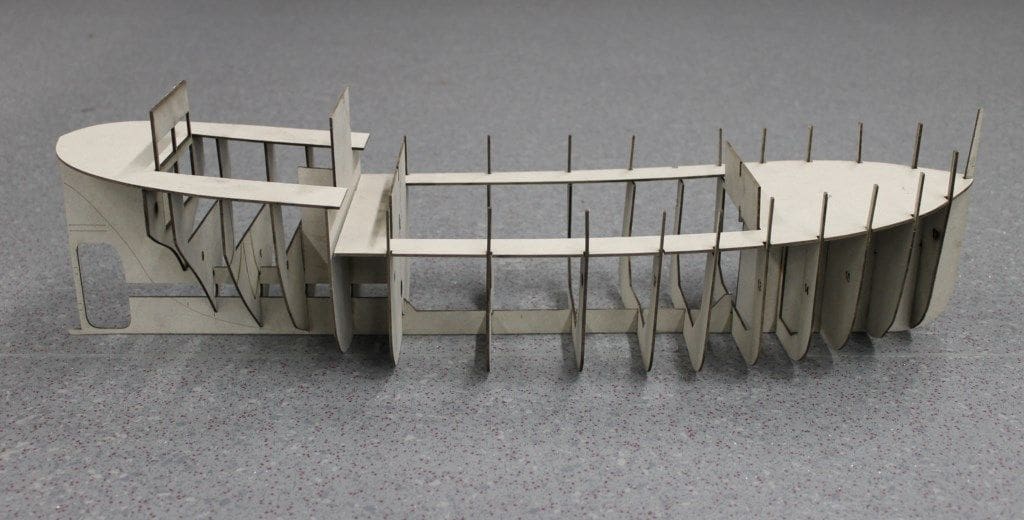
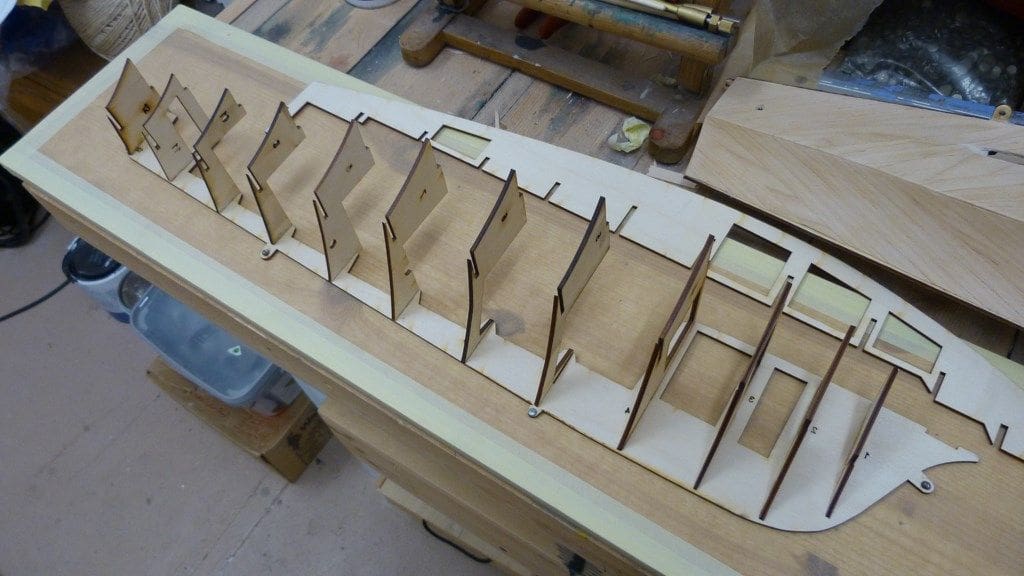
Photo 15 is of a ‘hull half ‘being assembled. The hull is made in two halves for convenience and the laser cutting process means that that the two sections match one another perfectly. Included on the laser cutting computer file are ‘tags’ with holes to enable the keel frame to be temporarily held to the building board.
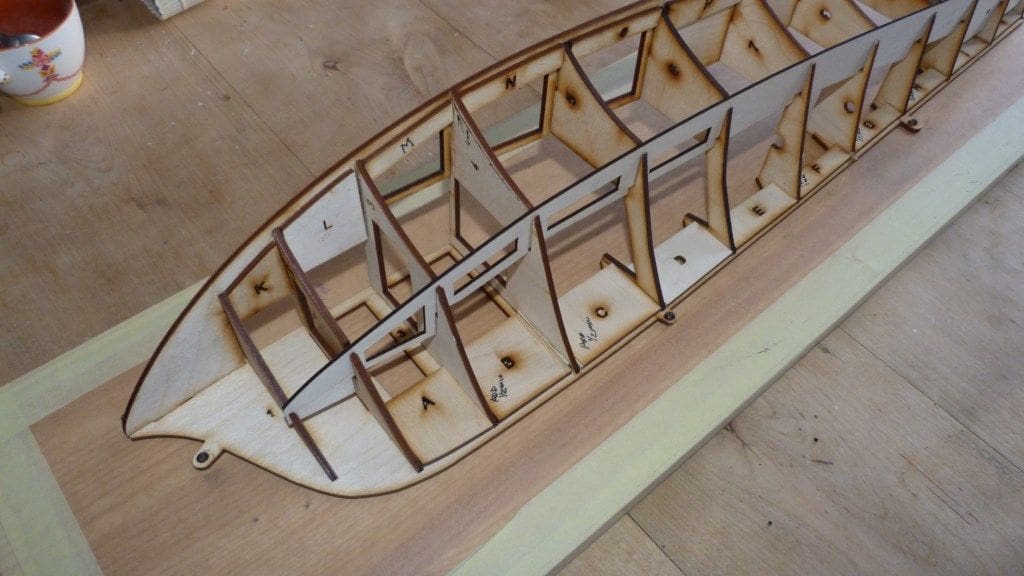
Photo 16 is of the chine support with its pre-cut lightening holes.
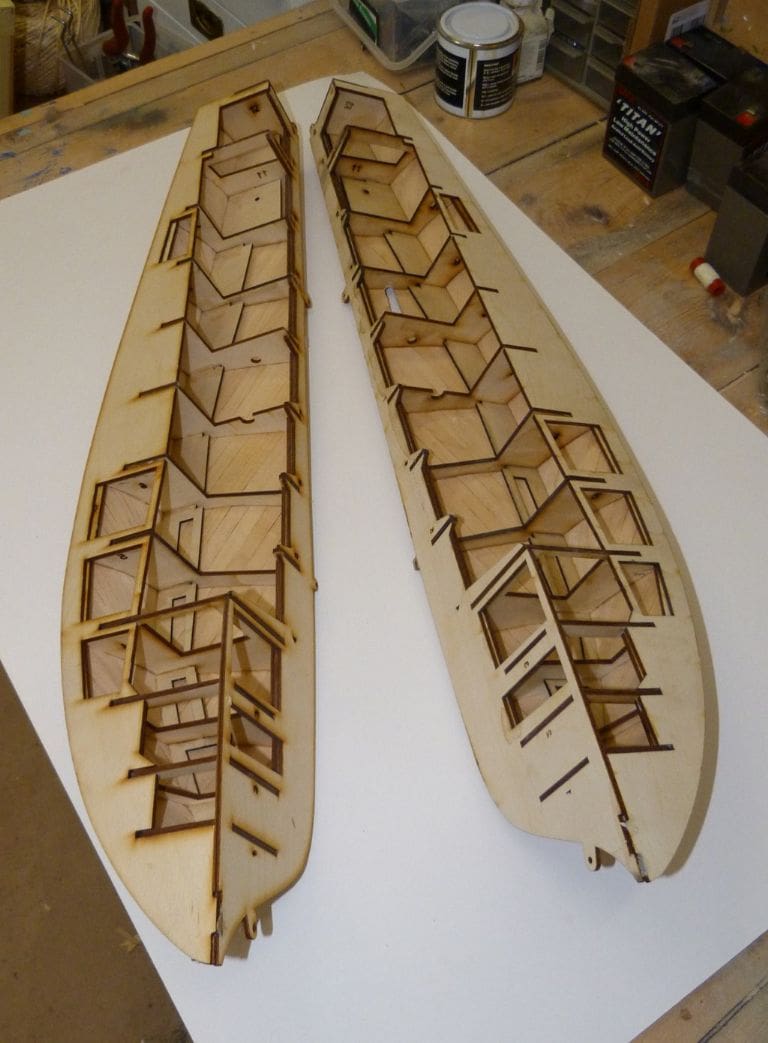
Photo 17 is of the two hull halves ready to be joined. The assembled pre-cut frames have been diagonally planked before joining. Sorting out the alignment of the propshafts and motors is very easy when building the hull in this way.
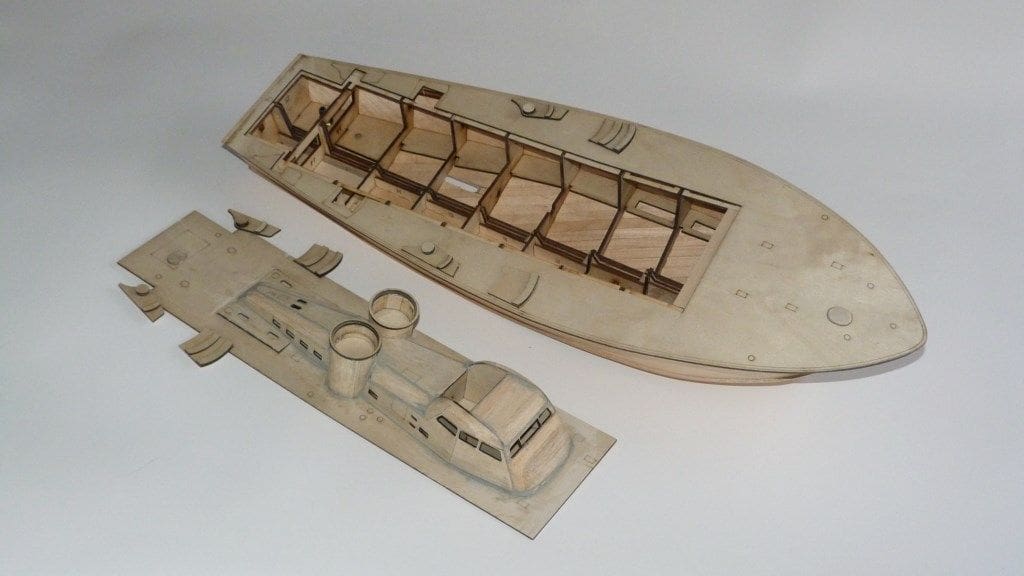
Photo 18 is the basic complete hull of PT 18.
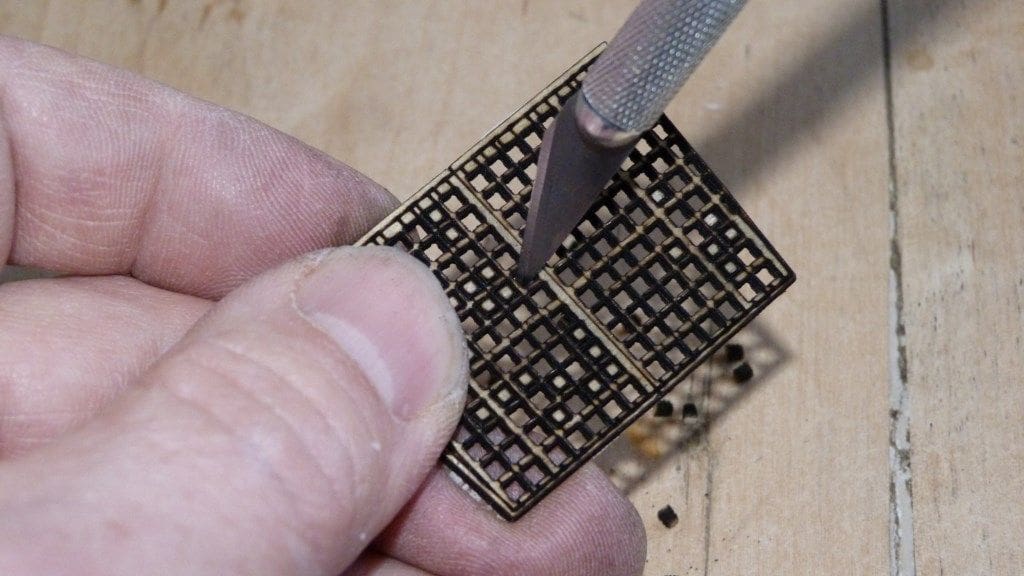
Photo 19. A laser-cut grating and this also shows what can be done with the technology for small parts.
Equipment and materials
Software
Inkscape was used, which is free to download from: www.inkscape.org.
Cutting services
There are several online services out there. I got quotes from the Ponoko/Formulor site based in Germany.
Materials
3mm and 2mm laser quality birch plywood from: www.hobarts.com.
Laser cutter
If you can afford it! A Laserscript LS6090 60 Watt from HPC laser Ltd is around £6000, but the cheapest machine now starts at approx. £1200. As technology is increasing almost exponentially as the years’ pass, the prices are coming down. However, using someone else’s does have an appeal and will be economical.
Photo credits: All photographs are by the author. The ‘screen grabs’ are from Inkscape and Laser System 5 and are also by the author.

