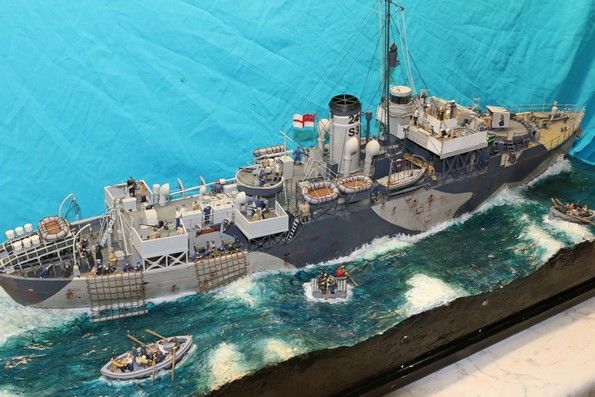
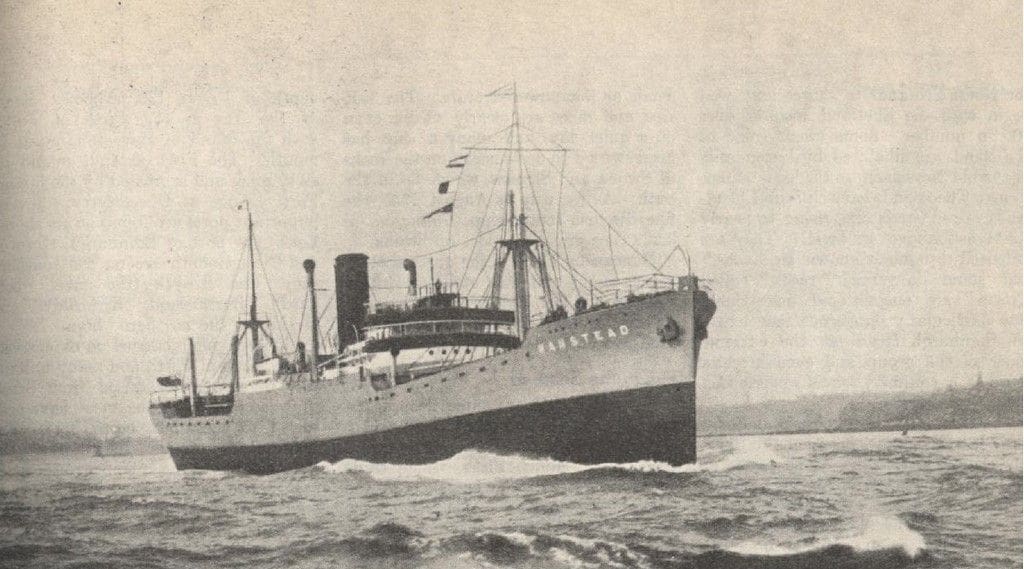
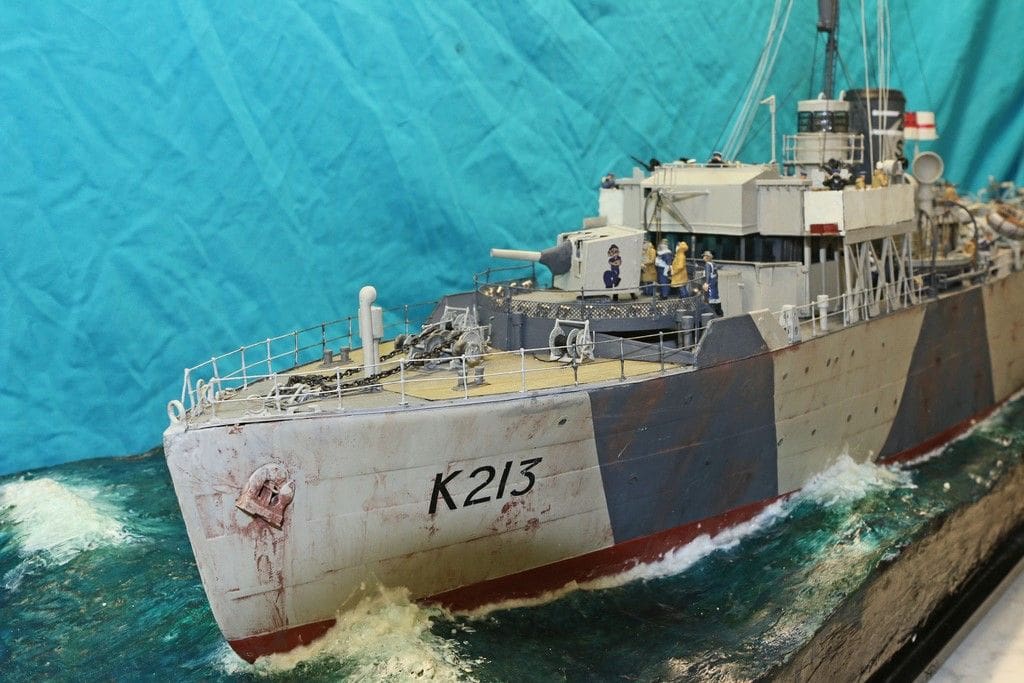
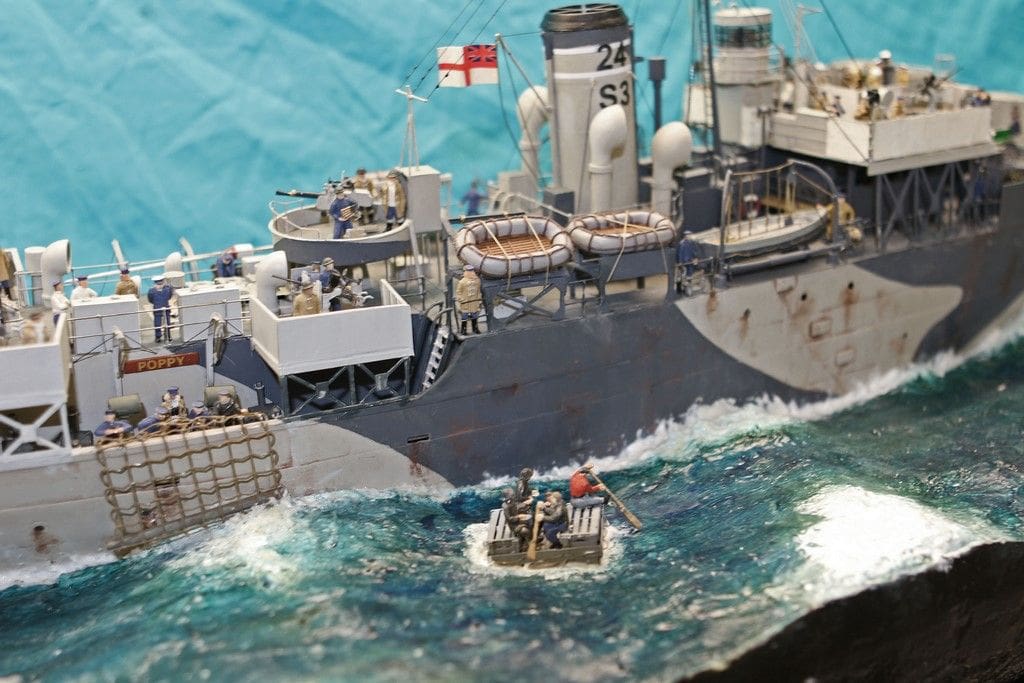
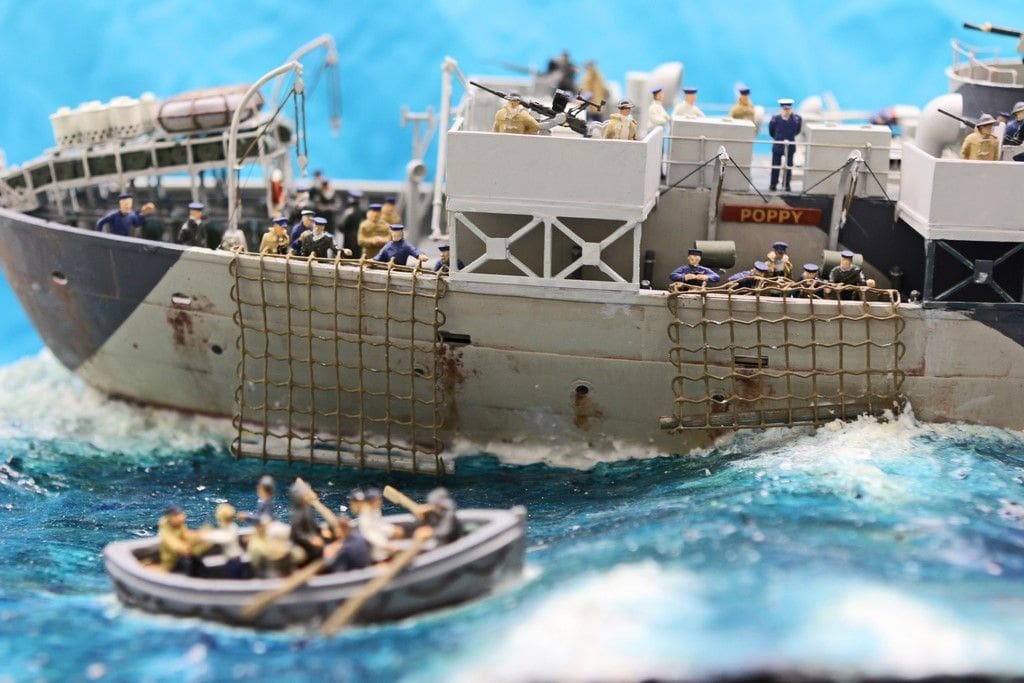
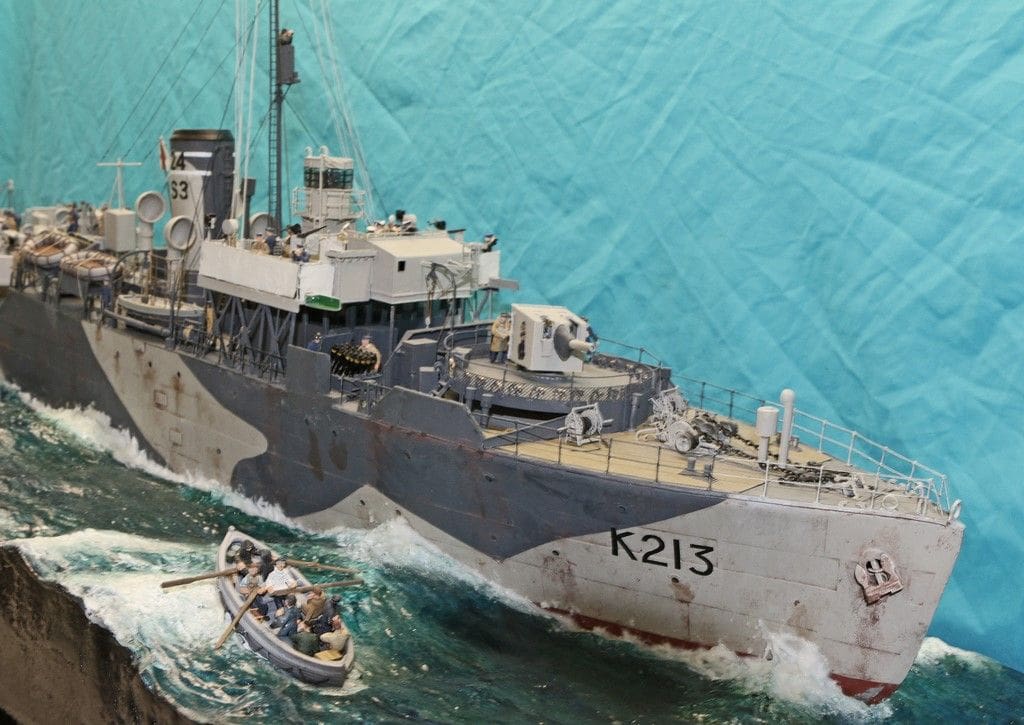
Chris Drage’s diorama depicts this WW2 Corvette rescuing the crew from the stricken S.S. Wanstead in April 1943
The Battle of the Atlantic was the longest running battle of WW2, being fought between September 1939 and May 1945 by British, Canadian and United States naval escorts, protecting convoys of merchant ships carrying the essential supplies to (and from) Britain, against the German U-Boat Wolf Packs. In his memoirs, Winston Churchill recalled that, ‘The only thing that ever really frightened me during the war was the U-Boat peril’. This battle reached a peak in early-1943, after which the numbers of Allied ships lost dropped as the number of destroyed and sunk U-Boats rose. This was due to the increased numbers (in particular) of RN escorts available, improved radar and sonar on them and the increased operational range of shore-based patrol aircraft. Escorts were also used more effectively by being placed into Escort Groups and HMS Poppy was in both E.G. 24 (Atlantic) and E.G.S. 3 (Gibraltar).
Having distinguished herself with the ill-fated Convoy PQ17, HMS Poppy continued through the remainder of the war providing safe escort to Atlantic, Arctic and Mediterranean convoys as well as being involved in Operations Torch (North Africa), Husky (Sicily) and Neptune (D-Day landings). I suspect that the reason she carried so much AA weaponry was due to her Mediterranean excursions – notably for Operations Torch and Husky.
Enjoy more Model Boats Magazine reading in the monthly magazine.
Click here to subscribe & save.
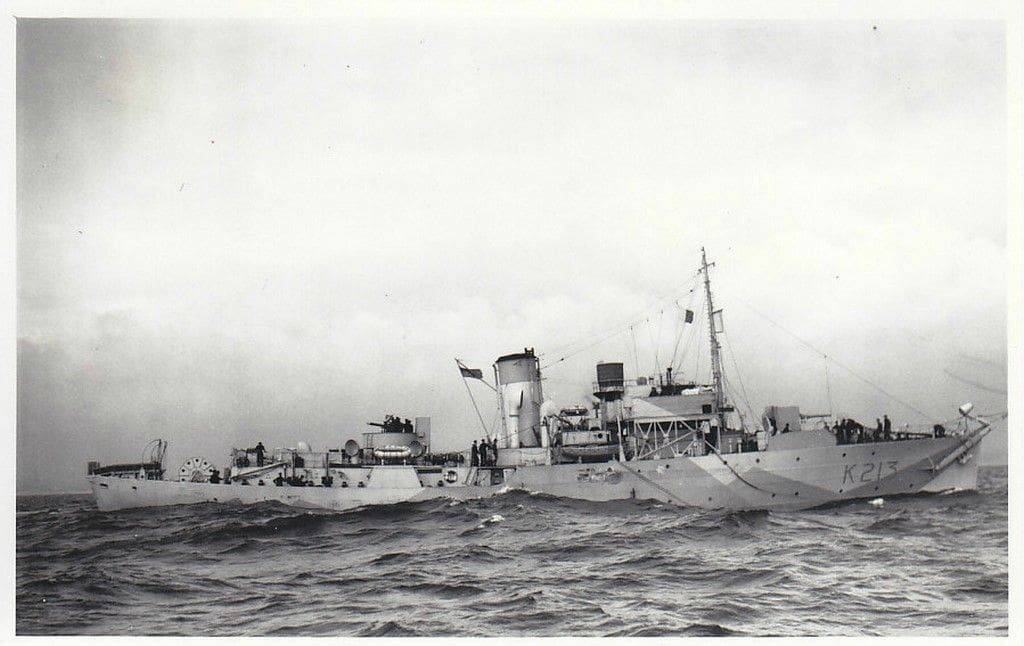
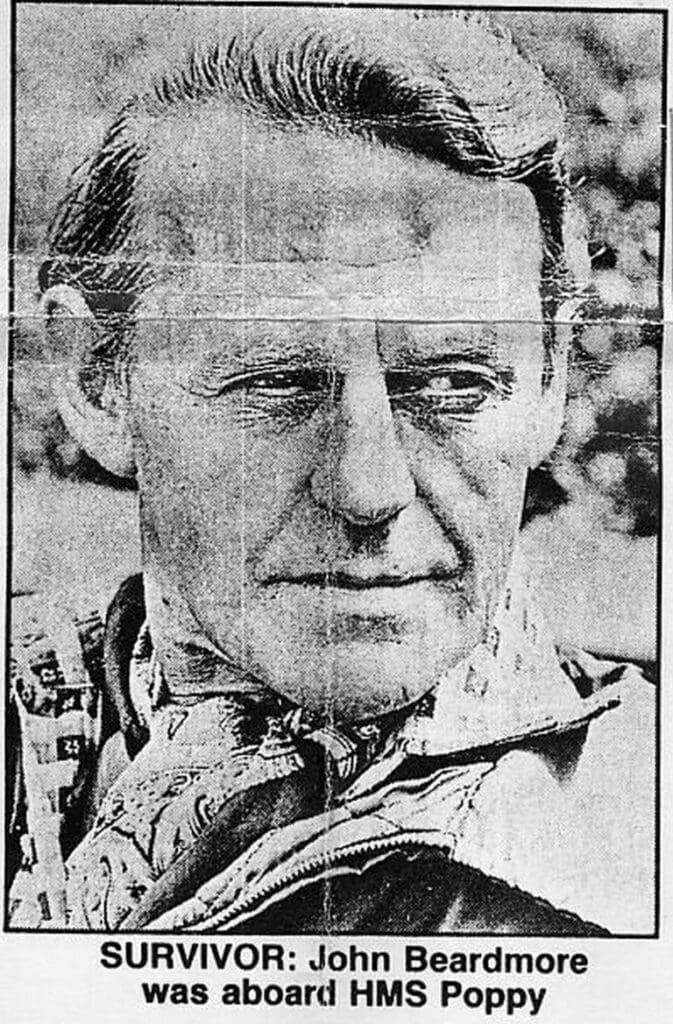
The main difficulty with modelling HMS Poppy depends entirely on the date at which she is depicted. The diorama as shown here, features a model of her as in April 1943 when she was escorting Atlantic convoys ONS 3 and SC 3 to, and from, St Johns, Newfoundland as part of Escort Group 24 (including the warships Lotus [SOE], Starwort & Dianella). With no plans or drawings available, I was fortunate to obtain information from her then navigating officer, the late John Beardmore, whose knowledge was indispensable in the absence of any clear photos of her at that time. Sadly, no photos exist of her port side, as it appeared after her refits. The only clues were two photos taken from the crow’s nest looking fore and aft and John Beardmore’s memories.
John dated the first forecastle extension as being December 1942 and the second extension being just prior to Operation Overlord in 1944. Apart from the official Admiralty pictures of 1942, photos are not dated accurately, so we don’t really know how far her forecastle was extended after December 1942. Although John records the date of the well-known starboard view of her as ‘Tripoli 1943’, I suspect that this was actually later in 1944 after her second major refit. However, at present there is no way of conforming this. The only clue we have as to whether the long forecastle extension was completed in 1942 is HMS Bryony which had a similar length extension during that year.
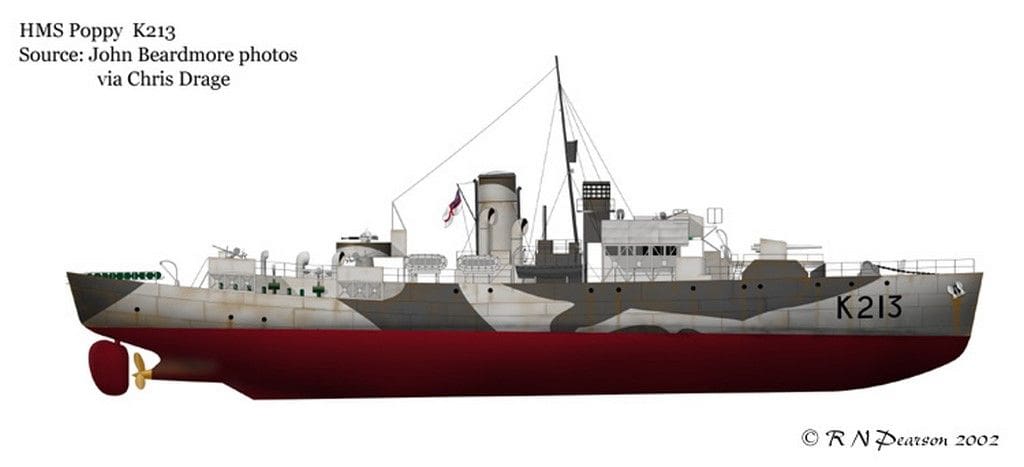
As far as camouflage is concerned, HMS Poppy’s arctic Admiralty Dark Camouflage (507A, 507C style) was asymmetrical port and starboard. Indeed I think HMS Poppy must have been the most asymmetrical of all the Flower Class corvettes. The two single Oerlikon sponsons on the starboard side were flared slightly on the bow-side of the screen whilst the port side sponson was a simple square box. Similarly, when she was fitted with the sixth Oerlikon, the forward port side gun had no shield or sponson, but again in John’s words,
‘…was abaft the lifeboat beside the funnel, very exposed and with no protection’. In other words, it was a simple deck mounting.
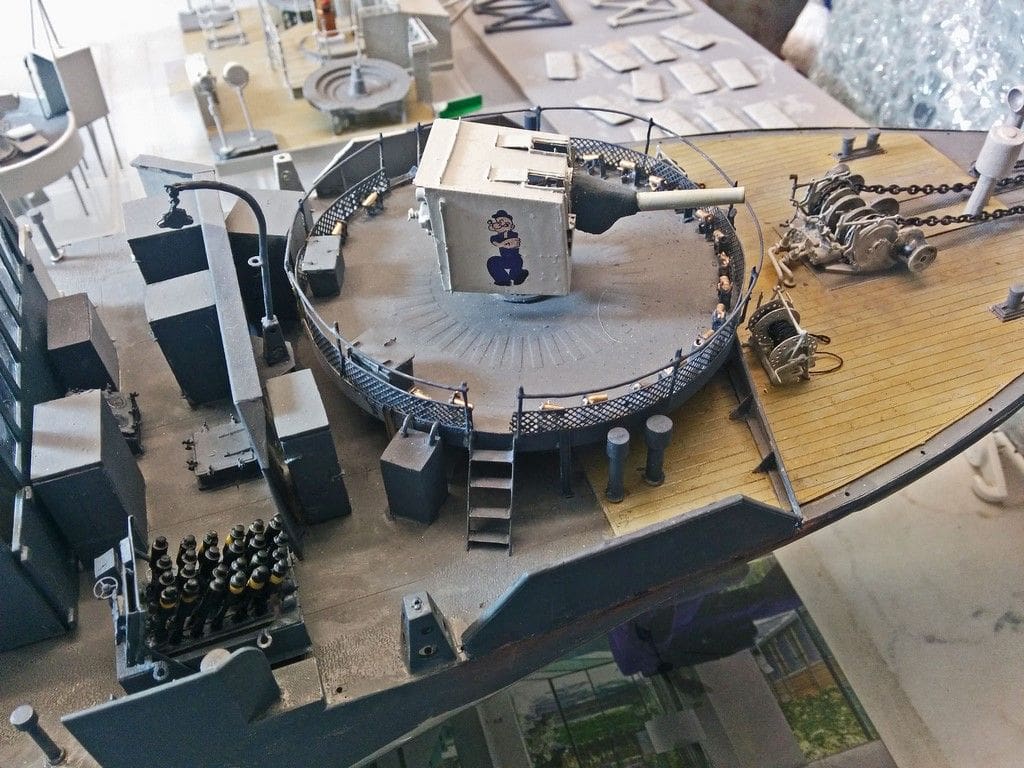
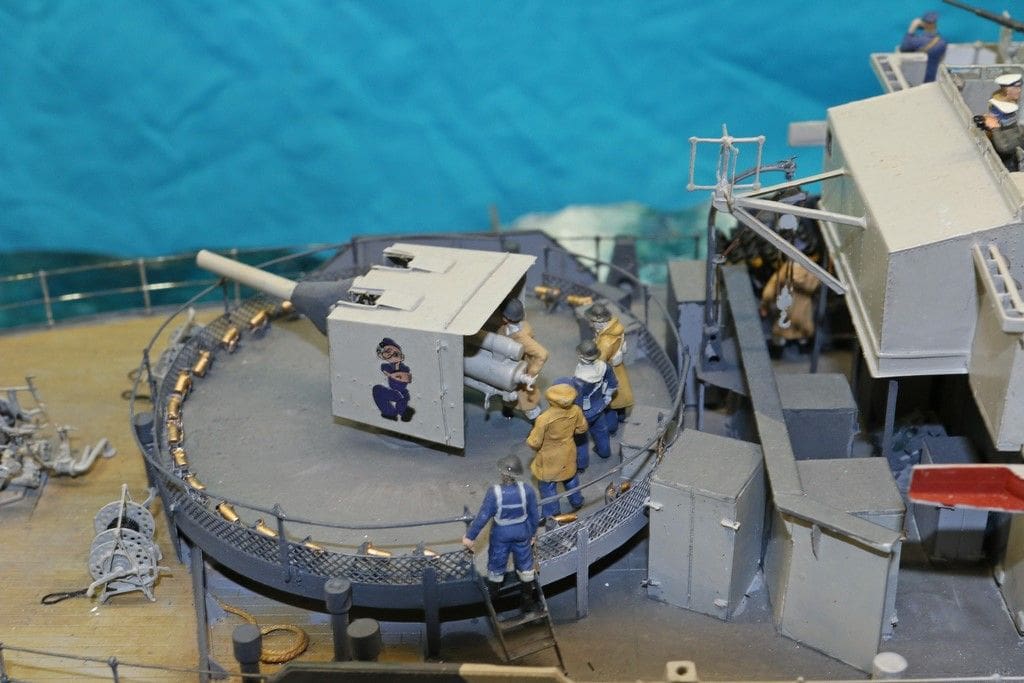
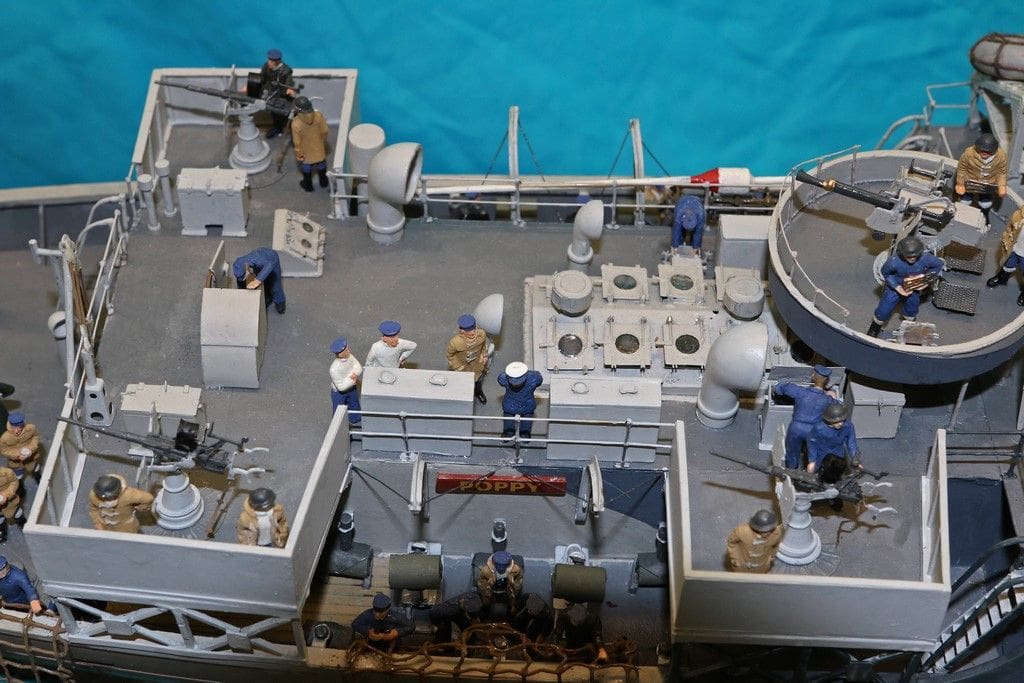
Similarly, she had an extra liferaft fitted to the starboard side. All this is due of course to the urgency of wartime and the refits being hurriedly completed, or perhaps even left incomplete. HMS Poppy always went to sea to the tune of ‘Popeye the Sailor Man’ playing from the ship’s tannoy, so it was only natural that the cartoon figure would also adorn her 4 inch gun shield. HMS Poppy’s distinguished war record can be followed on the website listed at the end of his article where I have reproduced much of the information as given to me first hand by John Beardmore.
From the few photos I had from John and the Imperial War Museum, coupled with further photos of HM Ships Bryony and Pennywort, and several key books, this all gave me enough clues as to how HMS Poppy may have looked. The diorama depicts HMS Poppy as she is about to rescue survivors from the stricken S.S. Wanstead which was torpedoed when in Convoy ONS 3 by U-413, but she did not sink. Here HMS Poppy is about to try to sink her, and on the bridge, Lt. Commander Neil Boyd (the skipper) is discussing the possibility of sinking the ship using depth charges or gunfire, each of which proved ineffective and S.S. Wanstead was finally dispatched later by torpedoes from the German submarine U-415. Meanwhile, apart from those deploying the scrambling nets, the crew is at action stations during this tense moment and every available member is on watch with binoculars looking for the telltale trail of a torpedo or any sign of a U-Boat in the ship’s vicinity.
The model
HMS Poppy was chosen for a number of reasons: To honour those who fought and died in the longest battle in WW2 (The Battle of the Atlantic), but also to honour my father Donald Drage and mother-in-law Poppy Rolfe, both of whom ‘did their bit’ during that conflict. The poppy flower is the symbol of remembrance and so it seemed appropriate all round.
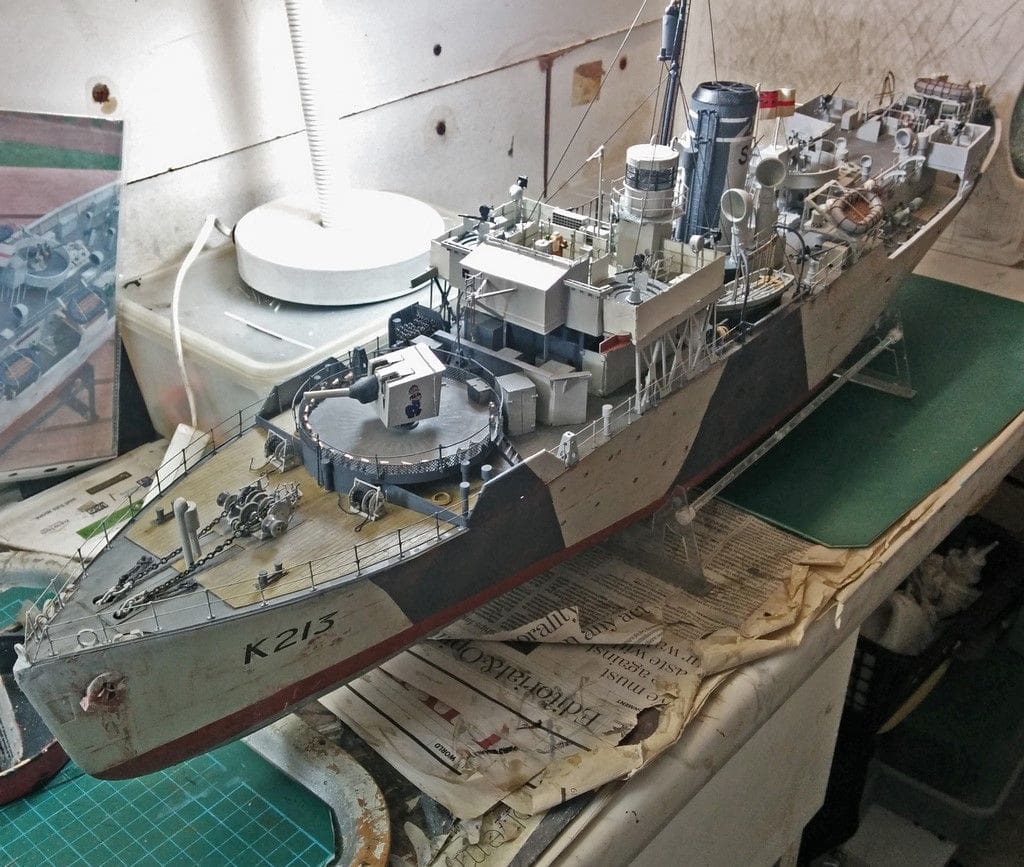
This 1:72 model is based on a Revell HMCS Snowberry plastic kit and the detailing sets offered by David J. Parkin’s Great Little Ships (website address at end). The plastic kit is produced from very old mouldings and it shows. The lack of fine detail is probably just about acceptable for a radio controlled model destined for a pond, but for a historically accurate model, it just won’t do. The etched-brass sets are a challenge to include, but well worth it when you see the results gained. David J. Parkins emphasises using solder for the etched-brass components, but in reality I just did not have the control necessary to use that medium so resorted to two packs of Cyanoacrylate glue, one thick and one medium, plus an accelerant for those moments one needs a quick grip and the first problem to solve was the forecastle extension.
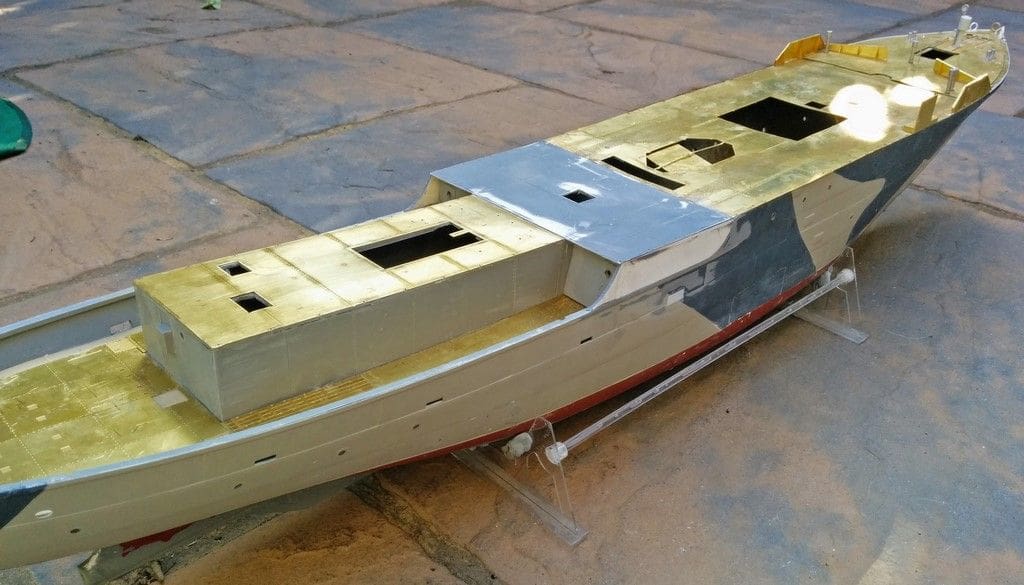
Forecastle
With no drawings or plans it was hit and miss using the few visual clues to hand and so it was using styrene (plasticard) that the Revell kit hull was modified, adding the etched-brass overlays until the hull was painted and the decks finished. The hull needed extensive rubbing down to remove most of the grossly over-exaggerated moulded plating. Once that was complete and the hull painted (the port side being from a sketch made for me by John), the scuttles were added. Decals were added which fellow corvette modeller, Bob Pearson in Canada made, printing them on his ALPS micro-dry printer. To complete this part of the project, ‘weathering’ was added, one of the most difficult things to get right. Corvettes typically gained a lot of rust and weathering on their hulls, but would seldom have rust stains above decks as in HM Ships this would be considered disgraceful and there would always be some wayward matelot whose lot it was to clean and paint any rust that might appear, as the boatswain or coxswain would see to that! A ‘rust’ paint mixed lightly with a black was used and to obtain the best effect does require observing as many photos as possible to see where the typical weak points are, such as the anchor chutes, scuttles, drains and plate joints etc. All paints used were either Humbrol or the White Ensign Models colours, the latter are now being available from Sovereign Hobbies.
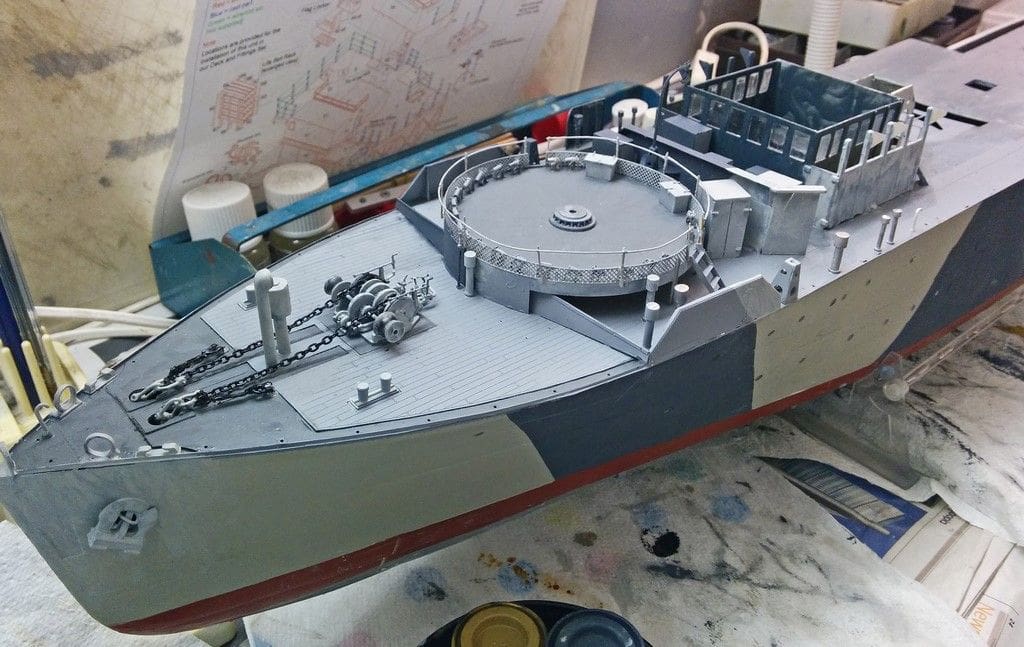
Detail work
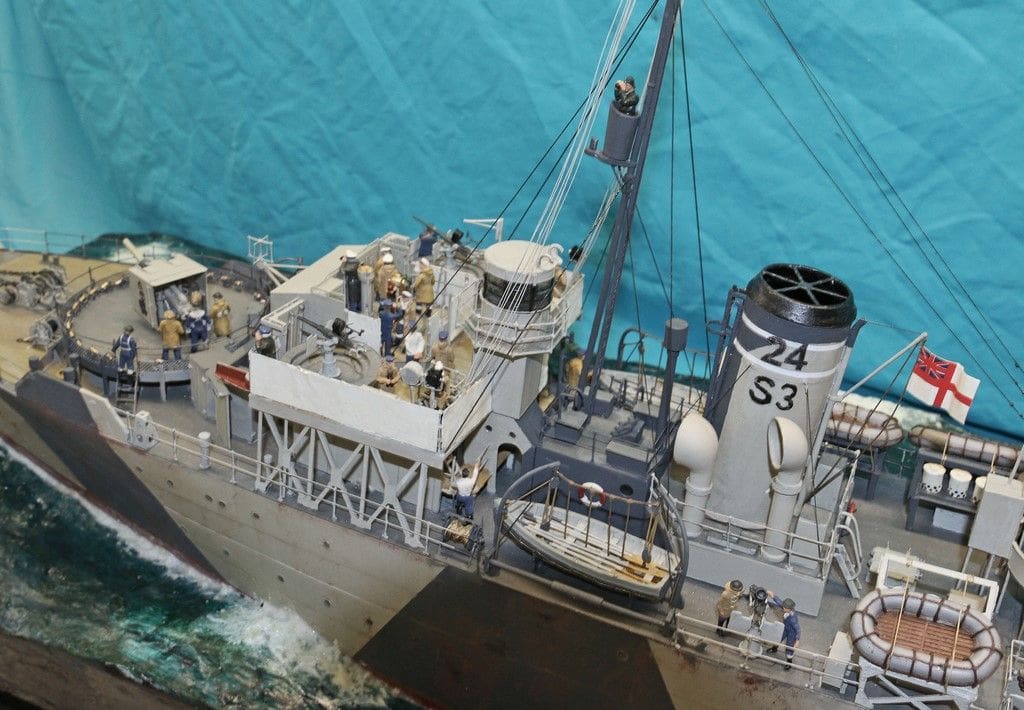
The general strategy was to complete HMS Poppy starting at her bow and working aft. So the foredeck with its winch, rope reels and various ventilators were all added after the hull and basic deck were completed, for which it was fortunate that the photographer in the crow’s nest also took a picture facing forward. The project continued pretty much following the directions given in the GLS etch kits and painting each part as work progressed using the few available photos and modeller’s ‘informed’ guess work. As to the deck fittings behind the gun platform, but just forward of the wheelhouse, the model is pure conjecture.
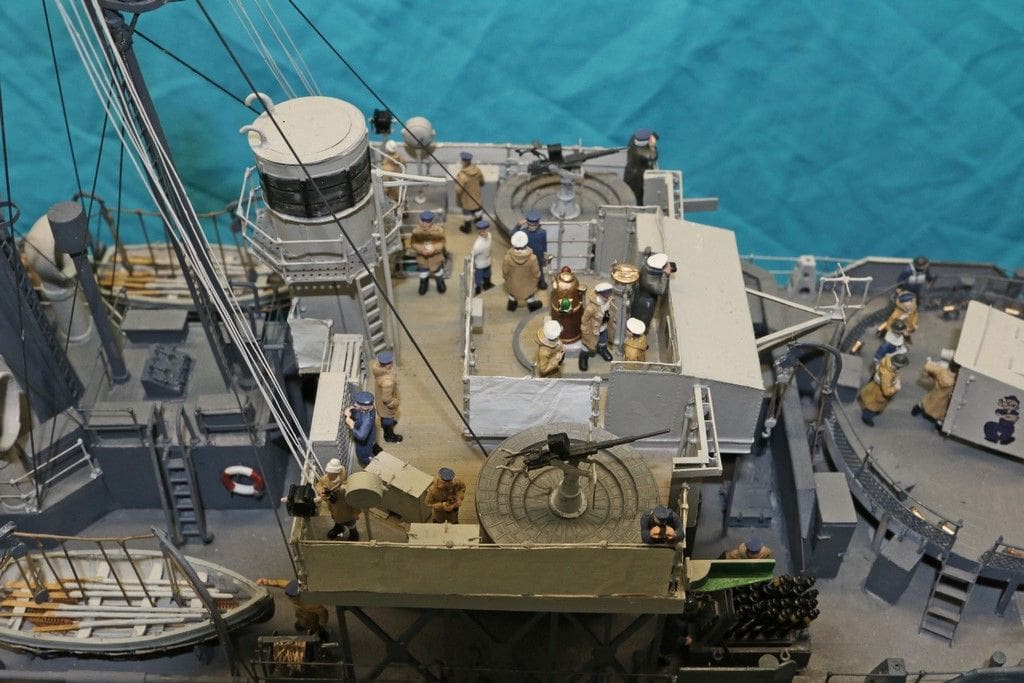
The GLS bridge kit with its supporting structures proved very challenging. To get an idea of what should fold-up into what, photos of other corvettes were used as well as the plastic parts in the kit. All the bridge components were added except the pipe rails which I judged better to add after the bridge was in-situ on the model. The wheelhouse was added to the deck using the plastic kit parts and with the etched-brass girder supports assembled, it was time to see if it all three items would actually mate successfully. It took a fair bit of tweaking and fudging here and there, but finally the superstructure was fitted in place.
The deck hatches were next, using Micro-Clear glazing for the windows in the engine room skylights and for the radar lantern on the bridge. These hatches were all added to the deck as the project progressed.
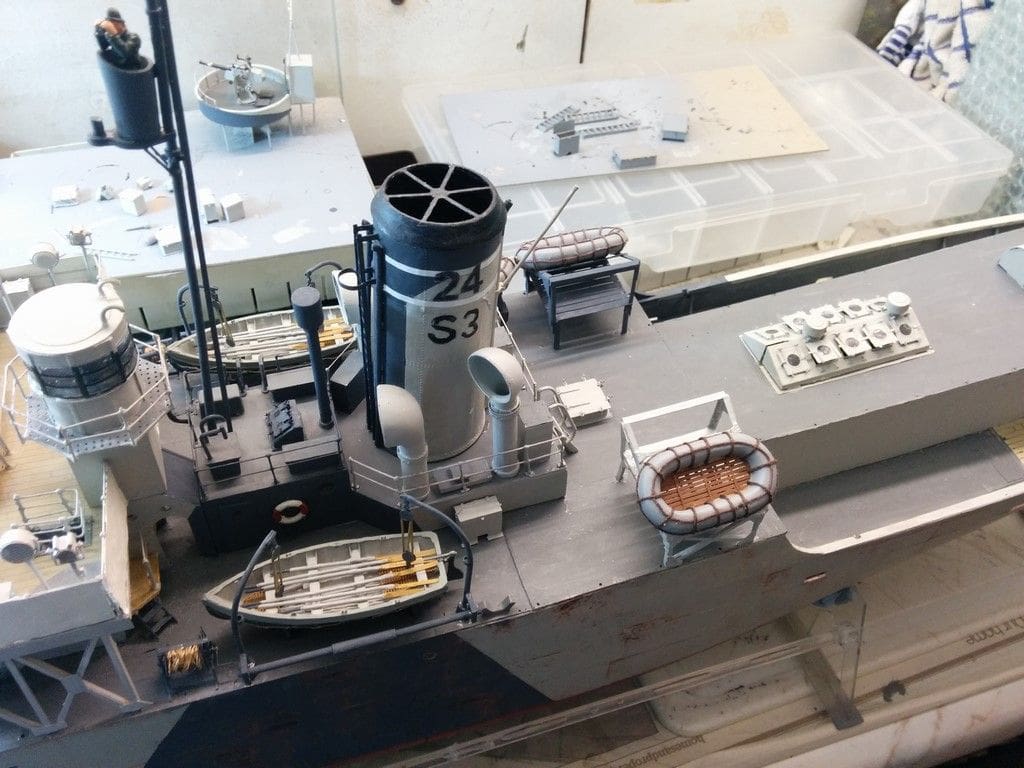
The funnel uses a wrap-round etched-brass sheet which had to be curved and added to the original plastic kit funnel and annealing the brass with heat proved to be the secret in getting it all to fit correctly. The basic funnel and galley sub-structures are all made entirely from the plastic kit components and were added next. An important point to remember here is to note that the etched-brass bridge structure has a companionway down to the wheelhouse. It was only just in time that I realised that this should also have an access ladder in place, a fact not mentioned in either set of instructions.
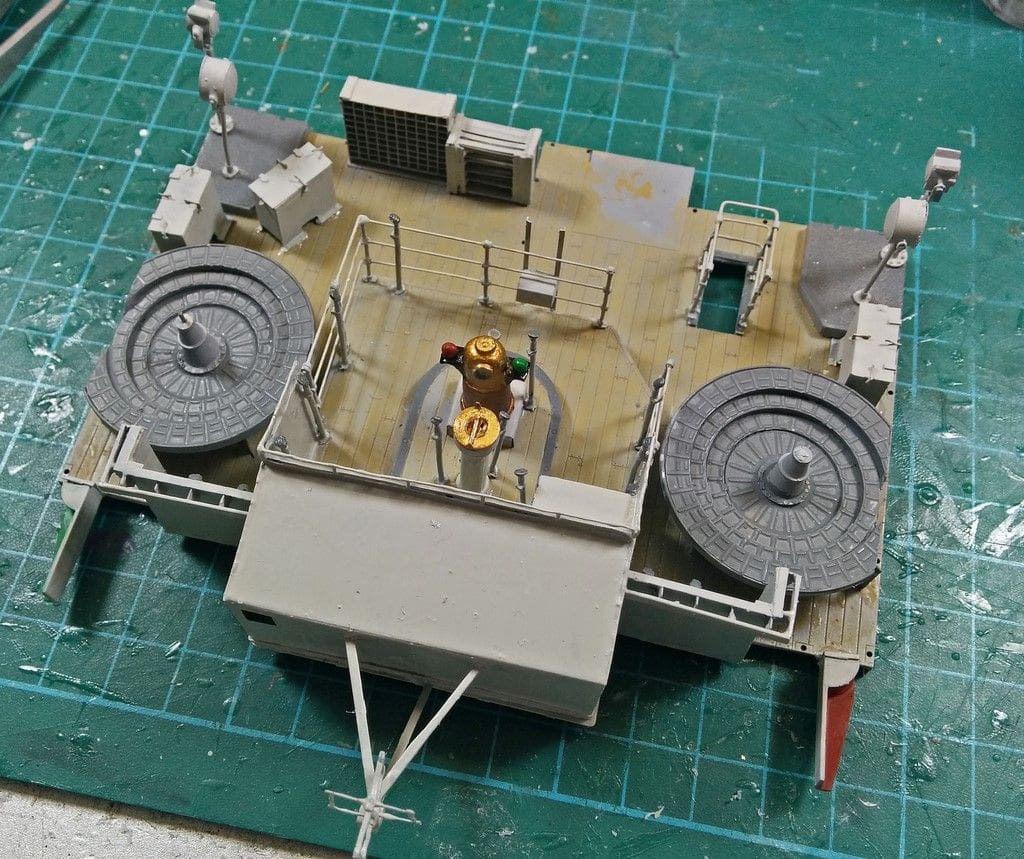
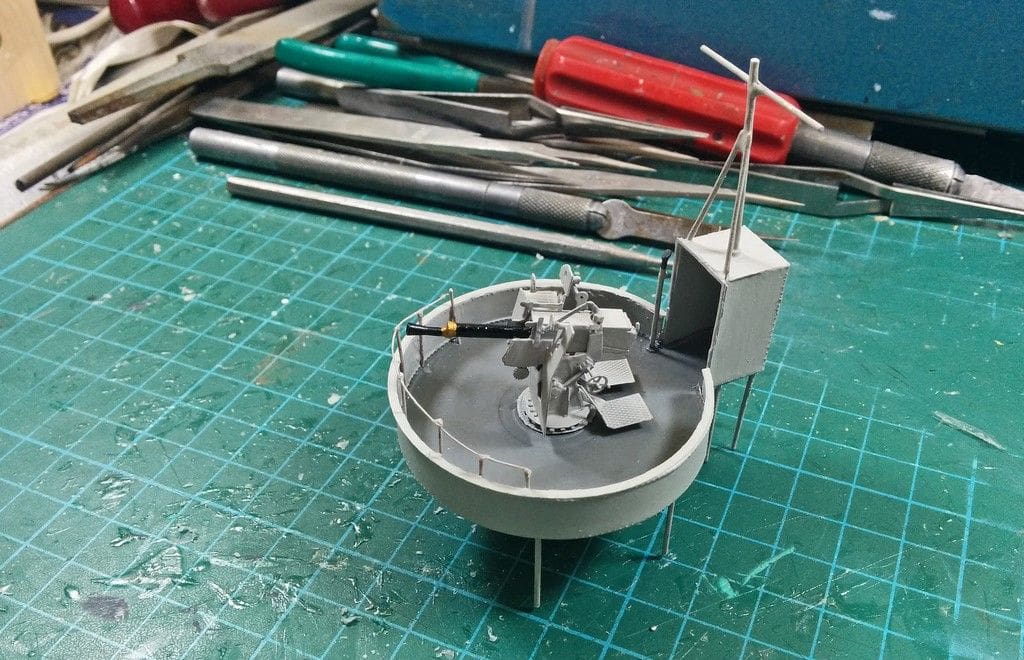
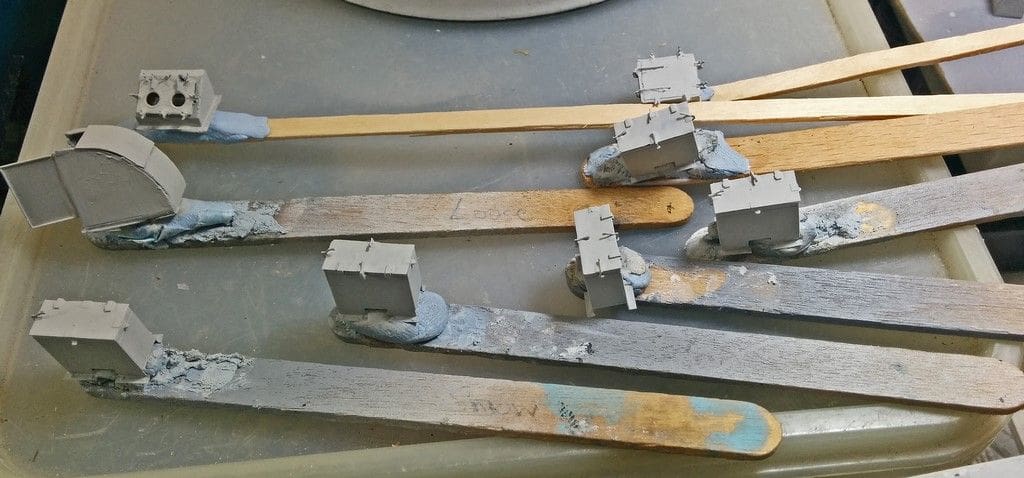
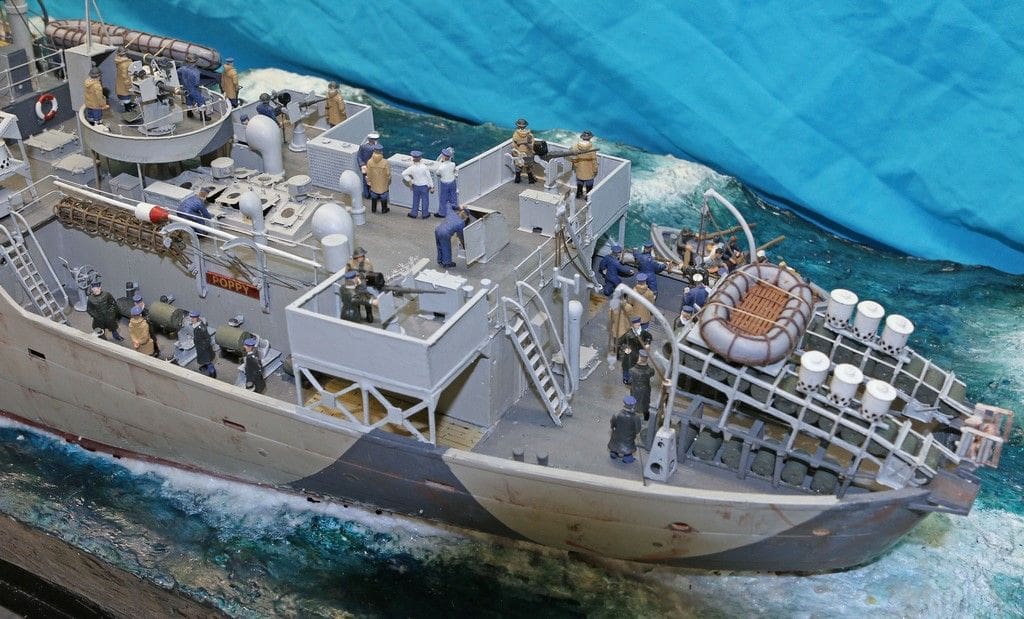
For what on the face of it is a simple model, HMS Poppy is surprisingly complex and as with all such models, the best way to build such a model is to pre-fabricate and paint as many of the sub-structures as possible. In this case that meant that the anchor winch; Oerlikon AA gun; 4 inch gun and its platform; Pom-Pom bandstand; lifeboats; liferafts; depth charge throwers and racks; survivor’s lifeboats and box float were all assembled and painted prior to the main build. By doing this, they could all be dry-fitted before final assembly, in particular to check that they ‘looked right’, or not, as the project progressed.
Of particular note was the difficulty with the depth charge racks. It was not clear in the instructions which way the etched-brass folded, resulting in a complete hash of the first attempt. Fortunately, David J. Parkins came to the rescue and sold me another etched-brass sheet. To avoid further disaster, the (poor) kit supplied plastic versions were assembled to get a better idea of how they should look, but in fact HMS Poppy’s racks were raised to drop the depth charges partly over the stern bulwark and not straight through it as per the kit model.
With no picture to confirm the exact configuration, other than a stern shot of HMS Pennywort, it was in the end a ‘fudge’, building the lower part of the racks using the plastic kit parts. Slots were cut in the stern bulwark to accommodate the depth charge ramps which were fashioned out of styrene. Other items which required a lot more scratch building were the asymmetric aft sponsons. Using the only two pictures which show these, a reasonable attempt at reproducing was made them using styrene sheet and rod. The unused bridge girder supports from the plastic kit were also pressed into service, plus a bit of scratch building to create the supports for each sponson.
Three further items that had to be scratch built were the single derrick on the stern deckhouse, the mine sweeping guide blocks mounted on the aft bulwark and the scrambling nets. The first two were a legacy from HMS Poppy’s earlier mine sweeping equipment that had obviously not been removed at the previous refit and both showed up beautifully in the photo of HMS Pennywort’s stern.
The scrambling nets however proved a bit of a nightmare, with only one picture showing that the ropes created approx. 40cm (16 inch) squares. Nothing obvious would suffice, until gardening mesh came to the rescue. One manufacturer produces metre squares of fine galvanised wire mesh which looked to be of about the right profile. Only a couple of 7cm squares of the stuff were needed, but there you go, that’s model making for you. With a bit of wire bending and cutting, two passable scrambling nets were produced.

Finishing HMS Poppy
With everything now in place, the final step was to add railings, canvas dodgers to the bridge and the rigging. David J. Parkins (Great Little Ships) correctly divides the railings into the pipe type of railing around the bridge area, and the braided wire variety everywhere else. It was quickly discovered that life is too short to try to use the fine thread provided for the latter, so I resorted to using 0.5mm (20/1000 inch) brass rod which, when painted not only gives a nice ‘taut’ look, but adds a lot of strength to the white metal stanchion posts. HMS Poppy did not seem to have splinter mats around the bridge at this time, so a material had to be found which would simulate 1:72 scale canvas dodgers and surprisingly, baking foil when primed and painted white, gave the impression of weather-beaten canvas and this was applied using white glue to the bridge railings.
For rigging, once again brass 10<15/1000 inch rod painted black for the stays and white for the signal halyards proved ideal. Using brass rod offers a modicum of additional strength to the mast, but more important does not did not sag as does nylon or plastic thread. Another problem which was not foreseen was the fact that the finely cast crosstree at the top of the mast was made of white metal and sure to bend under cord tension, but by using the fine brass rod this ensured that it remained true.
Seascape
The next stage was to position and secure the corvette into its diorama base. This had been prepared previously using the bare hull to shape the main cut-out, with a suitable aperture in the sheets of thin polystyrene foam which covered its MDF under-base. A ‘seascape’ had already been carved into this foam and Mod-Roc (a reinforced plaster used for plastering broken bones) applied to present a fairly rough sea, a photo of the crippled S.S. Wanstead showing the typical North Atlantic waves. Artist’s acrylic gel was added to enhance the waves and the sea also was painted with acrylic paints and a clear gloss varnish to provide a touch of translucence and water ’sparkle’. Copious amounts of acrylic gel were used to hold the hull in position and to fill the gaps between the hull and the sea scape once it was properly in-situ.
Finishing-off
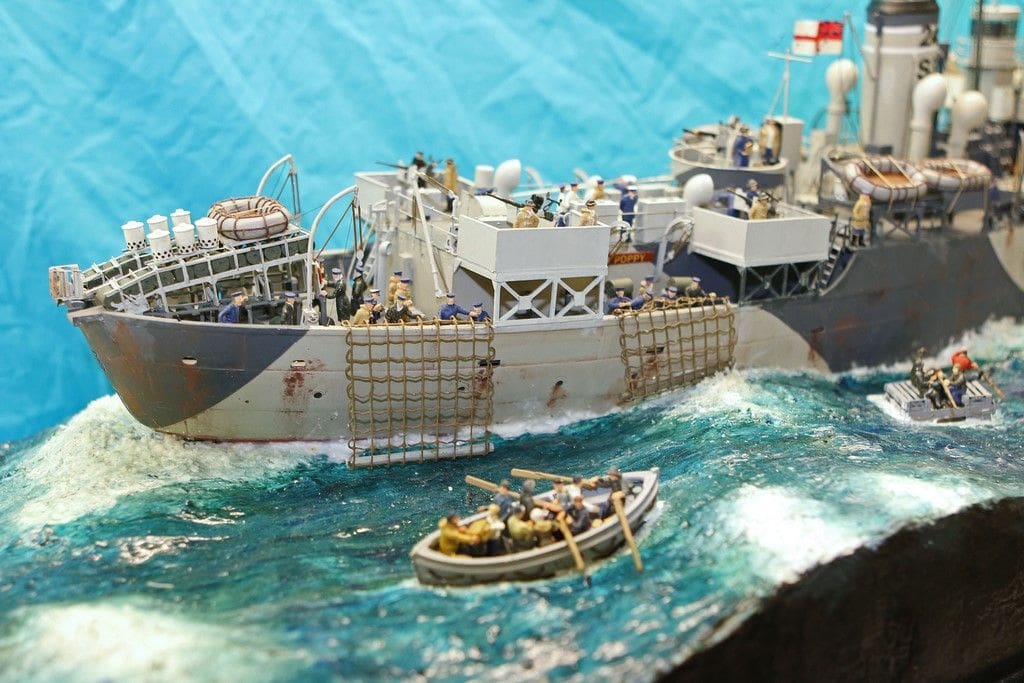
The last thing to add to HMS Poppy was a crew, since a ship without humans looks like the Marie Celeste, particularly on this type of diorama. At this later stage of WW2, and with all the additional armament, corvettes now had a sizeable crew, often notably exceeding the original designed specification. It can be safely assumed that whilst stopped dead in the water to retrieve survivors, the crew would have all been at action stations and therefore providing an excuse to show quite a number of them on deck.
Having scoured the modelling press and world wide web for companies selling British WW2 seamen, things were not looking too good. Even Revell were approached to sell me some additional frets of the kit included crew to their model and surprisingly this they graciously did. Also, some of the best RN crew scale castings are also produced by Gunthwaite Miniatures and their level of detail is exceptional. The real problem though was how to provide the survivors, who of course were merchant seaman and Langley Models (primarily a model railway supplier) came to the rescue with their white metal fishermen to OO scale (1:76).
Anyway, it was now possible to provide a crew who looked at least as though they were all doing something on board, if only observing the impending rescue operation. On the bridge, Lt. Cdr. Boyd is discussing with his officers how to sink the S.S. Wanstead and the gun crew is preparing the 4 inch gun for the shoot. Other sailors are deploying the scrambling nets and standing by with mugs of cocoa for the survivors. Everyone else, except the lookouts on the bridge and in the crow’s nest, are more or less at action stations. A few ratings and an officer have emerged from the engine room to ‘rubber neck’ the action whilst one of their colleagues is shouting down the hatch to a comrade, ‘Get up on deck, sharpish’!
Conclusion
This model was constructed over a number of years, work stopping for other projects, but lack of confirmed evidence for particular features sometimes being a contributory factor. There is no point in continuing with a project if you later have to discard some previous constructional or painting work. Now ensconced within a suitable clear acrylic cover and an engraved brass plate describing the scene, one can at last say though, ‘It’s finished’. I am sure that John Beardmore would feel proud to see the ship he served on throughout the war and during some of the worst horrors that naval engagements could throw at him and his shipmates, now suitably preserved for others to admire.
Christopher Drage – Summer 2016

