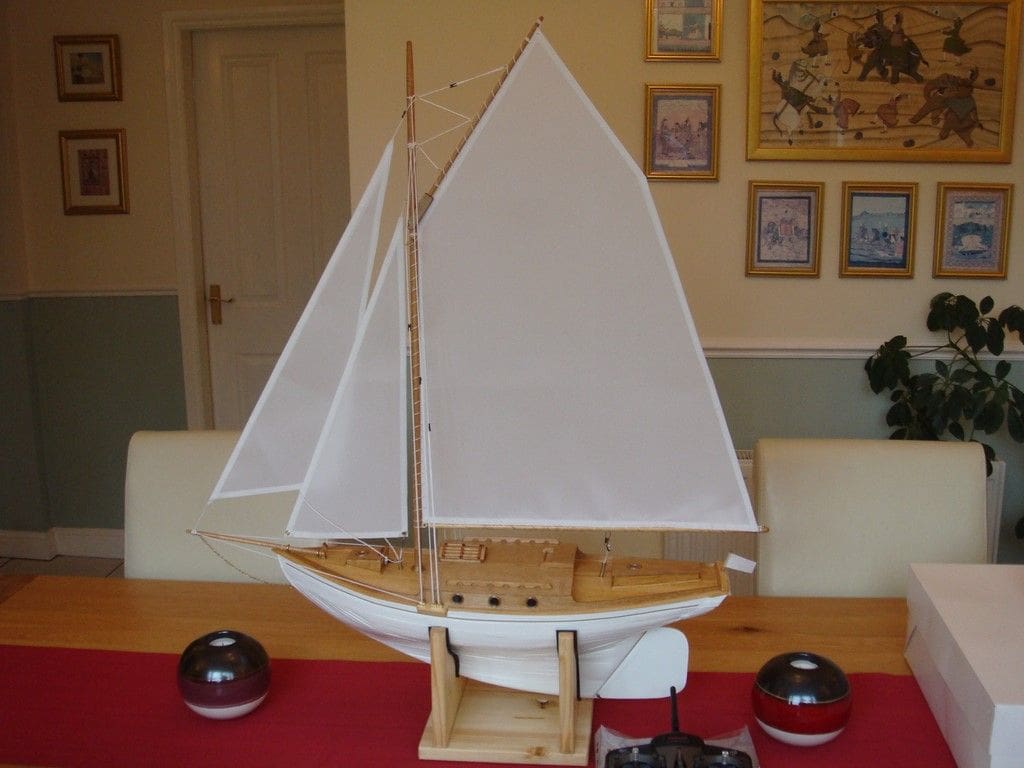
The quick-plank version!
ANDREW COPE describes his model, built in a week!

Now it’s only fair to warn you that this might upset the vast majority of serous model boat builders by describing how I botched together my first scratch built sailing boat. Every possible corner was cut, cheap materials used and it all relied on superglue, but my defence is simple. Some folks don’t have the time, skill, money, or patience to do it right, so this article is to celebrate all those folks that like to cheat a bit, that is assuming they can get away with it!
Enjoy more Model Boats Magazine reading in the monthly magazine.
Click here to subscribe & save.
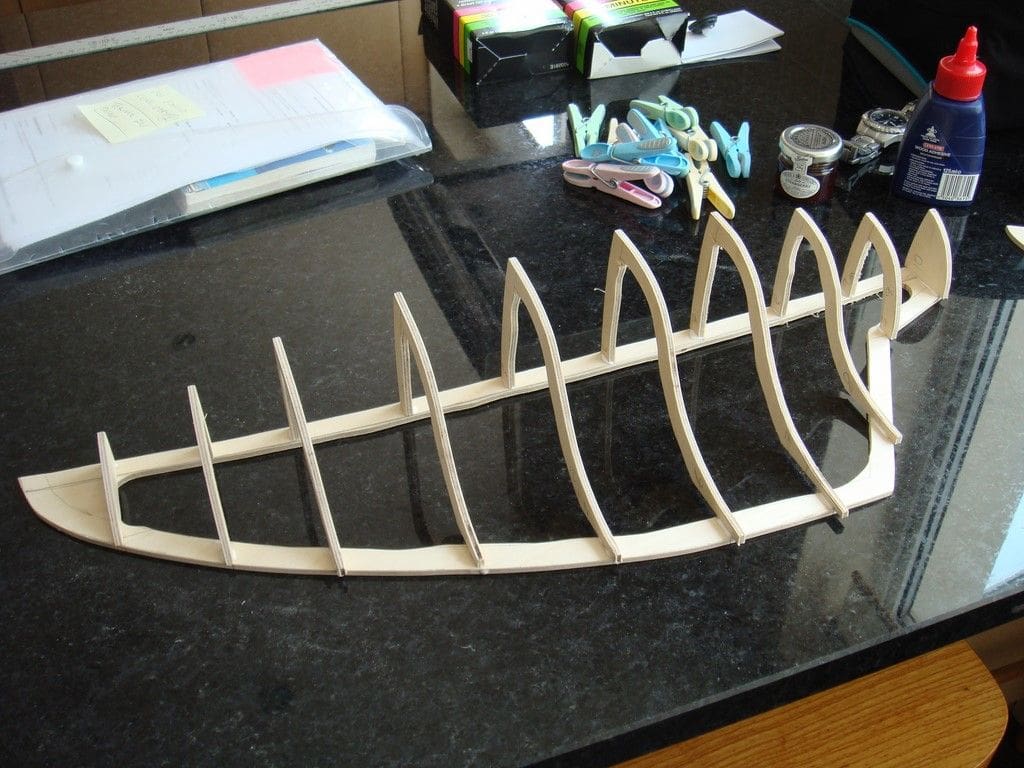
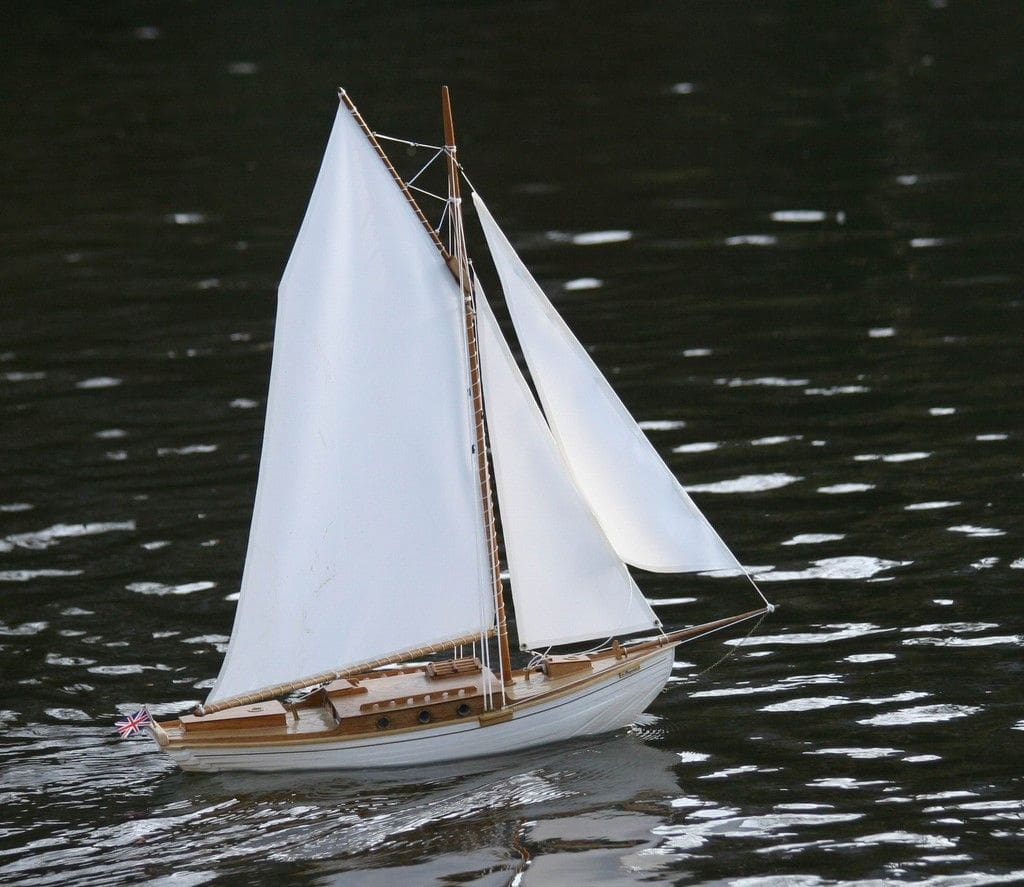
The hull
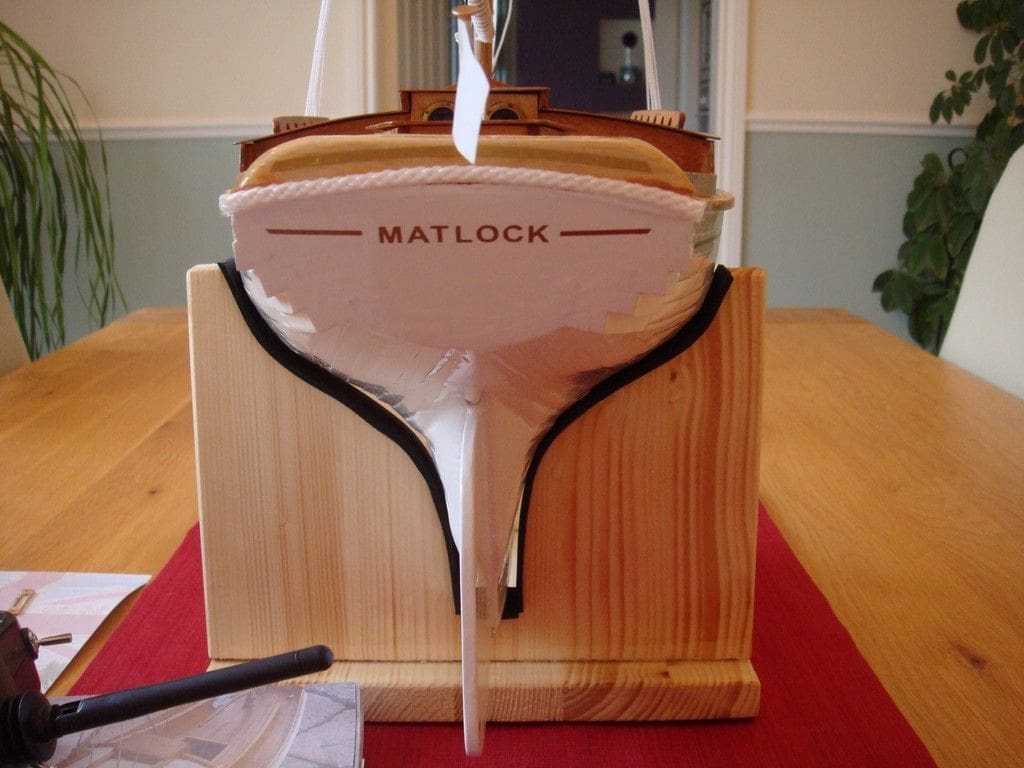
It started, as these things do, with the innocent comment that I liked the look of a fellow Buxton MBC member’s yacht and he ‘unfortunately’ replied he that he had the scale drawings for the hull, which were duly provided. So, I was already committed, being too polite to refuse them. These simple pen outlines were easily transferred to 4mm ply, and stuck to the keel section with PVA glue, but there was no way I was about to spend the next six months double planking the hull with a selection of tropical fruit woods to copy the original, so it was decided to go for good old 1/8in x 1/4in balsa strip which is cheap and plentiful.
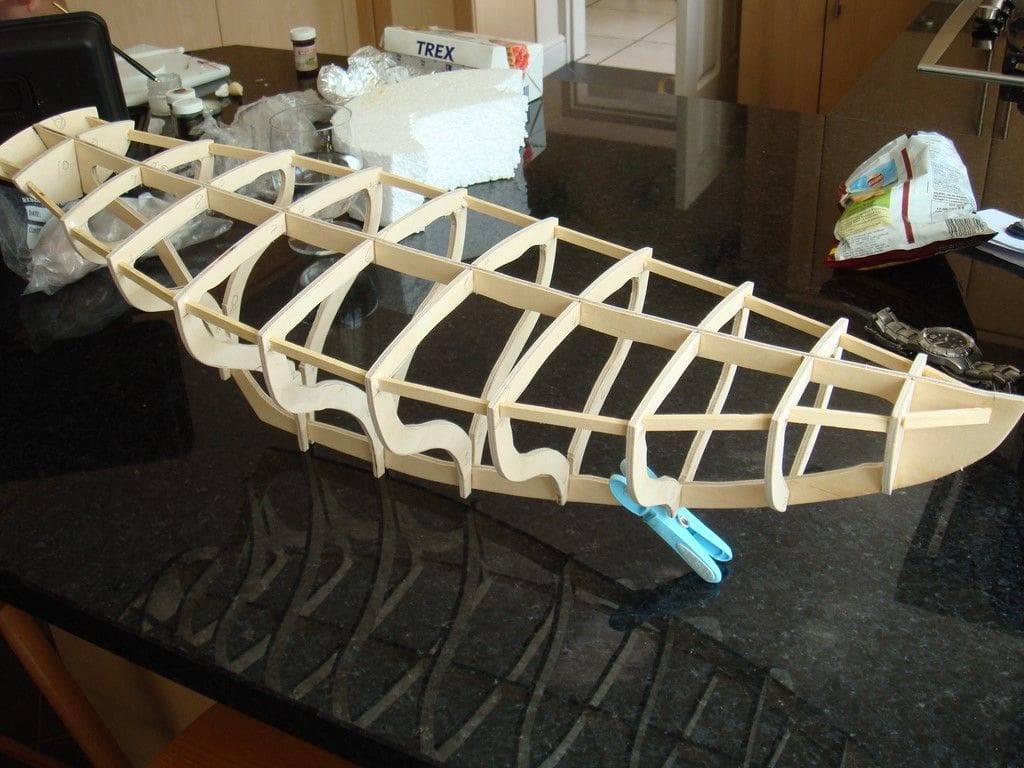
Each strip was glued to the hull ribs with ‘sponge safe’ superglue, which turned out to be such a quick method that I managed to plank the entire hull in one evening, although I admit that a stiff drink was needed afterwards! There was no jig, and just a flat worktop to keep the keel straight, one half at a time.
A coat of two-pack resin was then applied to the inside of the hull, while temporarily covering the outside of the hull with baking foil to stop it all seeping out through the gaps. This method not only provided all the strength for the hull, but nicely filled the gaps between the planks and all in one hit.
Peeling off the foil carefully, I discovered that I didn’t even need to reach for the sandpaper, so the hull was then brush painted with three coats of enamel and all done! Yes, as simple as that. Okay, not the strongest ever hull construction, but I’ve been sailing the model for over a year now with no signs of damage, leaks or splitting, so the method obviously works.

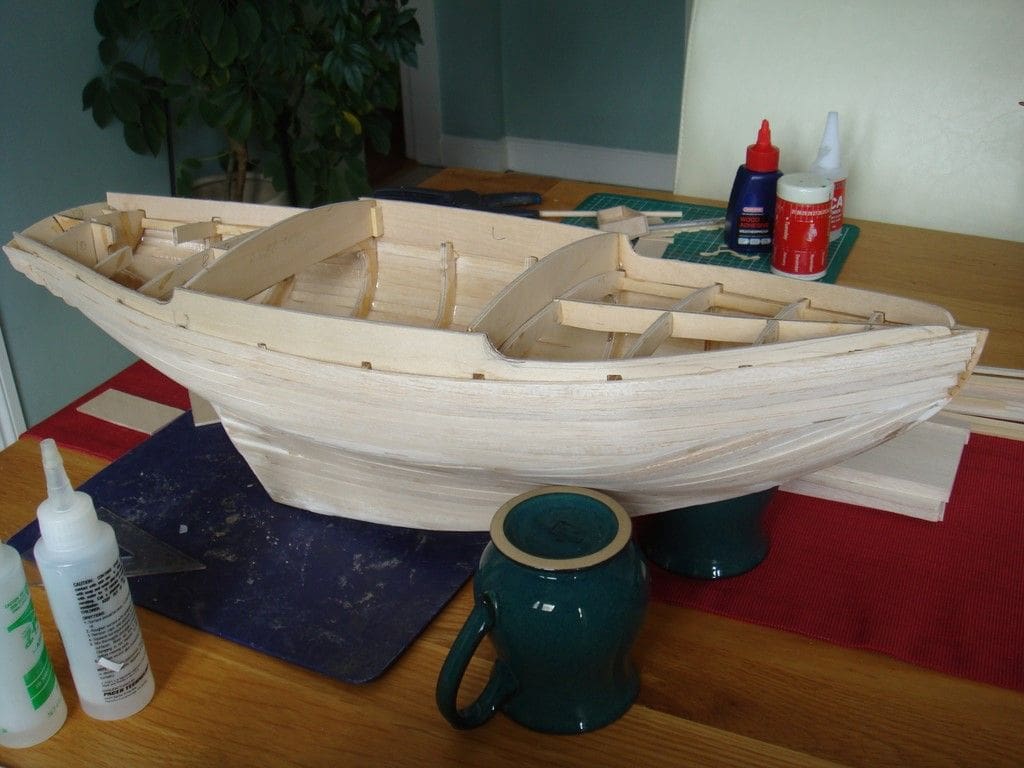
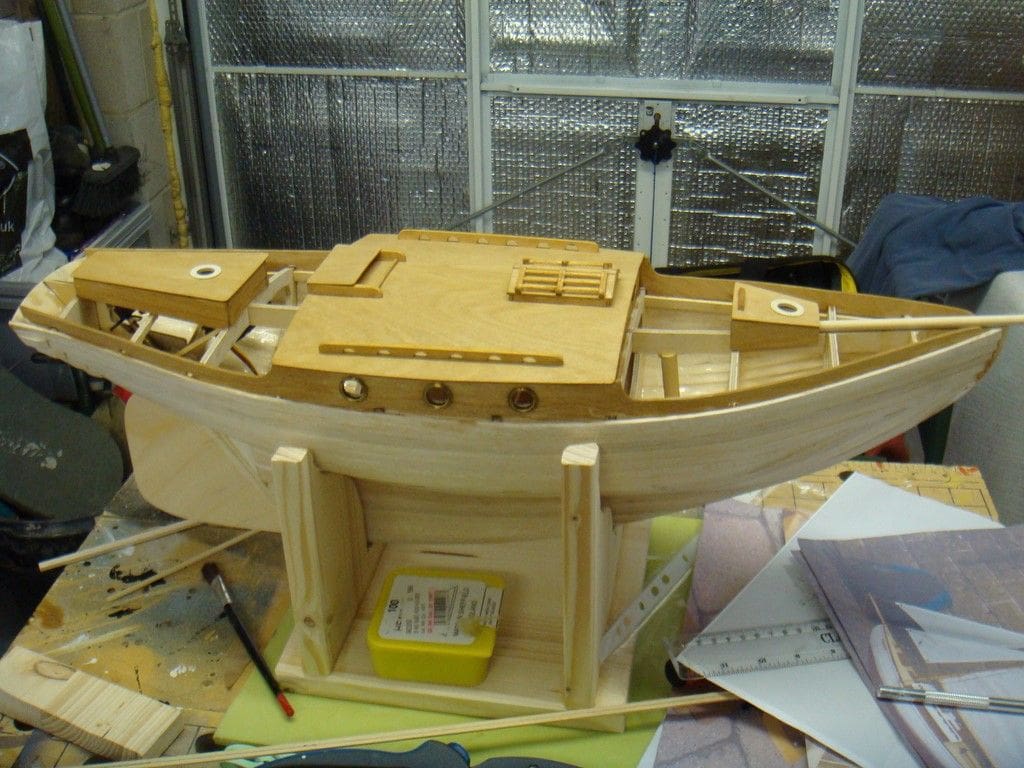
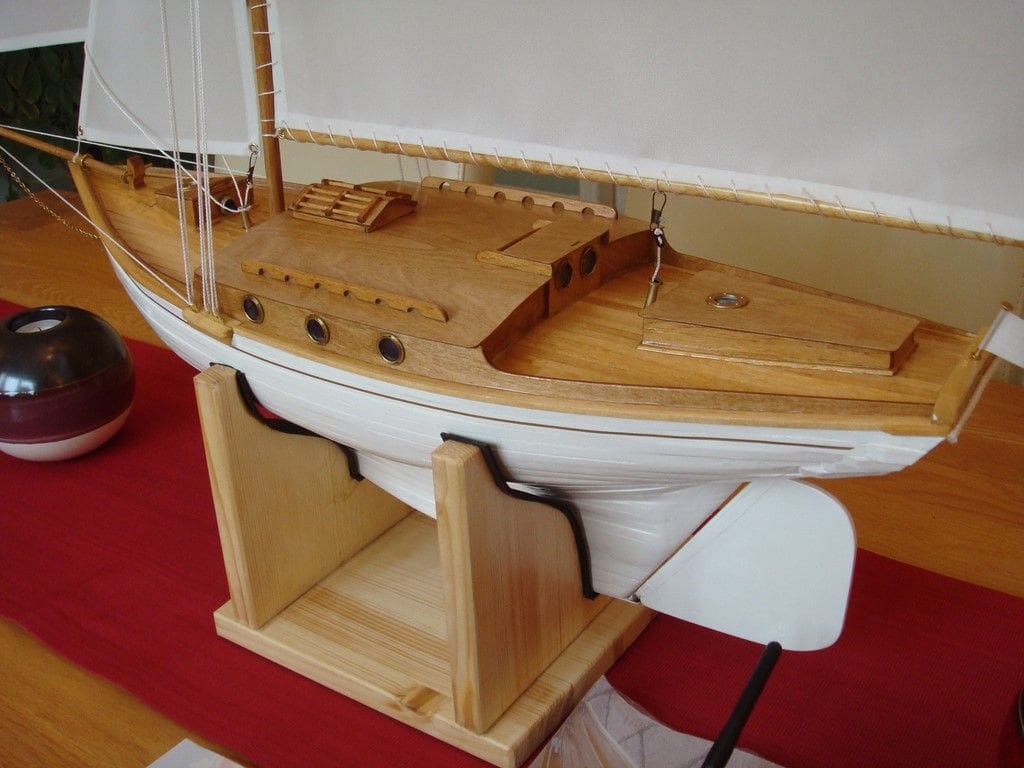

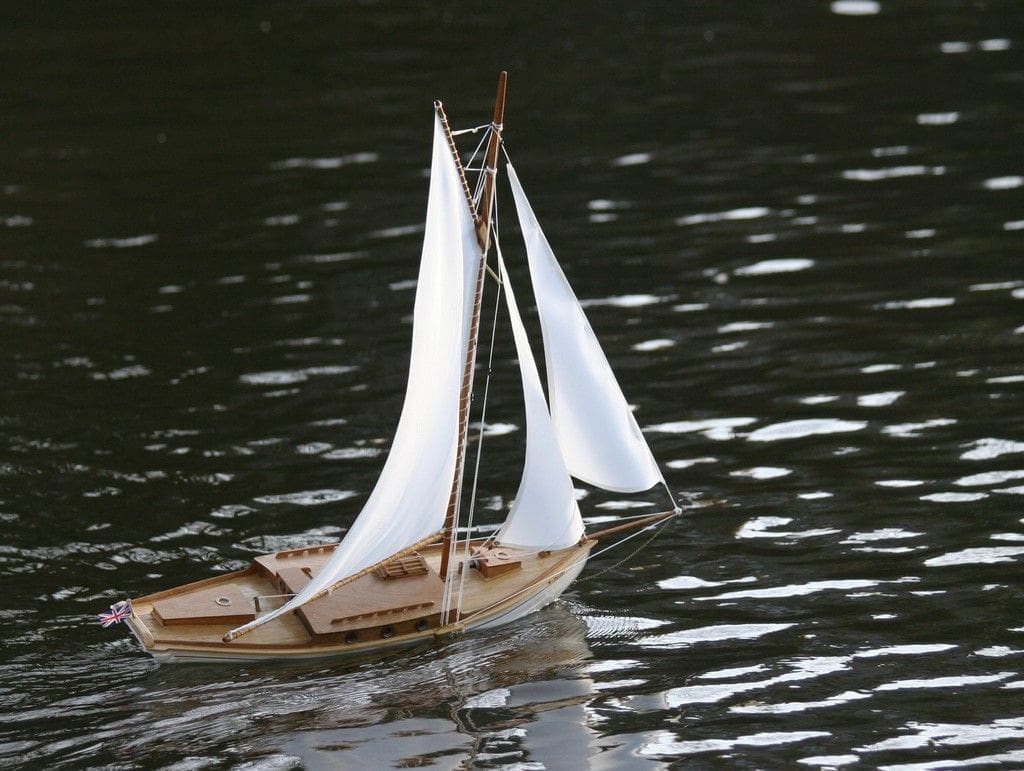
Deck and cabin
This followed exactly the same construction method as the hull, but the resin was applied to the outside (top of the deck) creating the final finish. The cabin sides and roof were cut from 2mm ply with a hobby knife. The only ‘fancy’ addition entertained, was to stain the deck, cabin and masts with ‘instant coffee’ before sealing and I have to say that even the coffee was ‘decaf’!
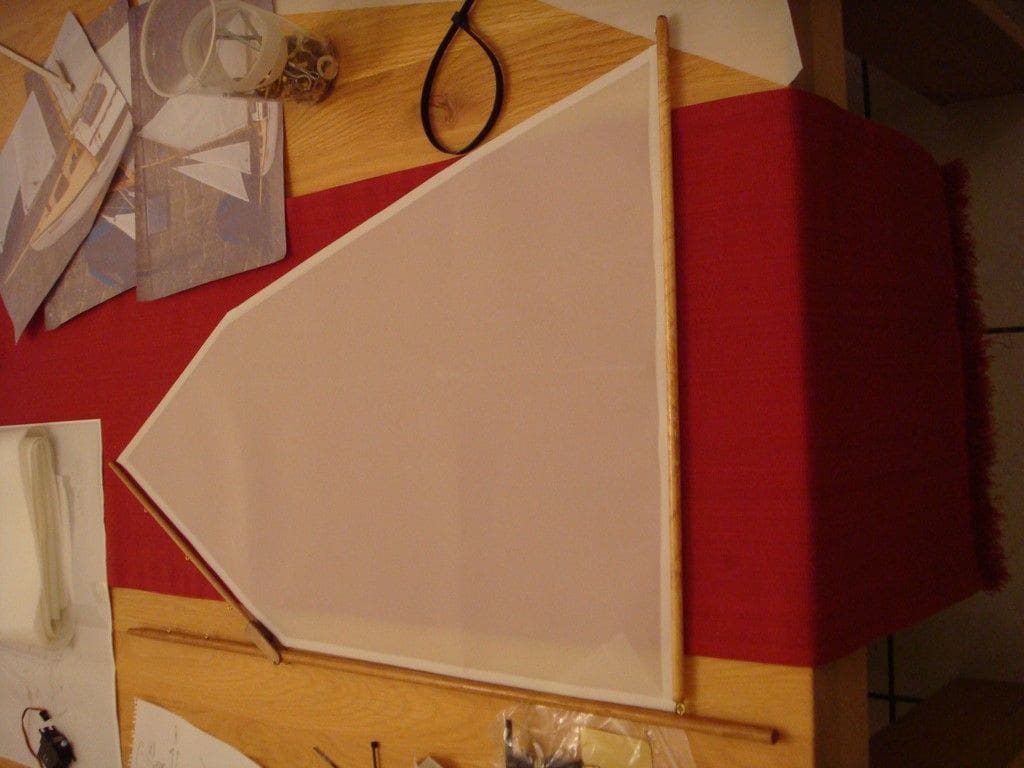
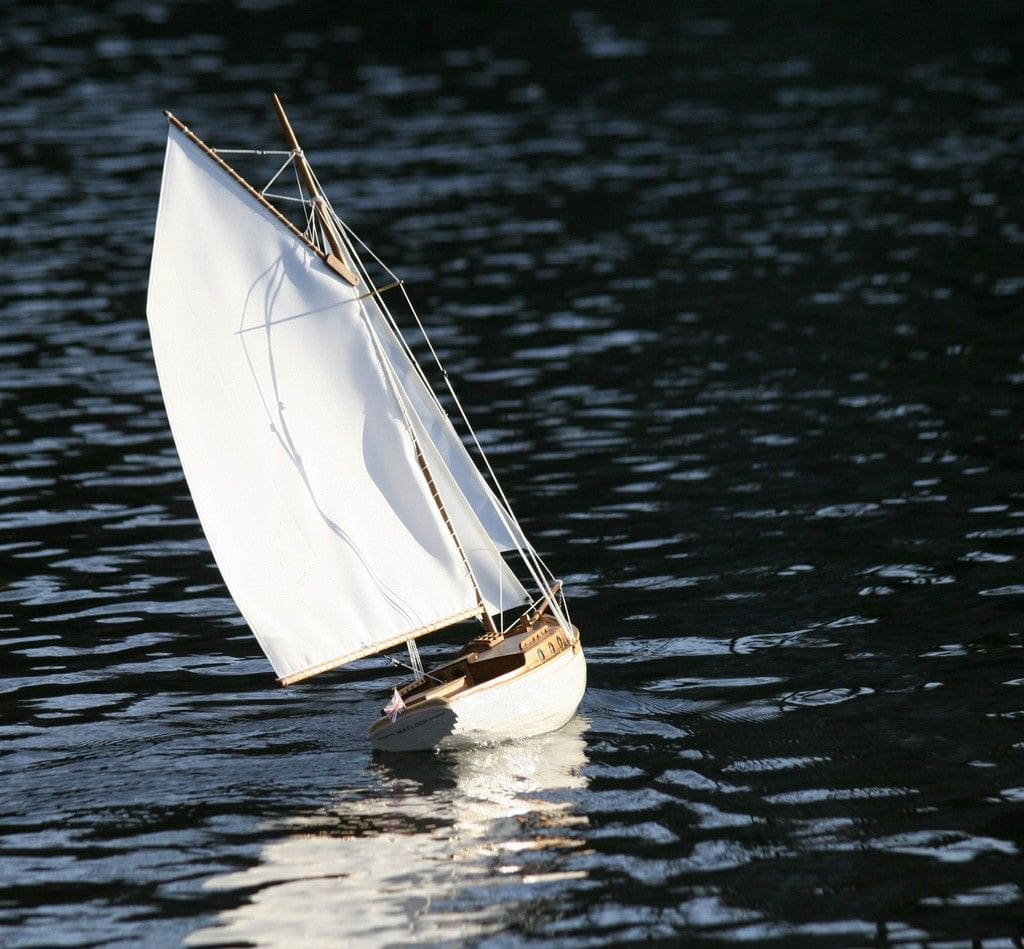
Sails
The next quick dodge involved sailing making. I was certainly not going to be sewing and hemming, so plumped for a couple of square metres of nylon sail cloth (from that well known online auction website) and edged all the sails, once cut to size, with a strip of spinnaker repair tape. This tape was easily strong enough to hold the rigging cord on to the foresails, so it was also used to secure the forestays without any sewing, thus another result!
Rigging
For this, some kite line was knocking about in the garage, but I did treat the model to some plastic bowies from the local model shop as a bit of adjustment is handy when it comes to rigging. With a large sharp pin, spirals of the kite line were simply threaded up the mast and along the main boom, piercing both the sail and edging tape. I didn’t bother with any other rigging hardware, as there would be plenty of time to fit fancy brass fittings in the next life.
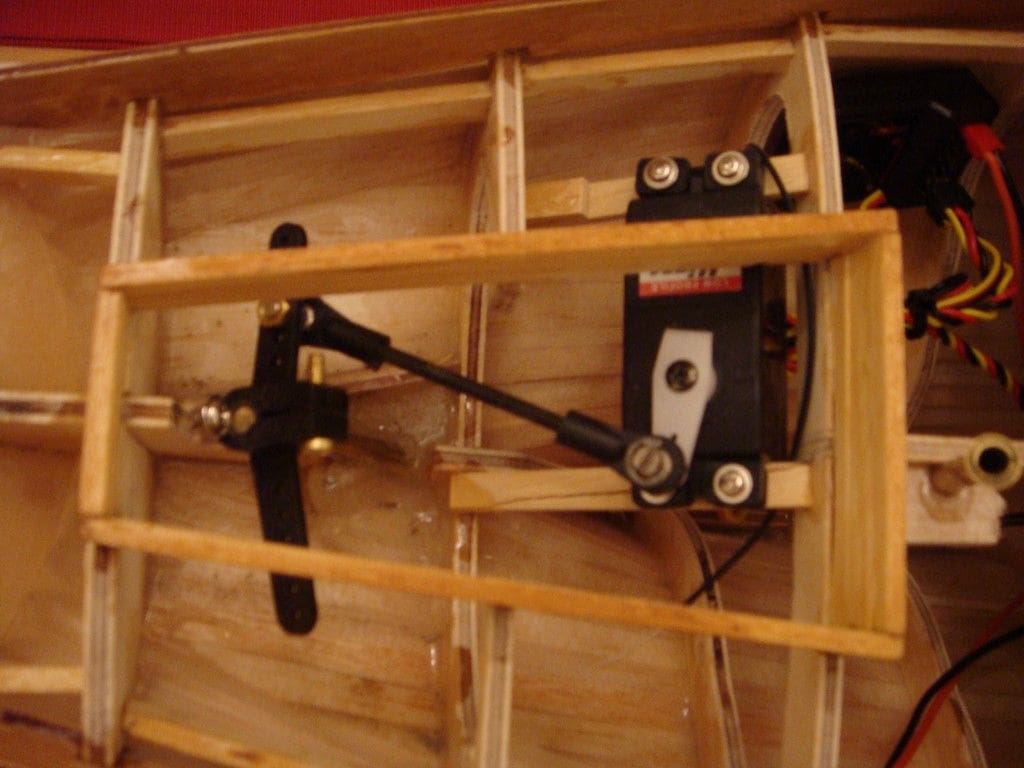
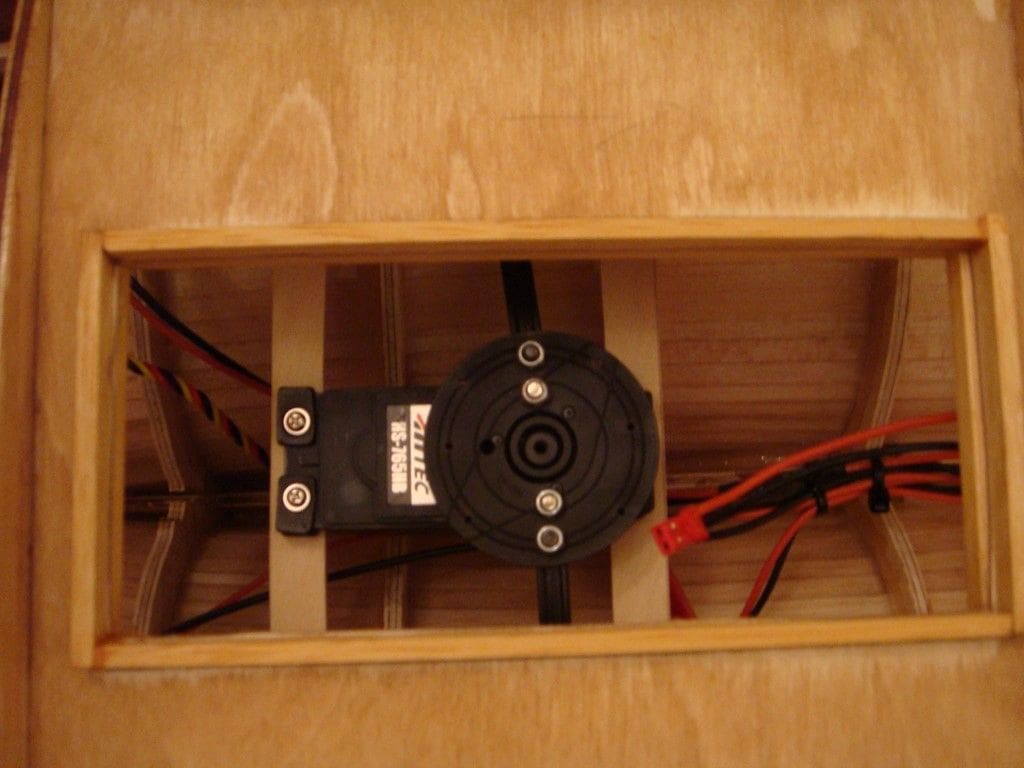
Radio control
There is nothing special with this, A two channel system with one servo operating the rudder and the other a being just a sail-arm type operating the mainsail. There is no motor, propshaft and propeller to get the model out of trouble , but where we normally sail has 360 degree access.
And the moral of this story?
Don’t be a slave to time consuming methods of model making if you’re not going to enjoy doing it. I worry that to many potential model boat enthusiasts and future club members are put off by the thought of having to spend their next 18 months locked in a shed building their first model boat. This scratch built yacht was completed inside a week (Scouts Honour!) and while it may not last for the next 50 years, if it only lasts five years, I know I’ll only have to set aside another week to build a replacement!
Andy Cope – Buxton MBC
Buxton Model Boat Club
In 2011 a group of local enthusiasts resurrected the club and as a result of successful meetings with Buxton Council the newly formed club was sanctioned to use the lake in Pavilion Gardens, Buxton, SK17 9AY, in September 2011. Sailing is on Sundays and Thursdays on this large lake within the Victorian gardens, situated in the Spa town of Buxton in the Peak District, Derbyshire.
Website: www.buxtonmodelboatclub.co.uk

