This issue we are writing about soldering, a little bit more about the Multiplex Cockpit SX R/C system and our visit to the Weymouth International Maritime Modelling Festival.
Metcalf Mouldings Waveney Lifeboat, ‘The Scout’
In a previous Focus on Scale, mention has been made of using various melting point solders to build up a prefabricated assembly such as railings. The techniques suggested here apply to other models as well as ‘The Scout’, so these few words may prove useful.
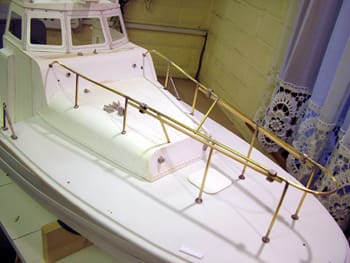
With ‘The Scout’ there are three sets of handrails for the bows, stern and rear cabin. In addition there are rails around the central post between the wheelhouse and rear cabin. The instructions provide very detailed drawings and suggest using templates for each to ensure accuracy. Paul however, has always felt that the best template for ‘one-offs’ such as these, is the model itself. You could make templates and jigs as suggested in the instructions and no doubt that is the ‘engineering way to do it’, but unless you are the type of builder who paints as he goes, then any flux dripped on the unpainted grp hull and cabins will not do any harm and can be easily wiped and cleaned away. Therefore all of the handrails were prefabricated on the model, which ensured that they all fit the mounting holes and are square in all respects relevant to the model. Every joint was reinforced with a brass pin and the principal solder used, was 145 degree detailing solder from Carr’s which flows very well and seems not to be too brittle. A normal 50w mains soldering iron was used. The aim being to get the heat onto the joint as quickly as possible and then remove the heat from the joint, once the solder had flowed.
Enjoy more Model Boats Magazine reading.
Click here to subscribe & save.
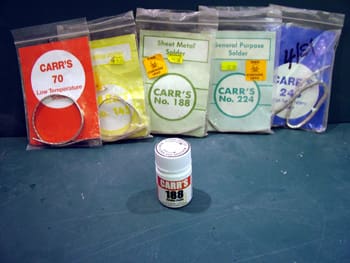
The range that Carr’s offer for white-metal, brass and copper materials are 70 degrees, through to 242 degrees, Photo 1. Specialised fluxes can also be supplied, but good old Baker’s Fluid works well in most situations. Home of ‘O’ Gauge’, Tel: 0208 5408808, address: 528 Kingston Road, Raynes Park, London SW20 8DT, www.ogauge.co.uk, currently provides an excellent mail order service for these solders from Carr’s, but long term supply is not guaranteed because of the new EU regulations regarding the lead content.
Detail parts, such as the white-metal feet for the vertical tubes, were added with 70 degree solder and using the temperature controlled iron. It took one long six hour afternoon to fabricate the bow railings, and two short three hour afternoons to fabricate the stern and rear cabin top railings. The brass tubing provided in the kit is particularly pliable without kinking and this also enables the builder to adjust and straighten as need be, without the tube fracturing. Dave Metcalf especially sourced this tube and it is good.
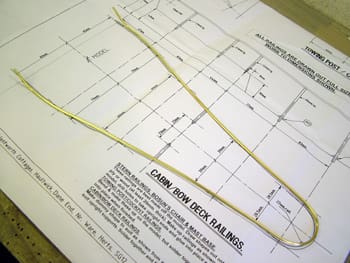
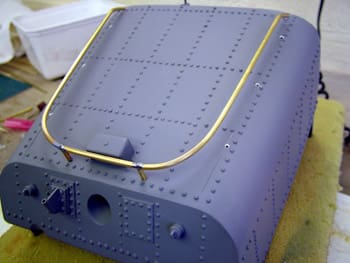
The procedure adopted with the bow railings was firstly to clean the tube with fine wet or dry paper to make it really sparkle and be clean, then to bend the top rail as per the plan, which proved easy just by using fingers for most of it and a small paint tin as a former for the 180 degree curve at the front, Photo 2.
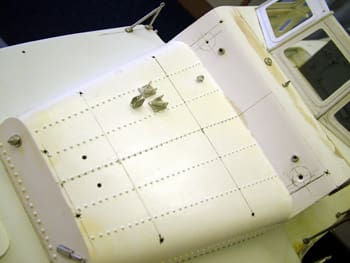
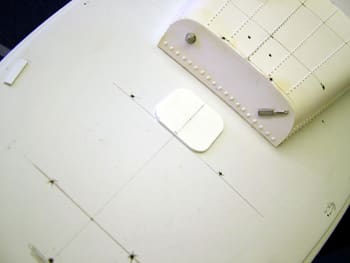
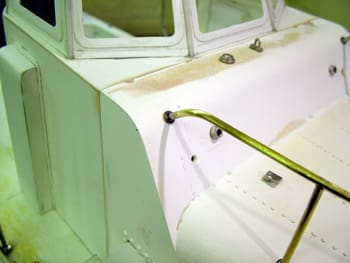
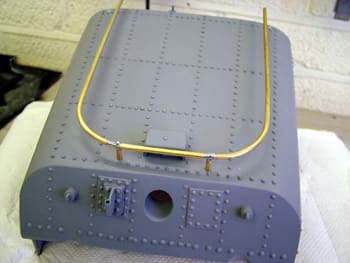
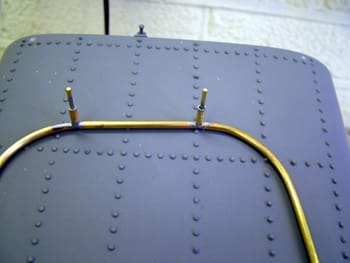
This produced the outline shape. The mounting holes in and on the front of the cabin and the deck were drilled, Photos 3 & 4, again by careful measuring from the plan and the then the two rear arms were inserted into the front of the cabin. Ordinary household pegs were clamped over the tubes to prevent them going through to far. The key point is to get the two vertical supports at the front in the correct position and the right height. If those are correct and the rear arms are correct everything else should just ‘fall into place’.

Having the model upright on a proper building stand makes life so much easier, since with a large set-square it is easy to ensure that the uprights are indeed upright, from all viewing aspects. The soldering proved simple – just a normal 50w iron, with the 145 degree solder, although the Antex low voltage adjustable temperature iron would do just as well. It is just that once a soldering tip has been used for 70 degree solder, some of that will tend to remain on the tip and may contaminate other solders. A ‘half round’ filed in the tops of the uprights to ensure a better joint with the top rails, helps as well. The joint is not particularly strong and will not withstand tweaking – therefore all joints of this type were reinforced by drilling through the top of the ‘T’ and inserting a 1.5mm rod into the vertical tube and then re-soldering the joint. This is in fact very easy. File a small flat on the top tube and with a fresh H.S. pilot drill (1mm or less) drill through into the vertical tube. The drill will find its own natural easy way into that tube provided you start in roughly the right position. Then open the hole out with the 1.5mm drill and insert the short length of rod (15mm) with a slight kink in it (to ensure a proper grip on the tube) through the joint. Then re-solder the joint with 145 degree. If you ‘tin’ the short length of rod prior to insertion this will ensure all the parts will become one, once heated, as it were!
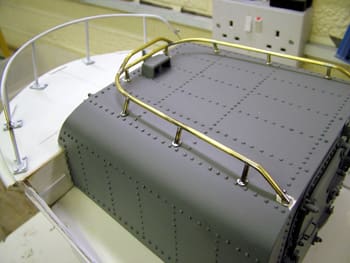
This was repeated on all the joints. Feet were added, white-metal in the case of the foredeck as supplied in the kit and small brass washers (not pro-typical) to the vertical supports and where the handrails finally enter the front to the cabin, Photos 5 & 6. The brass washer feet (bases) ensure that when the handrail is finally added to the cabin after painting, it will sit in exactly the right position again and any glue applied to the inside should not ooze past the base and mar the exterior finish.
This took some six hours in total for the foredeck and front cabin handrails, but it fits the model exactly as built by Paul (there will always be some minor variation in an individually built model). What on the face of it is a bit of a problem turned out to be quite simple, provided it was taken a step at a time. The same principals were applied to the rear cabin handrail – centre rear uprights first, then the front arms into the cabin top and then the side supports, Photos 7, 8, 9 & 10. The flux did not damage the Halford’s primer undercoat on the cabin – the flux just washed off.
Always remember to be careful with solder and fluxes – the fumes can be hazardous to health, particularly if you suffer from lung problems. Therefore endeavour to work in a well ventilated area.
This is perhaps the lesson from this task – break it down into small logical component units and if you are satisfied at each stage then the whole thing will be OK. Very often we carry on with something that we know is not right, compound the error and then waste time having to start all over again, when early on the error – hole in the wrong place for example – should have been corrected and thus avoiding all the ‘aggro’ later. So the real point of this homily is to take time, think about the task, simplify it as far as possible and then the final result will be OK.
Multiplex Cockpit SX 40MHz R/C system
Just a little add-on to the report in last month’s ‘Focus’ on this equipment. There is included an ‘exponential’ function within the Tx electronics and this was discussed at a recent Brentwood MY&PBC meeting. For clarification, this means that instead of the movement of a control stick resulting in a direct linear response from the servo or electronic speed controller, the Tx can be programmed for whichever channel(s) you wish, for the relevant servo or speed controller to respond less, proportionally, at small stick movements. This would assist in slow speed manoeuvring giving additional enhanced speed control, but top speed would not be affected. The system has performed perfectly so far in the last month (September 2006) and does exactly as it ‘says on the tin’!

Weymouth International Maritime Modelling Festival
Over the last few years, Marion and David have often discussed visiting this show, but there was always a clash with something else. This year we finally made it. Jointly organised by SWAMBC and Weymouth and Portland Borough Council, this annual event is held over a weekend in July. We registered online via the SWAMBC website and in due course sent off our Modellers Registration form. This included car parking preference, asked if camping was required and offered the opportunity to book for the Saturday evening entertainment (at £5 per adult!) This year’s entertainment was the ‘Searchers’ so we said ‘yes’! In addition, if you wished to display at the show, tables could also be booked at this time. A short time later we received a pack containing information sheets which covered most of the questions we might have asked as well as a list of traders due to attend and a list of competitions and other events for modellers.
On the Friday prior to the event we parked our caravan on the reserved area of Lodmoor Country Park (only available for pre-booked units) and renewed old acquaintances with others on the site. Mike Knight was looking after the site as he has done for many years before.
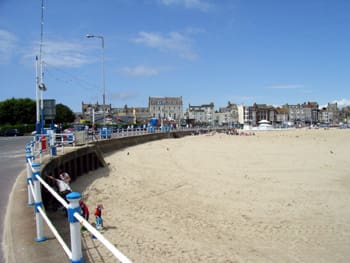
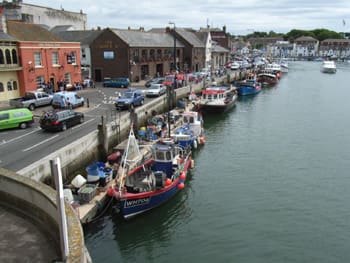
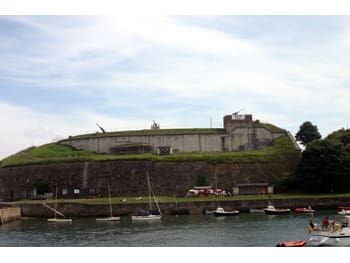
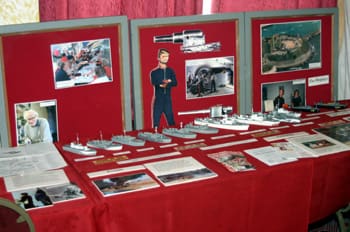
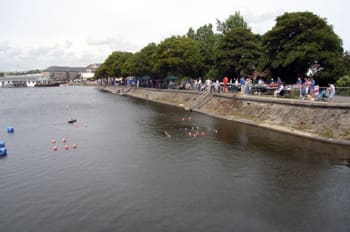
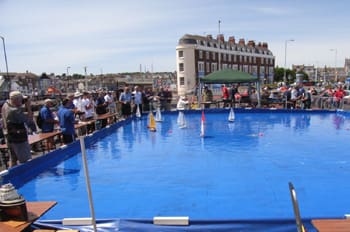
We had a drive into Weymouth itself and had a look round to get our bearings. One thing that impressed us was the lovely beach, Photo 11. This was ideal for families and had a separate area for dogs. We walked round to the harbour, Photo 12, the entrance of which was dominated by the Nothe Fort, Photo 13. Later on, when we were inside the Pavilion, we saw this display, Photo 14, about this Victorian Fort. A leaflet was also available which gave details of the fort being built to defend Portland Harbour against the French. When its military life ended in 1961, it eventually passed onto the Weymouth Civic Society who restored the fort and continue to improve it. It is now a museum of coastal defence and features many events throughout the year. Continuing our walk around the harbour, we eventually ended up at Radipole Lake. This is the principle area for the majority of the outside activity that takes place. This is where a large number of club stands are set up and where the public can enjoy a variety of displays from different types of models. Photo 15 gives a general view of the area. Two other areas were used for model boating activity – the sea and the small pool on the Pavilion forecourt. Over the weekend a variety of activities took place at these two locations as well.
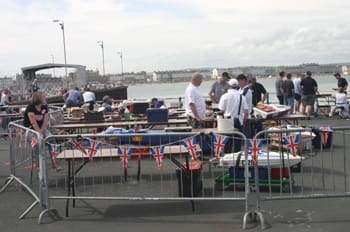
On Saturday morning Laser racing was scheduled in the sea off the Weymouth Pleasure Pier. This was followed in the afternoon by OMRA Z class racing and practice for Sunday’s National Grand Prix Offshore Model Powerboat Championships. Photo 16 is of the OMRA pit area.
Our Photo 17 shows the Footy Yacht racing in action on the pool on the Pavilion forecourt.
Back in the Pavilion, we made our way round the static displays and the trade stands. This year’s theme was ‘Isambard Kingdom Brunel’ celebrating his 200th anniversary and his association with Weymouth, Photo 18. This theme was continued in the diorama section, but more of this later.
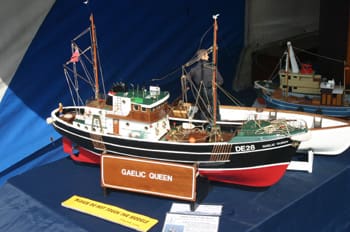
On the Shepton Mallet Drifters stand was this nicely detailed model of the Gaelic Queen, built by Ted Porter, Photo 19. This was accompanied by lots of information which told us that it was built plank-on-frame and teak, rosewood and elm were used in its construction. The fittings were brass and the model uses 40MHz 6-channel radio. The length is 33 ins and beam 7 1/2 inches, weight is 10lbs. Ted also provided information about the full size vessel.
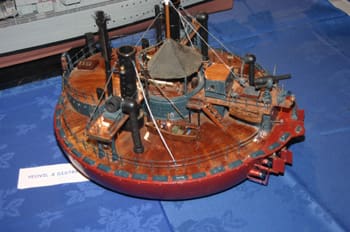
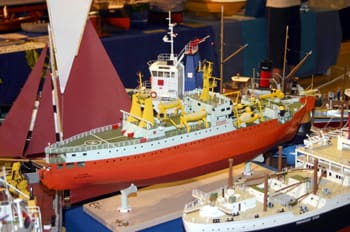
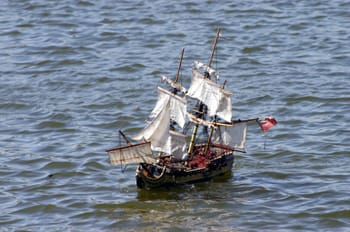
Alex Lyons had on display his model of the Admiral Popov, Photo 20. This strange vessel was named after Vice Admiral Popov and was built in 1874. It proved to be a design failure, with poor sea keeping and manoeuvring abilities, and ended up as a static harbour defence vessel before being scrapped in 1912. Graham Castle had his own display primarily featuring his range of model puffers through the ages. Graham was also actively promoting the building of dioramas. Regular readers will recall Graham’s article on this subject some time ago. Due to space restrictions, we will feature some of these next month. One model that did catch our eye was Graham’s model of the Vulcan, 1819, Photo 21. This was Scotland’s first boat built from iron.
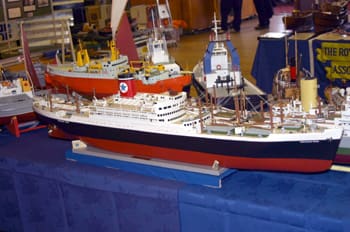
Plenty of information about the next model, Photo 22, except the builder’s name. The CS (Cable Ship) Iris was commissioned in 1976 and scrapped in 2001. Owned originally by the Post Office Corporation, she had a series of owners before being scrapped. Adjacent to CS Iris was this fine model of the Blue Star Lines Paraguay Star, Photo 23. This also had information about the full size vessel but no model or builder’s details.
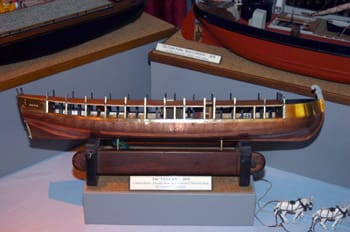
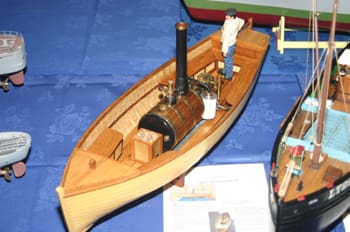
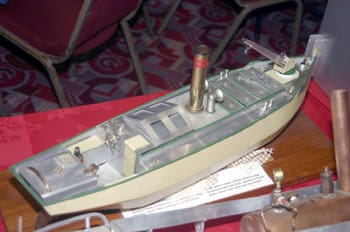
George Kirkham, President of the Swindon Model Boat and Engineering Club, had his model ‘Jon’ on display, Photo 24. Built to a scale of 1 1/4 inches to 1 foot, the model is a clinker built on shadows using 1mm plywood planking. It is powered by a 3/8in bore by 3/8in stroke double acting vertical twin steam engine with the steam provided by a 3in by 5in boiler with a working pressure of 50psi, fired by gas.
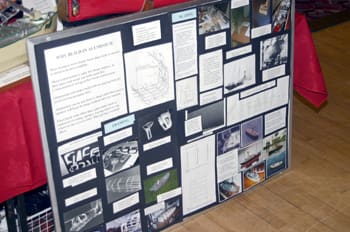
There was an interesting display board describing all of the various advantages and features of building in aluminium, Photo 25. This was the work of John Hanson who also had a variety of models on display, some under construction and some completed. Photo 26 is of an Estuary Work Boat made from scrap aluminium and built with a hard chine hull. A single cylinder, double acting oscillating steam engine provided the power.
As we mentioned earlier, there was quite a considerable trade presence at the show, based in the Pavilion. A couple of them we don’t come across too often, the first, the Ship Finder General had quite a good offering of ready built, ready to sail models on his stand which were for sale with part exchange also an option, Photo 27.
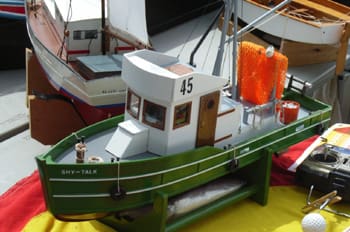
For those modellers interested in fishing boats, Models by Design had their range of grp models on display, Photo 28. These could be purchased as a set of mouldings, or hull only.
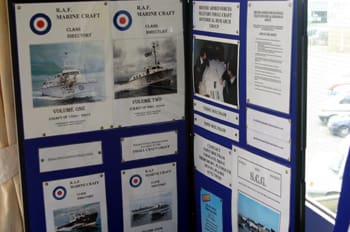
We made our way upstairs in the Pavilion and near to the large display of Phillip Warren’s Matchstick Models was the stand of the British Armed Forces Small Craft Historical Research Group. To quote their handout, ‘this is a group of small craft enthusiasts and historians, formed in 1994, as a sub group to the naval group of the World Ship Society Limited.’ Tony Holtham was manning the stand. Photo 29 is of their display board, and he was a mine of information for anyone who has an interest in this type of vessel. The basic aim of the group is the research and development and individual histories of small craft past and present which fall under the groups heading of ‘British Armed Forces Small Craft.’
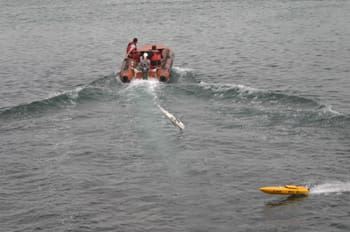
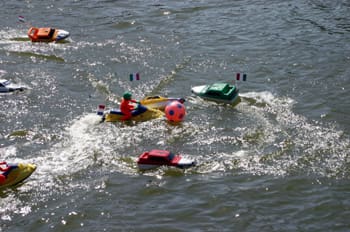
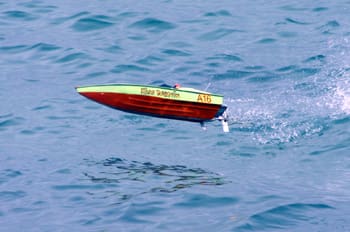
Leaving the Pavilion by the back door, we made our way around the harbour to the Pleasure Pier to see the OMRA members in action. ‘Action’ was certainly the right word! Photos 30 & 31 show what these models get up to when crossing the wake of another model or the rescue boat.
On leaving the Pleasure Pier we walked up through the town to the Radipole Lake. There is a shuttle minibus service available for registered modellers but as the sun shone all weekend we made the most of it.
As we mentioned earlier there were club stands and tables for all modellers to display their models to the public, as well as he opportunity to sail on the lake.
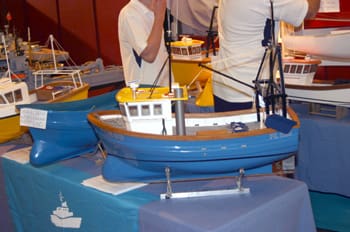
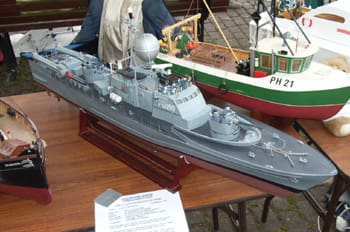
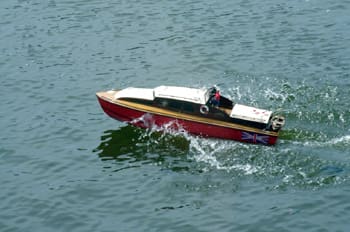
We saw yet another version of the MB free plan Giacomo designed by Glynn Guest on display, Photo 32, with additional detailing. Dave Hutson of the City of Plymouth MBC had his model of the FGS Hyane (P6099) Zobel Class model on display, Photo 33. Dave’s model is based on the Graupner Weisel kit. This model of the Aerokits Sea Commander was taking full advantage of the lake, Photo 34. On the final day (Sunday) we had a couple of events to look forward to. One was the Portsmouth Model display team with their pyrotechnics. Photo 35 is of one of their vessels about to go into action. We were also treated to the World Cup Final – on water – re-enacted by the Sedgemoor Jet Ski display team and a team of Club 500’s predominately from Southend, Photo 36. Please don’t ask what the result was – it was anybody’s guess!
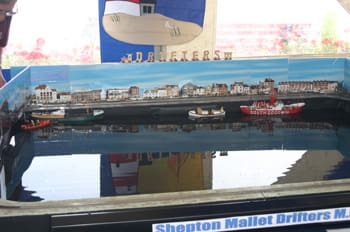
A couple of final pictures to finish off with this month. Photo 37 is of the Shepton Mallet Club’s miniship display. The interesting feature is the backdrop which is composed of a series of photographs taken of the Weymouth buildings facing the sea and pasted to make a continuous backdrop.
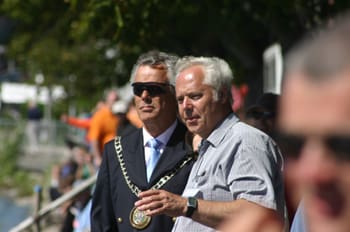
Finally, Photo 38 is of the Lord Mayor and Barrie Stevens, who with his wife Jackie and a team of helpers put on, in conjunction with Weymouth and Portland Borough Council, this fantastic weekend of model boating.
That’s all for this month. Happy modelling from Paul and Dave.

